Maintenance Log 11/2009 - 03/2010
March 05, Friday
Busy day working on a few small projects. Started off cleaning out the aft shower sump. It was draining very slowly, and a cleanup was all that was necessary.
The refrigeration cooling pump was still giving me trouble. When the refrigeration compressor would come on, the pump for the raw water cooling would not come on, which caused the refrigeration compressor to shut down with high head pressure. I swapped out the pump with the pump I use for the cooling water on the ice maker. Both pumps are the same. I took the pump that was used for the refrigeration cooling apart, and everything seems to be in order and is working properly. These pumps are not even a year old so we shall see.
I put the old refrigeration cooling pump back into the ice maker system and put everything back together. The ice maker cooling pump seemed to work just fine in the refrigeration system. I measured the voltage going to the refrigeration cooling pump, and it was low compared to the battery voltage. The battery voltage was 12.8 VDC, and the voltage on the pump was 11.8 VDC. This tells me I have some king of voltage loss in my refrigeration system. I will look into that problem this coming Sunday. It will not take long to track down the problem. The real problem will be to get to the refrigeration system. It is in the store room, and it will take some doing to get everything moved.
Next, I ran the water maker. I was able to make water for two hours with no big problem. I did have a small problem, and it is with the lift pump. The system is starving for water. The lift pump is not delivering the amount of water I need for the water maker high pressure pump. I am trying to use one pump for my raw water washdown and the water maker lift pump, but I may have to go with two pumps. The biggest problem is where to put an additional pump. I also may go with a big centrifugal pump for the water maker, and when I transfer the water supply to the wash down system, put a pressure switch in line. Any way, I was able to make water for two hours at a rate of about 12 gallons per hour.
I got out a power cable to loan to Noel on Tantalus. This would enable him to run the output from his small gas generator to the main power input to his boat. As it turned out he already had one.
Kitty turned to on the cockpit. After an ocean passage, salt is all over the place. The water evaporates, and leaves a lot of dried to sticky salt. I saved the rinse water from doing the breakfast dishes, and Kitty used this water to wipe down the cockpit. and all of the hatches and ports.
I also worked on the galley sink faucet's. They were leaking a bit, and you really had to crank down on them to get the leaks to slow down. Wasting fresh water is not good when you are cruising. I took the units apart and replaced a O-Ring that was bad on each faucet. I put the faucet's back together, and we did not have a leak.
I had a spare lock, and I was able to find a piece of wire on the boat to be used to lock the dinghy gas tank to the dinghy. There have been a couple of reports of thefts of dinghy fuel tanks, so we decided to be safe than sorry. These reported thefts were in Belize not Roatan.
Last project for the day was to do some re-arranging of units in the navigation station. I did some moving around, and I am not sure it will remain that way. For now it is a work in progress.
February 27, Saturday
I went up main mast to check all of the rigging, both running and standing rigging.
We tested all of the navigation lights and the main spreader lights. All lights are working properly.
I purchased 15 gallons of diesel and five gallons of gasoline. This completely fills both inboard fuel tanks, and all four fuel jerry jugs carried on deck. We also have the Yamaha outboard tank full of gasoline, the Mercury outboard tank full, and a five gallon jerry jug full of gasoline.
We went over to Tantalus, and helped Nicola and Noel take down their awnings, and fold them and put away.
We went to a party and took our electric blender to make drinks. The cutting blades on the blender would not cut, so Noel and I repaired blender. All were happy as we were then able to make frozen drinks.
February 26, Friday
Installed the rebuilt screen back on the main cabin starboard port. The second screen on the main cabin starboard did not need rebuilding.
I decided to test the bad Jabsco Lift pump that I had received when Paul came down to the Rio in January. I just could not believe it was bad. It was bad! I can not do much as far as troubleshooting any problem. It is a new pump and the label on the side says if I take the motor apart, I void the warranty.
Put another coat of orange paint on the port wind generator. It will look really good when I get it repaired and re-installed on the mizzen mast. The real reason for the additional paint was I only had very little paint remaining, and did not want to carry around an almost empty can of paint.
Tested all of the bilge pumps on the boat. The two automatic bilge pumps that live in the bilge were tested. I then tested the float switches on each of the bilge pumps that live in the bilge. One of the automatic pumps is a 2000 gallon per hour (GPH) pump. The float switch for that pump is on the bottom of the bilge. It has a red light that goes on when the pump activates. The other automatic pump is a 3400 GPH pump. Its float switch is on top of the 3400 GPH pump. There is a red light that goes on when this pump activates, but also an alarm sounds. If this pumps starts, there is a lot of water in the bilge. I then tested another electric pump has a pickup in the bilge, but the pump is not in the bilge. The pump is manually activated on the electric panel. The last pump tested is a completely manual 30 gallon per minute (GPM) pump. It really moves some water. I have made a handle for this pump that is as long as can be, and will enable the operator to stand up while pumping. All pumps checked out and operated in the manner in which they were designed.
February 25, Thursday
Installed the rebuilt screens back on the ports on the port side of the main cabin.
I removed one screen from the main cabin port. In the workshop at Monkey Bay, I took the sandwiched screen apart and cleaned all of the surfaces. I then put the screen back together with Life Seal sealant. I used all of my clamps I had on board to do the one screen, so left it overnight to set up.
I put five gallons of diesel in starboard fuel tank to top it off, and 10 gallons of diesel into port tank to top it off.
February 24, Wednesday
In the workshop at Monkey Bay, I took the sandwiched screens apart and cleaned all of the surfaces. I then put the screens back together with Life Seal sealant. Could only do one screen at a time because it took all of my clamps I had on board to do one screen. The good news is the Life Seal sets up in about three hours, so was able to get one screen done, and do the second and leave it over night.
I went to the Puma station and purchased 20 more gallons of diesel and 5 gallons gasoline to have for the passage.
February 23, Tuesday
Took all of the cockpit cushions to the forward deck box, and washed and rinsed them all. They were really dirty. Stood the cushions up on the life rails and let Mother Nature do her job.
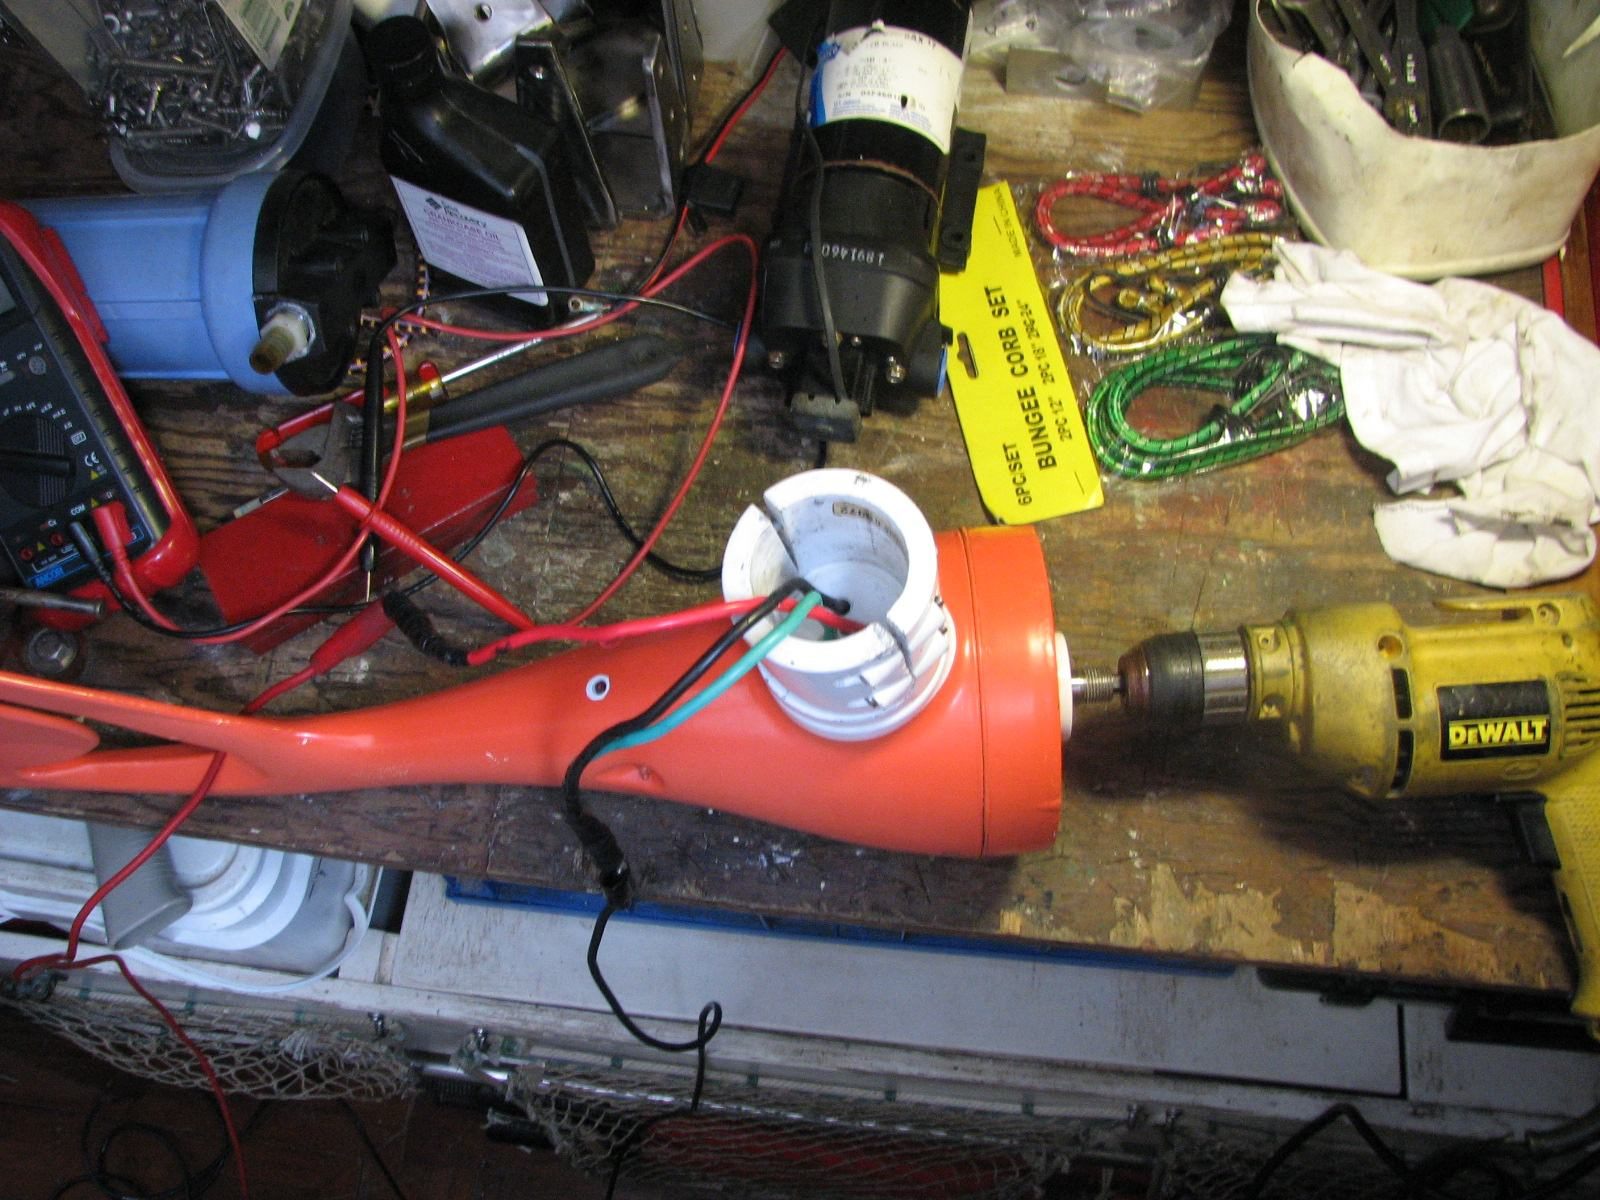
I painted the blades for the port wind generator. It is a swirling pattern so it should look cool when spinning. I am hoping to get my replacement part before we head out to Roatan. If it does not happen, I will repair it when we get back to the Rio.
I took off the port two main cabin port screens to rebuild. The screens I made myself and needed to have new sealant put in. The screens are made of brass screening, sandwiched between two pieces of plastic with sealant. The two pieces of plastic are cut in the shape of the outside trim ring on the port. I took the trim rings off many years ago, and welded bolts onto the trim rings to hold the screens flush with the trim ring on the port. It is a much better arrangement than the original screen solution from ABI.
February 22, Monday
Climbed up the Mizzen mast and replace the H3 55 watt bulb in the starboard mizzen spreader light. I had purchased new spare bulbs on our field trip to Puerto Barrios. Checked out the spreader lights and all work OK.
Put 20 gallons of diesel into the starboard fuel tank from the jerry jugs filled yesterday.
Installed two of three locks delivered by Thomas. One lock on the forward deck box, and the second on the mercury outboard on the aft rail.
Tested EPIRB, monthly check, and charged Globalstar and hand held VHF radios, in case any are needed during the passage
Took masking tape off of the freshly painted oars and put into dinghy.
Noel, on Tantalus was able to get the main engine started and running yesterday, but no water coming out the exhaust. We found the problem to be the raw water pump. It took some effort, but we got the raw water pump off of the engine and took it apart. It was obvious the impeller needed replaced. Just about every blade on the impeller had broken off and was jammed into the water outlet. The good news is the broken impeller blades did not continue on in the system and block the heat exchanger. It took Noel sometime to find the spare impeller, but once it was found, we put the new impeller into the pump. We then put the pump back on the engine, and connected all of the water lines. We started the engine and we had cooling water coming out the exhaust. One more project down.
I had brought all of my SCUBA gear up to Nicola & Noel's boat so I could search the bottom for an anchor which they had lost. I donned the gear, got all set and got into the water. I initially had a couple of problems with my BC, but thought I had it all worked out. I went down to the bottom, only 15', but with no air in the BC went down like a rock. I cleared my ears, and started searching for the anchor. About a minute later, my right ear drum burst. Not much pain, but equilibrium went south. Got to the surface, and told Noel the diving expedition was over.
February 21, Sunday
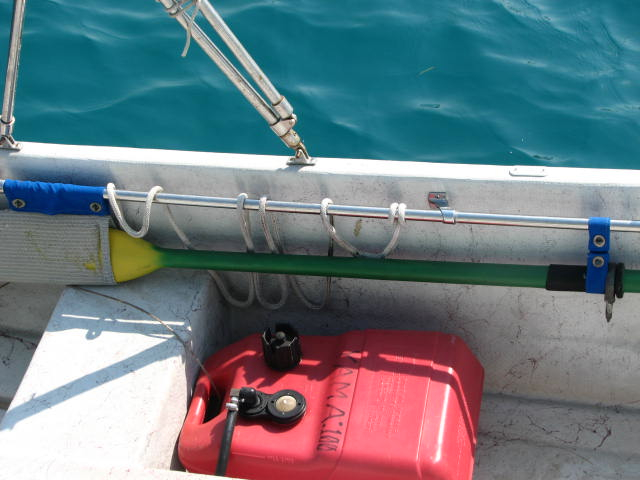
Went to Tienda Reed and purchased more spray paint. On the return trip, stopped by the Puma station and purchased five gallons of gasoline, and 20 gallons of diesel. Put the last coats of paint on the dinghy oars. They look really good, and unusual. I painted the handles green to match Dream Away, and the paddle portion yellow. In the future, I will re-paint the paddle portion orange, but the paint was not readily available.
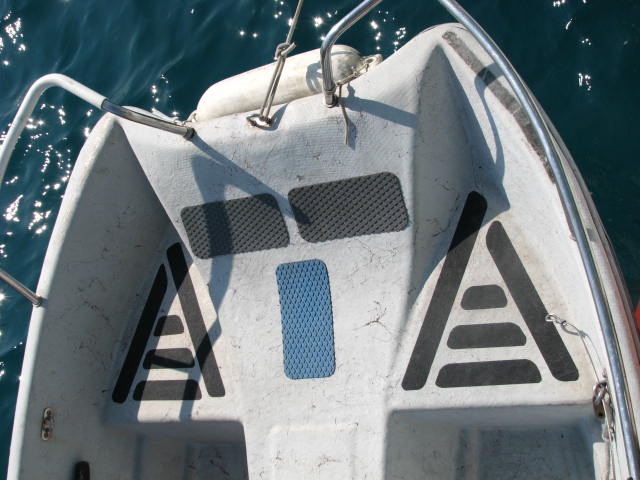
The very front portion of the dinghy was very slippery when dry, and really really slippery when wet. I had some 3M non-skid tape in my stash so I put the non skid tape on the front portion of the dinghy. I also had some Treadmaster pads left over, so I attached them to the front area of the dinghy. No you will have a very difficult time slipping on a wet surface at the front of the dinghy.
Oars On Dinghy Showing Color Scheme
Pattern Of Non-Skid Tape And Treadmaster On Front Of Dinghy
February 20, Saturday
Sprayed second coat of paint on oars, and then ran out of paint. Will need more paint!
Today I went to Nicola & Noel's boat and we troubleshot the problem to get the starter to turn over. I had brought my new key switch, and Noel had purchased some new wire. We took the wire, fabricated ends for it and connected the wire directly to the starter solenoid. We connected the key switch to the other end of the wire, and we were able to get the starter to turn over.
I had also brought a stop switch, because the one on Tantalus had come apart due to corrosion. We installed the new stop switch, and the new start key switch. The new key switch worked so now we were able to turn the starter over, and if the engine started, we could stop it.
Next we had to verify that we were getting diesel to the injector pump. This turned out to be an adventure, as the electric fuel pump did not work. We ended up getting a spare outboard in line pump into the system, and got diesel fuel all the way to the injector pump, and all of the air out. We tried several times, but we could not get the engine to start.
We gave up for the day. Noel was going to charge the start batteries all night, and try starting the engine tomorrow morning.
February 19, Friday
Sanded on the oars, and got them really smooth and ready for the paint. I decided not to hang the oars and paint them because they are very long. I laid them out on a table and only painted one side at a time. Throughout the day I was able to get a primer coat on both sides of the oars, and a first coat on one side.
Went over to Tantalus to help Nicola & Noel with the batteries they have just purchased. The new batteries were of a smaller capacity, so they had to purchase four more than they had. This all caused several other problems. Noel had to make up more cables to jumper the batteries together, and also had to figure a way to tie down all of the new batteries. I helped Noel fabricate some of the last cables for the battery installation. We then actually installed all of the batteries (10) and connected them all together. We double checked all of the connections, and verified the run to the battery switch, and all worked as planned.
Next on the list for Tantalus was getting the starter to turn the engine over. We were able to narrow down the problem to get the starter on the main engine to turn over. It was not the starter or the solenoid, but either the start key switch or the wiring to it. I have a spare key switch on my boat, but it was late in the day so we had an adult beverage, and decided to pick up on the problem in the morning.
February 18, Thursday
Today I sanded the two oars from the dinghy and prepared them for epoxy. I mixed up a batch of West Systems epoxy and applied it to the paddles of the dinghy oars where the wood was starting to split.
February 17, Wednesday
The work bench in the garage was getting to the point where I could not use it! So I spent a good hour putting away stuff, tools and parts!
Went back to the workshop at the marina and sanded the spare oar. The application of the epoxy went very well. Got the oar sanded smooth, and checked the flag pole again. Wiped down the oar and the flag pole, and then applied the first coat of primer. When they had dried I applied the second coat of primer. When the second coat of primer had dried, I sanded again with 220 grit sandpaper, then applied the first coat of paint. Bright orange on the flag pole. Bright yellow on the paddle of the oar, and white on the remainder of the oar.
Waited four to five hours for the paint to dry, then applied the second coat of paint, to allow it to dry overnight.
February 16, Tuesday
I started off the day by washing down the cockpit and binnacle. I wanted to get this area cleaned up and dried before finishing up with the installation of the net bags in the cockpit.
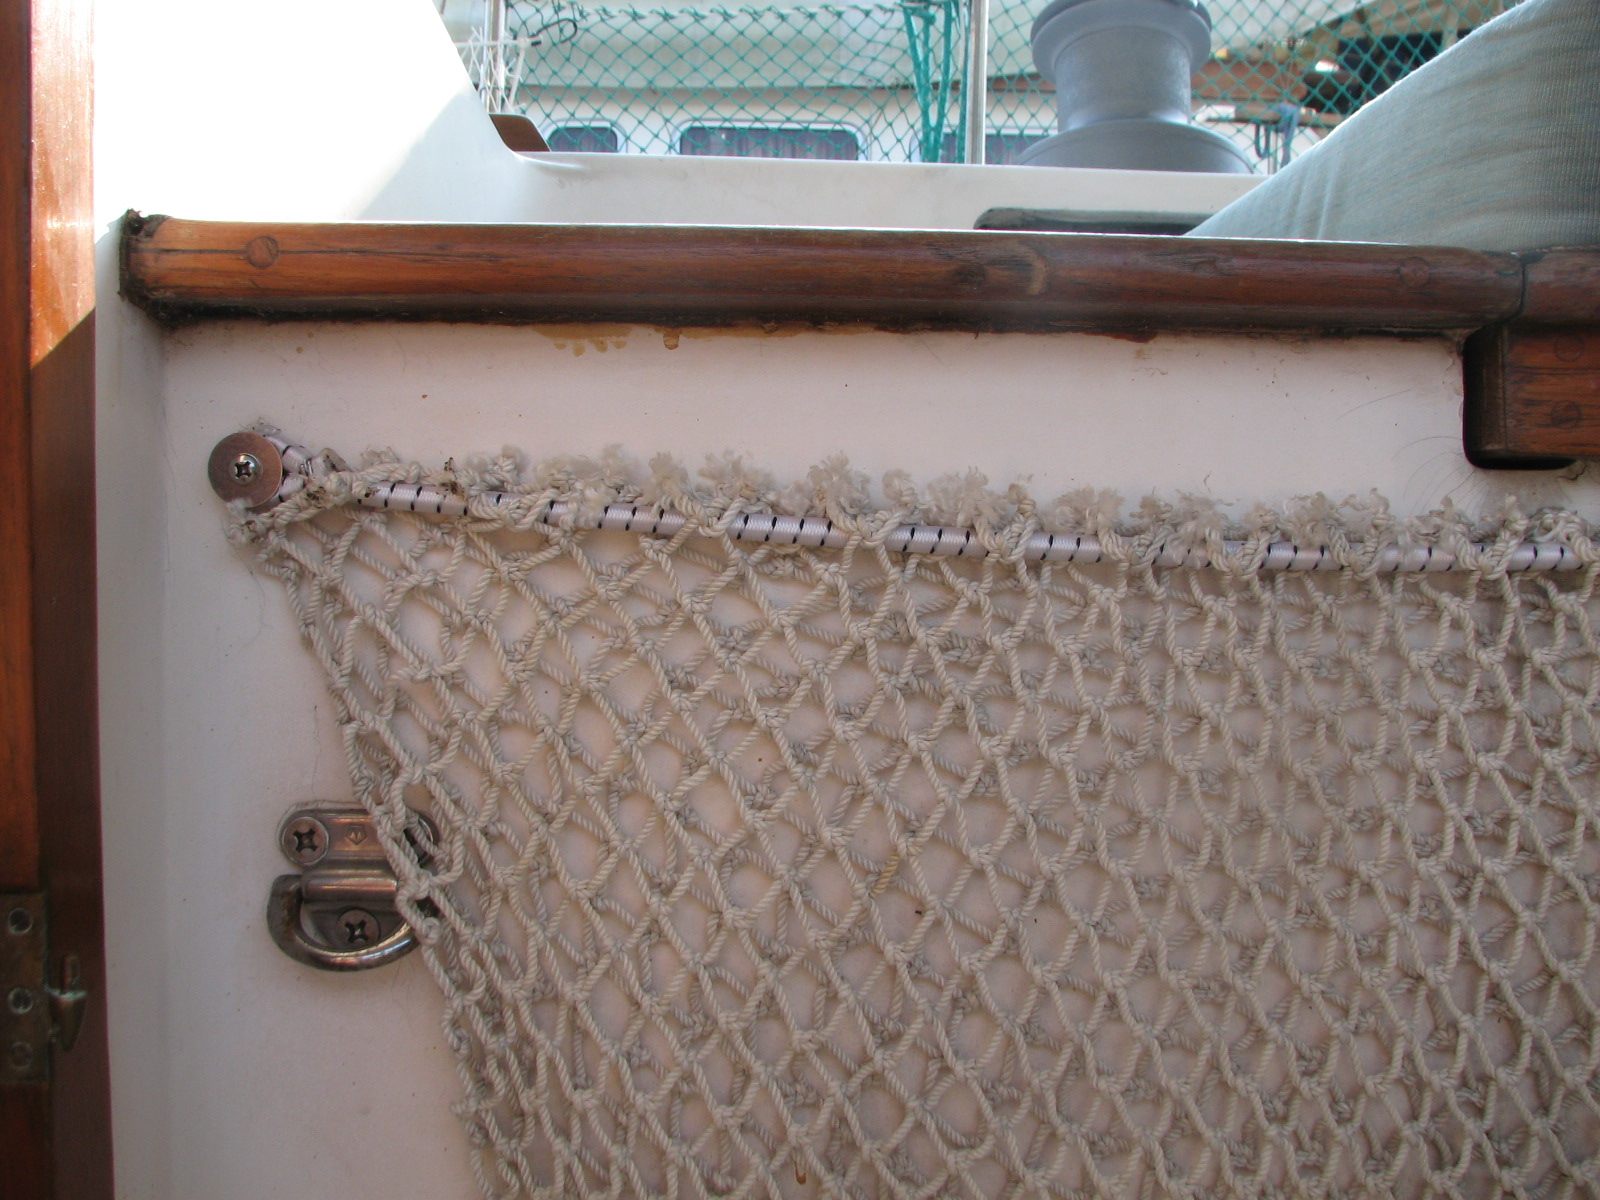
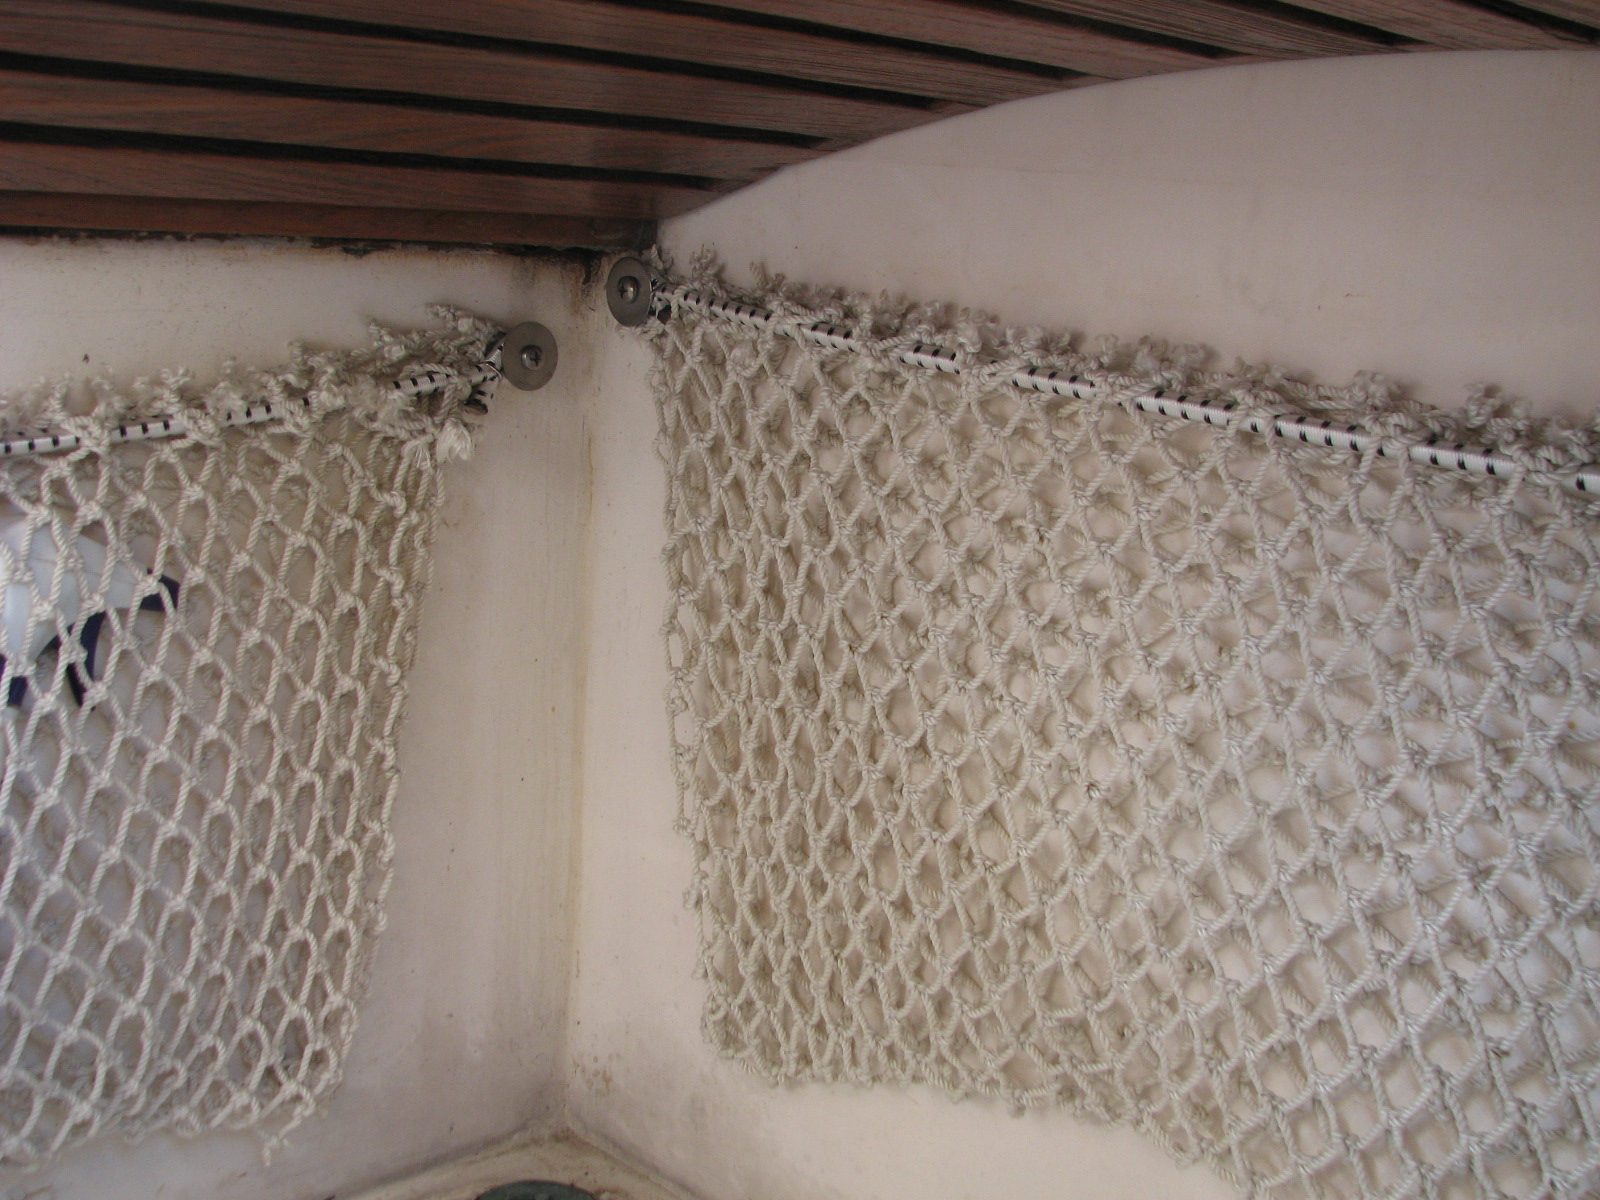
The parts shipment that Thomas drove down from Houston included several pieces of bungee cord, so I was able to finish the net bags in the cockpit project. I had already washed the last three nets we use in the cockpit to hold sheets and other lines while sailing. I also got some new hog rings with the Houston parts shipment. I measured and cut the bungee cord, made the loops using the hog rings, and fitted the bungee cord to the net bags. I then installed the net bags in the cockpit.
Net Bag With Bungee Cord And Attachment Point
Net Bags In Back Of Cockpit
I have a spare wooden oar that I keep on Dream Away. Before we left Texas, I had stripped all of the varnish off of this oar, and the two oars in the dinghy. The problem was I did not get them painted before we left Texas. If I did not get them cleaned up and painted, they were going to fall apart. I decided to start with the spare oar. I took the oar to the Monkey Bay workshop and sanded it down to bare clean wood. The pieces in the actual paddle portion of the oar were starting to come apart, so an application of epoxy is necessary. I also had some other parts in the boat that needed some epoxy, so I went back to Dream Away and prepared the pieces that needed the epoxy.
Two pieces of trim wood had fallen off of the area around the dish storage under the Microwave/Convection oven. There was also a cracked piece of wood on the table in the main salon. I got the pieces sanded and masked off where necessary, and mixed up the epoxy. I applied the epoxy to the main salon table, and then the area around the dish storage in the galley. I went back to the workshop and applied the epoxy to the spare oar.
Next I sanded down the flag pole that goes on the dinghy davits. It was the same story with this piece of wood. I did not have time to get it painted before we left Texas. I got the flag pole all sanded and ready to apply paint.
February 15, Monday
Started off the day knowing I had to get the refrigeration working properly. First item was to swap the ice maker cooling pump for the refrigeration system cooling pump. This was pretty easy because of the way the pumps were installed to make maintenance very easy. When this was finished, we started the refrigeration system, and the cooling pump started right up. We did a couple of starts and stops on the refrigeration system, and the cooling pump started each time. So it seemed the problem is the cooling pump.
I took the refrigeration system cooling pump apart, and I could not believe what was growing inside. Not only were there barnacles growing, but some other stuff was in there that seemed to keep the pump from working. It was like this stuff had grown from one side of the pump to the other and kept it from working. Other than that the inside of the pump was in great shape. I cleaned up the pump, removed all of the debris, and put the pump back together. The pump had no problem operating on the bench, so I was convinced.
To do the deed to make sure the pump was fixed, I swapped the refrigeration pump back into the refrigeration system. Once we got the pump installed, we check it out by starting and stopping the refrigeration system two or three times, and the pump worked just great. Since the ice maker pump was out of the system, I took it apart and cleaned it. It was no where as bad as the refrigeration system pump. I put the pump back together, and got it back into the ice maker system, then started the ice maker to verify operation. Both systems are back up and running properly.
Since I was back and forth under the companion steps several times changing out pumps, I decided to fix one of the hinges on the hatch under the steps for the companion way. The hinge was OK, just the heads of two of the screws holding the hinge to the deck had broken off. This had been a problem for a couple of years, but it was like the leaky roof, so it never got repaired. Today was the day!
I was able to scrape enough wood from around the remaining screws, to get a pair of needle nosed Vice-Grip pliers on the remaining screws and unscrew them out of the wood. Once this was done it was a matter of installing longer screws and putting the hinge back where it was. It was nice to get that project finally off the invisible list.
I finally purchased some 15 amp fuses for the water maker lift pump. I installed the fuse and applied power. After some delay, normal, the pump started right up. This was a great relief, and I happily put this pump back in the pump spares locker.
I repaired a set of jumper leads. I had built a set of jumper leads so I could get 12 VDC to my work bench. They had worked very well, and have proved to be useful to me and to other boat owners. One of the clip leads had come apart and the spring was lost. I was able to get another clip lead from my spares, and attach it to the wire of one of the jumper wires. Another problem fixed.
Last for the day was to help Noel find his anchor. He had a anchor out to secure his boat, but when he pulled in the anchor rode, just the rode came in with no chain or anchor. Noel asked if I had a grapnel anchor, and if I did could I come and help to drag for his chain and anchor. I have a small grapnel anchor I use for the dinghy, so I got a 30' piece of line and we went off to his boat. Both Noel and I dragged our grapnel anchors back and forth in the area with our dinghy's, and were not able to latch onto the anchor or chain.
We decided I would come up with my SCUBA tank and see if I could find the anchor and chain on the bottom. Now we will have to wait for a nice sunny day.
February 13, Saturday
Worked on the refrigeration to see if I could find out what the problem is. There is actually two problems to be fixed. The refrigeration thermostat does not work properly. When the refrigeration thermostat is actuated, the freezer should come on, but it does not. The freezer will come on, run for about three to five minutes, and then stop. It will continue like this as long as the power is on.
I noticed that when we turned the refrigeration system on, the cooling pump would not start. With this happening that explains why the freezer would cycle. I was getting high head pressure. The automatic shutoff for high head pressure would shut the system down, the pressure would bleed down, and then the system would come on again.
This time when I turned on the system, I rapped the cooling pump, and it started working. This allowed the freezer to run for about three or four hours, and then it stopped again. The cooling pump had stopped. Sort of good news and and bad news. I did not have a spare pump, but the cooling pump for the ice maker was the same pump, so I could swap them. This was a project for Monday after Valentine's Day.
February 12, Friday
Today we took a field trip to Puerto Barrios, via Morales. We were able to stop at a bearing shop, so I got bearings I needed for the Jabsco raw water pump on the generator. I also got face bearings for the wind generator.
I also found the location of a shop that sells refrigeration parts, a shop that repairs motors, and a shop that sells plumbing parts and water filters.
February 9, Tuesday
Today I went up the mizzen mast and brought down the port wind generator. It was a lot of fun trying to balance on the mast, actually above the top of the mizzen mast, hold on, and get the wind generator loose. I finally got the wires disconnected, and the wind generator down on deck. I did not loose any tools or parts, so I am good to go there.
When I got the wind generator on the work bench, I took it apart. I did not see the problem initially, but I could smell it. What happened was one of the wires I used to solder the capacitor back to the PC board had broken loose, and shorted against something. This actually burned up the PC card. With 20/20 hindsight, I should have secured the capacitor somehow to the PC board. Using a big blob of silicone would have done it. I assume all of the bouncing around of getting the wind generator up the mast and on the support broke the wire loose.
Oh well, onto the next screw up. I decided to work on the Jabsco lift pump that is used for the water maker and the raw water washdown system. I had rebuilt the pump portion of the system on 01-20-10, and it still made a lot of noise. I figured the problem was in the motor. We were going to Puerto Barrios this coming Friday and planning to stop at a bearing store. If I needed a bearing, I wanted to know.
I took the pump off of the motor, and then took the motor apart. There was a lot of brush dust inside, but the brushes looked to be in very good shape. I brushed off all of the dust on the inside of the motor and cleaned it all up as best I could. One of the bearings was in really good shape, and spun very well. The other bearing was rough and I am sure that is where the noise was coming from. I wanted to remove the bearing from the housing, but the bearing housing was not normal. It looked like the bearing was installed in the housing, and then the excess metal around the outside of the bearing was pressed over the bearing to hold it in. It did not look like something I wanted to get into. I was worried once I took the bearing out, I would not be able to get a new bearing back in. I will leave this to a professional.
What I did was spray a lot of corrosion block and penetrating oil into the bearing. I would wipe off the excess junk that came out of the bearing, and then repeat the process. I did that four or five times, and the bearing started spinning a lot quieter that before. I then sprayed in some lubricant, and that helped also. I put the motor and pump back together, and then put power to the pump. Nothing! What did I screw up? I checked and I had blown the fuse, and I did not have a spare.
I took the pump off of the motor, and took the motor apart to make sure I had reassembled the motor properly. It all looked good, so I put the unit back together, and left it on the workbench. It would have to wait until I purchased some fuses. So far it was not a good day, so I quit. Took a shower, and fixed an adult beverage.
February 8, Monday
I checked the switches for the wind generators, in case there might be an issue there. These are three position switches that can switch the wind generators from run-off-stop. When I took the box apart, I remembered I had wired around the port switch because when I first worked on the switch, I dropped one of the bolts into the bilge and could not find it. Now I wanted to put the switch back into the circuit in case it might have something to do with the operation of the wind generator.
I could not find the bolt in the bilge, and I could not find another bolt of the same size and threads. I then took the switch out of the box, and drilled and tapped new holes for a 10 X 32 bolt. Now I know I will have spare bolts in case I drop another bolt in the water. Naturally since I have spares, I did not drop and bolts into the bilge. I connected all of the wires back to the switch for the port wind generator. While I was doing this, I noticed a ground wire for the starboard wind generator was very loose. I replaced the connector for this wire and re-attached it to the switch for the starboard wind generator.
When the wind finally came up, there was no change. The port wind generator would not charge. it acted like wind generator was in the stop mode. I guess another trip up the mizzen mast will be in order.
Since I was working in the engine room, I also put the roofing tabs on two more of the engine room doors. At my present slow pace I will eventually get all of the engine room doors finished.
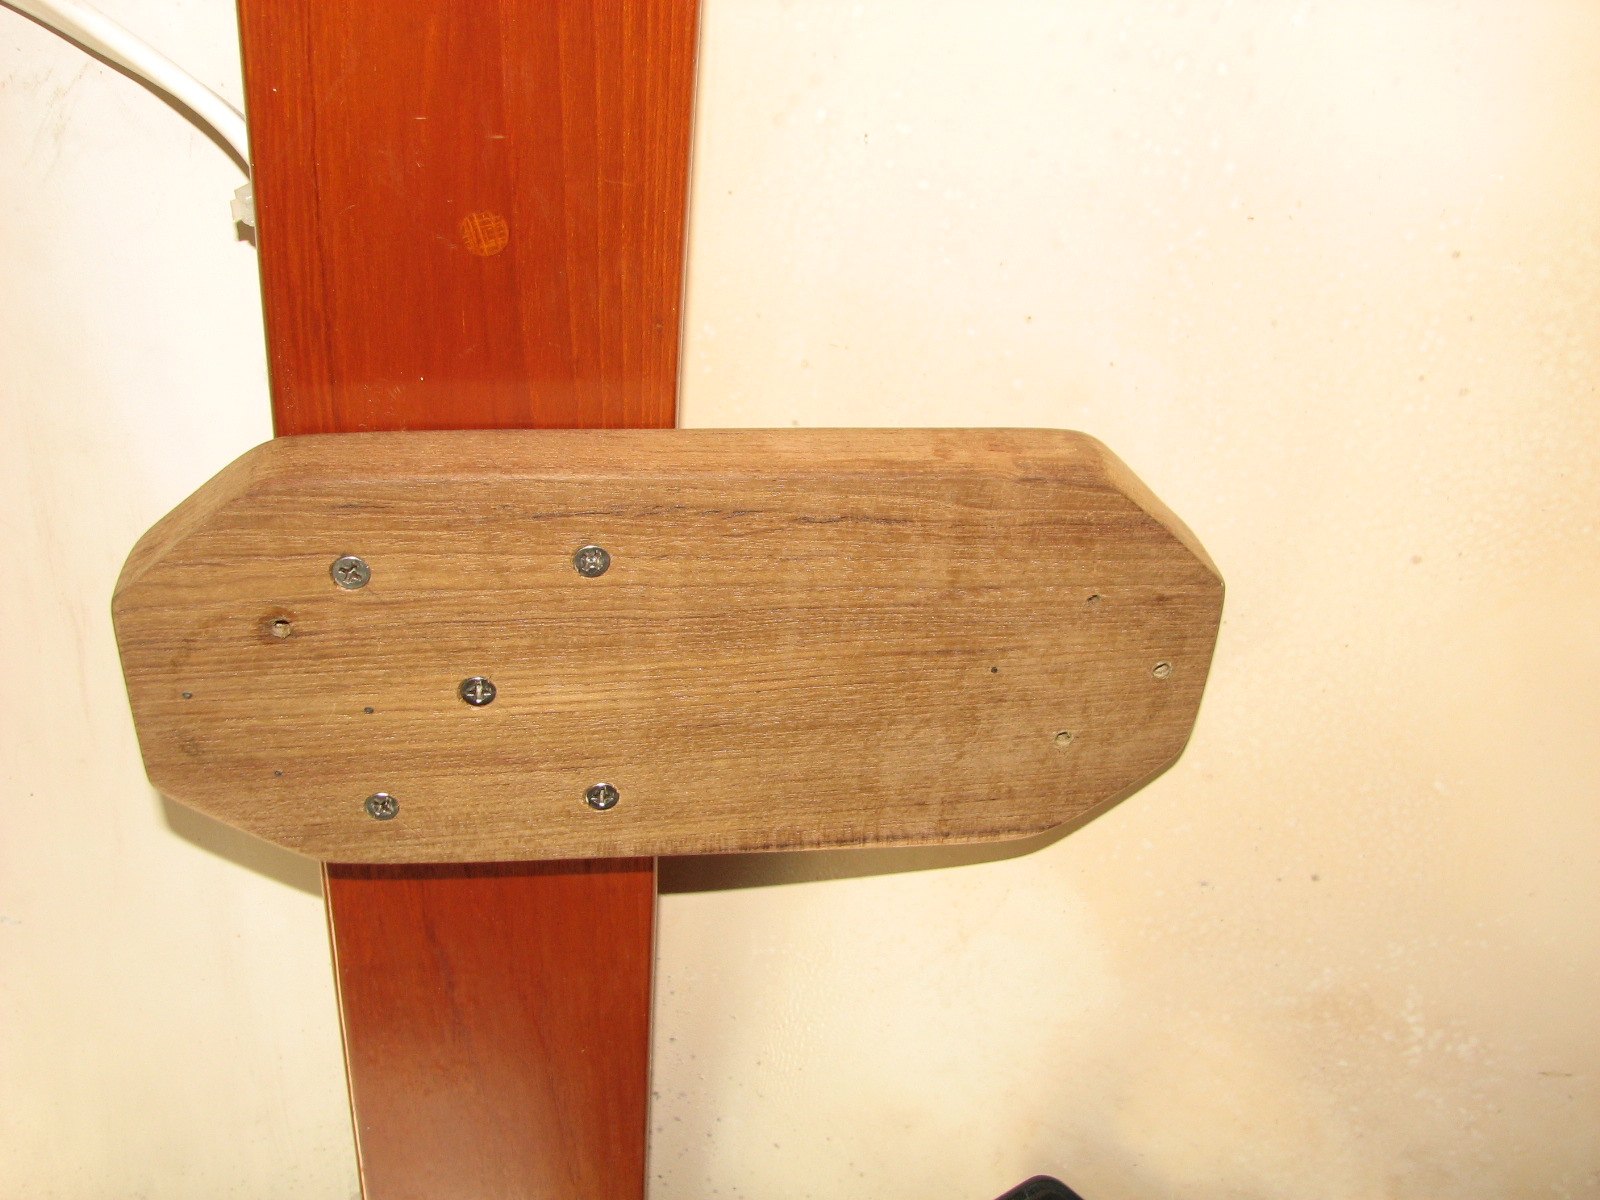
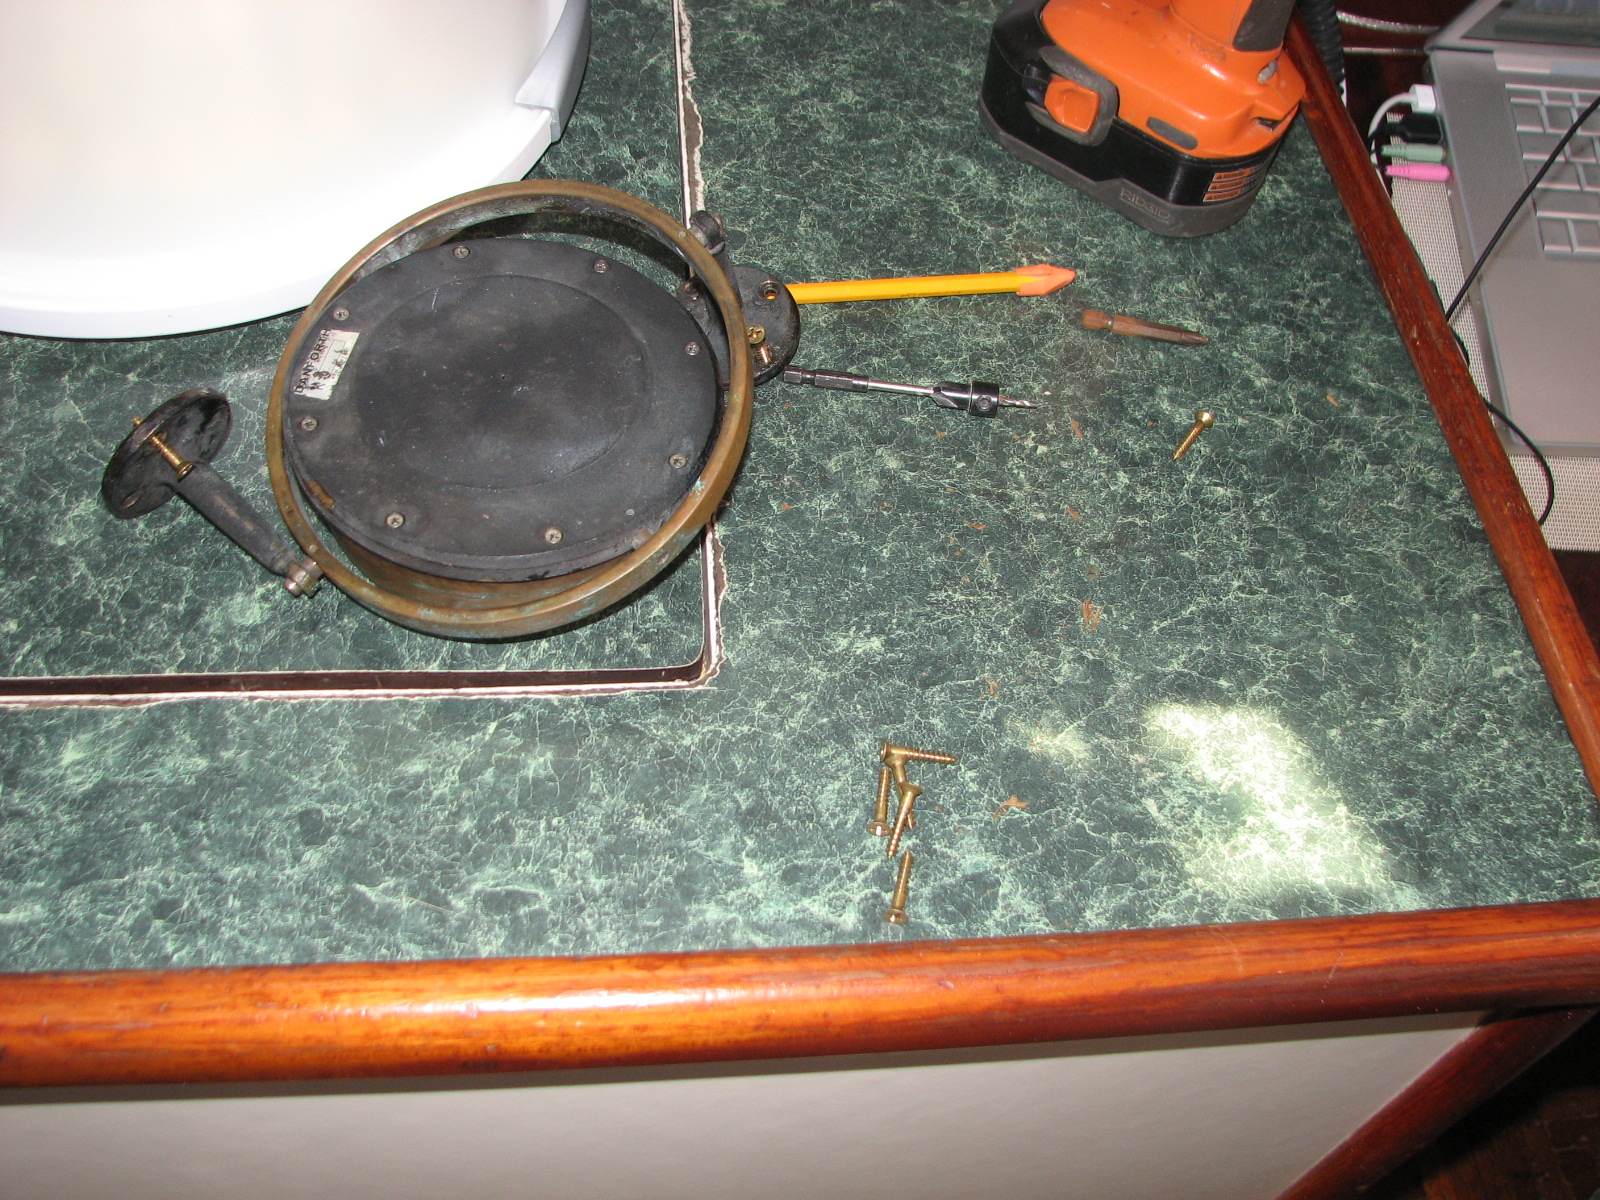
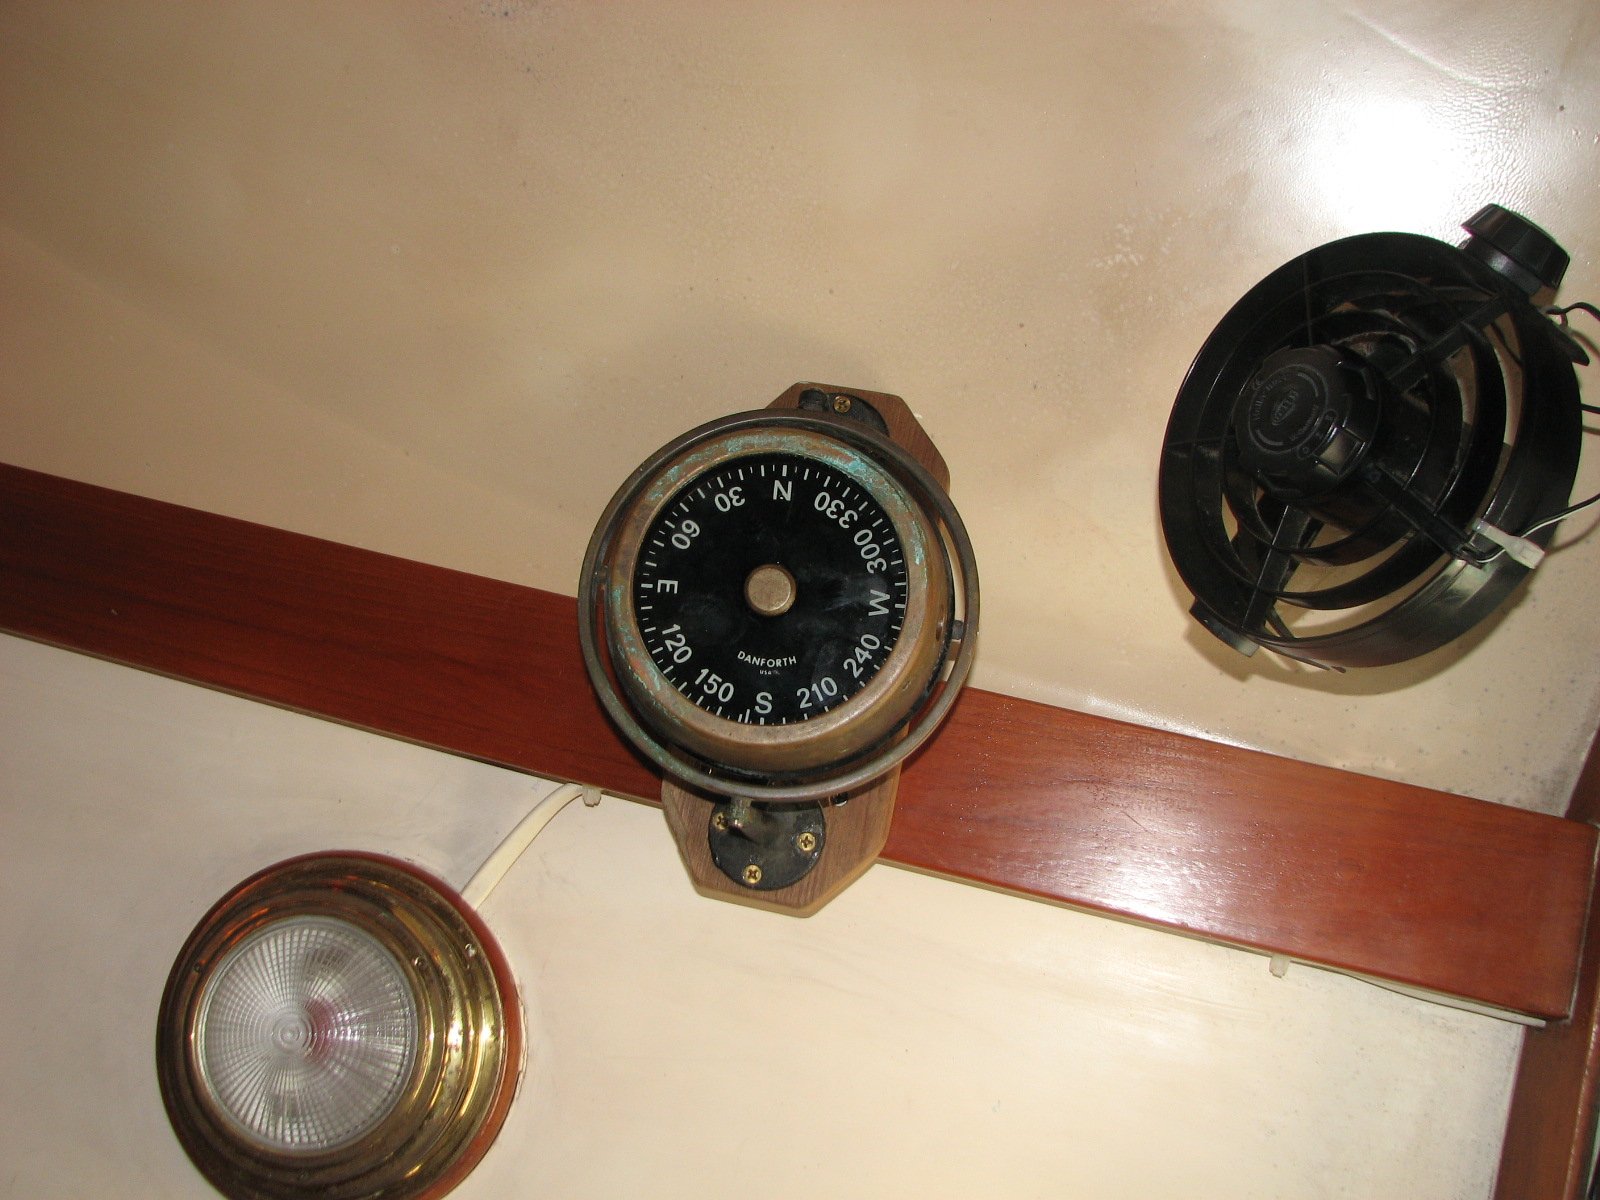
The last project for the day was the telltale compass installation. I had already cut and sanded the base piece of teak for the compass. I just had to decide where to put the compass. The obvious place was over my head in the aft cabin. Kitty did not want to put the compass there because she was afraid the compass would fall and hit me on the head and kill me. A valid point if the compass ever fell, because the compass is very heavy. But what is my nickname, "Overkill Kenworthy". If I would have put the compass over my head, there was no way it would have fallen.
Any way the decision was to put the telltale compass over my head in the navigation station. The compass was pretty much out of the way, and it would be very use full there. The only disadvantage of this particular compass is it has no light in it. So no matter where it is installed I will have to use a light at night to see it.
Compass Base On Overhead Beam In Navigation Station
The Work In Progress
The Telltale Compass Installed
February 7, Sunday
I spent most of today working on the computer, doing updates and emails, and working on the latest web page update.
The very disappointing event of the day, was the wind came up and the port wind generator is not fixed! I do not know what the issue is.
February 6, Saturday
I started off the day by taking the Air-X Marine wind turbine apart. We are making a field trip on Tuesday to go to Puerto Barrios. I am hoping to get some bearings in that city. I decided I needed to take the face bearings out of the wind turbine, and check to see if I needed new ones. When I picked up the wind turbine, something rattled around inside of the unit. I new this was not good!
When I took the unit apart, I found a capacitor that had broken off of the PC board. The capacitor must have been stuck into the back of the unit, and did not come loose the last time I took the wind turbine apart. I did not notice the missing capacitor from the PC board. When I discovered where the capacitor went, I was not able to solder the capacitor back on the PC board, so I got some AWG 20 wire and used it to solder the capacitor back into the circuit. I put the wind turbine back together, and darned if it did not pass all of the bench tests!. It might be fixed!
Since today was cool and overcast with no wind, I decided to get the wind generator back up on the mizzen mast. This was a fun job. It would be a lot easier if I had another person with me up the mast, but alas I got through it. The wind turbine is now installed. Now I have to wait for some wind to see if the problem is repaired.
February 5, Friday
Today was a fix day. The thermostat for the refrigeration failed, such that it is always on. This is not good because of the way I have the system put together. I have a thermostat in the freezer and the refrigerator. If the freezer senses high temperature, the compressor come on and refrigerant flows through the holding plates in the freezer. If the refrigerator senses high temperature, the compressor comes on and refrigerant flows through the holding plates in the freezer. It also causes a solenoid to actuate that allows refrigerant to flow through the refrigerator holding plate. If the refrigerant flows through the refrigerator holding plate when ever the system is on, the refrigerator gets to cold.
I took the thermostat out of the system and put in an off/on switch. This will cure the problem until i can purchase a new thermostat.
February 4, Thursday
All morning was spent helping Paul moving his boat, and doing grocery shopping. When I finally returned from lunch, I looked for the fiberglass pieces in several other places on the boat, but still felt they under the berths in the forward cabin. I decided I did not do a through job searching yesterday, so went back again. I removed all of the wood, bottle of Argon, SCUBA tank and the spare membrane filter for the water maker. There they were under the SCUBA tank and spare membrane filter. I removed the fiberglass pieces and then put everything back under the berths in the forward cabin. I was very pleased. Now I can start on the leaks with a vengeance!!
February 3, Wednesday
Started off the day by taking Paul's davit to the marina shop and using the drill press to finish drilling the hole in the davit. After drilling the hole we took the davit back to the boat and drilled the remaining hole in the base. We inserted the bolt into the unit and tightened down on it. The davit did not swing any more. We did the same thing to the second davit, and were successful there. The davits do not swing.
Paul then took me over to the Yamaha dealer her on the Rio and I purchased a new connector for the fuel tank. We came back and worked on the fuel tank. I verified that there was no water in the tank, and poured back in the gasoline from the diesel tank to the dinghy fuel tank. I again used a coffee filter to verify the gasoline was clean. A friend John, here on the dock, gave me a new in line filter element for my fuel line. I also shortened the fuel line from the tank to the engine, in case that was part of the problem. I also put the new Yamaha connector on the end of the fuel line.
Paul and I verified the fuel system was working by taking the fuel pump apart on the engine and making sure gasoline got that far in the system. We put the fuel pump back together and tried to drain the bowl on the carburetor. This did not happen as the drain was clogged. I got a wire and cleaned out the drain plug. Then gasoline came out of the drain on the bowl of the carburetor when we squeezed the in line fuel pump. It looked like everything was working properly. On the first test run the engine seemed to run a lot better but still had a hard time getting on a plane, and the engine would not idle. Paul and I worked on the idle adjustment on the tiller and got that adjusted. We also adjusted the idle jet which made a huge difference. Now the engine would idle properly, so that was nice. We also adjusted the angle of the motor in relation to the dinghy. I took her out for a test run, and WOW. She jumped right up on a plane, and the dinghy was level, and I was only about 3/4 throttle. Plus when I returned, the engine idled wonderfully. The engine also started without using the choke.
Next project was to look for the fiberglass pieces to put on the cap rail after I remove the wooden cap rail. I took the cover off of the forward cabin berths, I dug down under all of the teak and other stuff I have stored under the berth. I found the two long pieces of fiberglass, but could not find the remaining pieces. I then put all of the wood and other things back and restored the forward cabin to a usable cabin. I was very put out I could not find the remaining fiberglass pieces.
February 2, Tuesday
We went into Fronteras in the dinghy, and the Yamaha engine on the dinghy would not idle very well, and has a very difficult time getting the dinghy on a plane. In fact it did not happen. When we got back from town I decided to look into the problem and get it corrected.
The in line fuel filter had a bunch of junk in it, so I looked in the fuel tank. The was a bunch of junk floating around. I am pretty sure the junk was a result of letting the tank sit for a couple of years and allowing the gasoline to evaporate leaving a bunch of junk on the bottom. When I started using the tank again, I did not clean the tank out. Now I am paying the price. I took the tank back to the shop, and drained all of the gasoline out of the tank into one of my diesel jerry jugs. I used a coffee filter to filter out the junk. I then took a hose to the fuel tank and washed out all of the junk, making sure the tank was clean, and the pickup tube was clean.
I showed my friend Paul the connector from the fuel hose to the motor, and he thought it was bad and not making a good seal. I felt the same way. We decided to go to the Yamaha dealer first think tomorrow morning and get a new connector. In the meantime, I turned the fuel tank over and positioned the tank so all of the remaining water would drain out.
Next I helped friend Paul drill a hole in his dinghy davits and base. He has no way to keep the davits from swinging in the base, so he decided to drill a hole through the base and the davit, and then using a through bolt to tighten the whole thing. We got about half way through the first hole, and then it was happy hour, so we stopped the work until tomorrow.
February 1, Monday
Started the day by running the generator for a total of five hours. At the end of the five hours there were no water pump leaks, and all seemed to be in order. This was a good sign. For the first 1.5 hours of the generator running, I ran the water maker. The new lift pump did great, and had no water starvation in the system. I ran the water maker until the port water tank was filled. The real test will be when we get out to salt water again. Here in the Rio Dulce, which is fresh water, I run the water maker at 300 PSI and I make over 20 gallons of water an hour.
Next item of business was to clean up the work bench in the garage. I had been working on projects, and then just piling stuff onto the work bench. Folks would borrow stuff from me, so I would just pile the stuff back on the work bench. It really needed cleaning. Of course once I got all of the stuff put away, I then had a work surface again.
The next item on the list was to take the net bags, that had been soaking in a soap and bleach solution, out of the bucket and get them hosed off. I got the bags rinsed off and hung out on the life rails to dry.
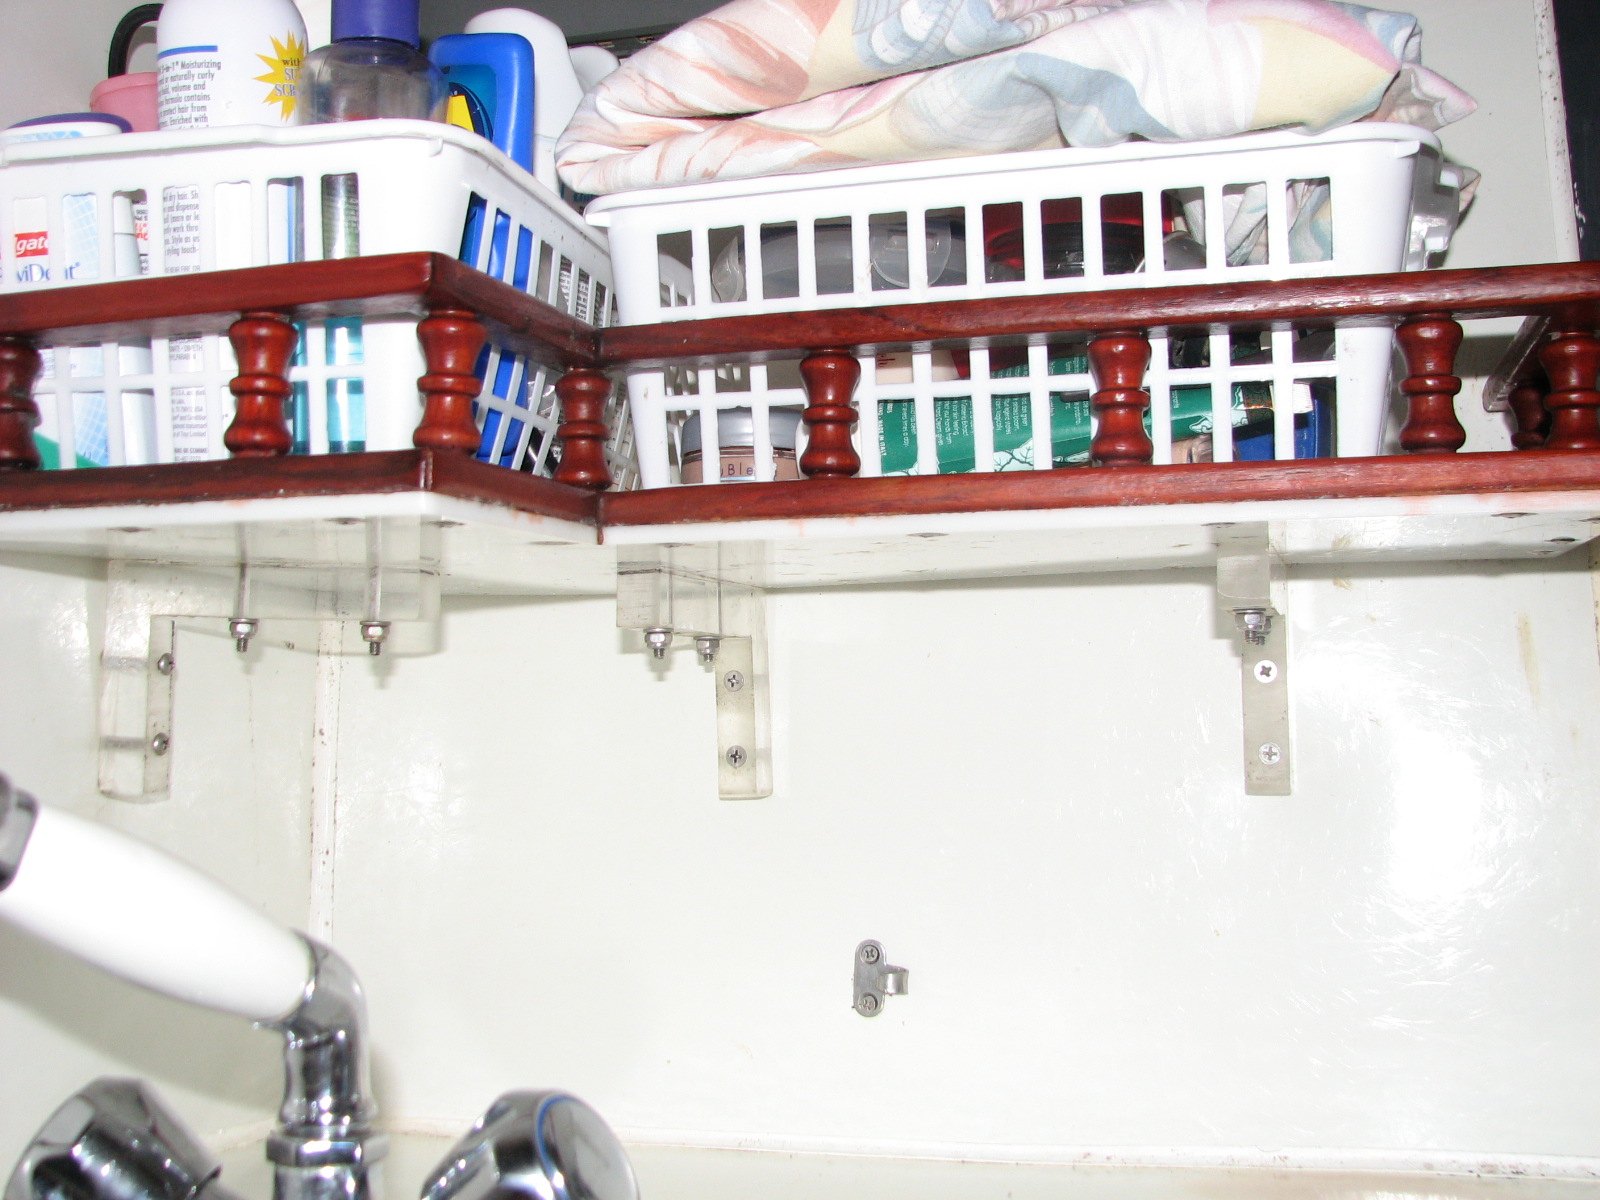
There is a shelf in the head that holds a lot of goodies, but the screws were getting loose and it was just a matter of time before the shelf fell off. I decided it was time to repair it. The screws that held the shelf supports that went into the bulkhead between the head and garage, were changed out for through bolts. This will anchor the shelf to that bulkhead. For the screws that held the shelf supports on the back of the shelf that went into the hull I changed out the #8 screws for #10 screws. The #8 screws had worked loose over the years and would not hold. With the through bolts holding one side, and new screws in the back supports, hopefully the shelf is anchored for good.
Head Shelf Showing Through Bolts To Left and Screws On The Back
I then went to the dinghy and re-attached the whales tail back on the outboard. The experiment did not work. The prop still cavitate's a lot with three people in the dinghy. I then changed the angle of the outboard relative to the dinghy to see if that helps with the problem. We shall see.
Last item for the day was to climb the mizzen mast. One of the new spreader lights was not working, so I had to check it out. I was able to get the cover off of the base without a big problem. The cover actually had captive screws, so they did not fall out. The engineer that designed these lights must have owed a boat!! I checked the voltage, and the actual H3 bulb was defective. I put the cover back on the base and brought the bulb down to the deck. I also checked the bulb on the bench, and it is bad. I will go into an auto parts store the next time we are in town and see if I can purchase a new bulb, and a couple of spares.
January 31, Sunday
Today was a computer day. I spent most of the day working on Kitty's computer getting all of the navigation software installed and running on it. I also had to sync up my computer to the backup hard drive that contains all of the most recent navigation files. I got the job about 2/3 done. I still have to install the weatherfax software and the software used to send email on the Globalstar and Iridium satellite phones.
January 29, Friday
Went to the dinghy and emptied it of water. We had had about two inches of rain in the previous day or so. Got all of the water out of the dinghy, and pretty well dried it out, and got it ready to go.
I also removed the whale's tail from the outboard engine on the dinghy. The whale's tail is used to help get the dinghy up on a plane, and it worked quite well when I had the Avon RIB. On the Livingston catamaran dinghy, I think the whale's tail is a hindrance. With just Kitty and me in the dinghy, we have no problem getting the Livingston up on a plane, but when there is another person, or a lot of extra weight in the dinghy, the Livingston will not plane. It seems that the prop on the engine cavitates. Not sure if what I am doing will help, but it may. Will report later.
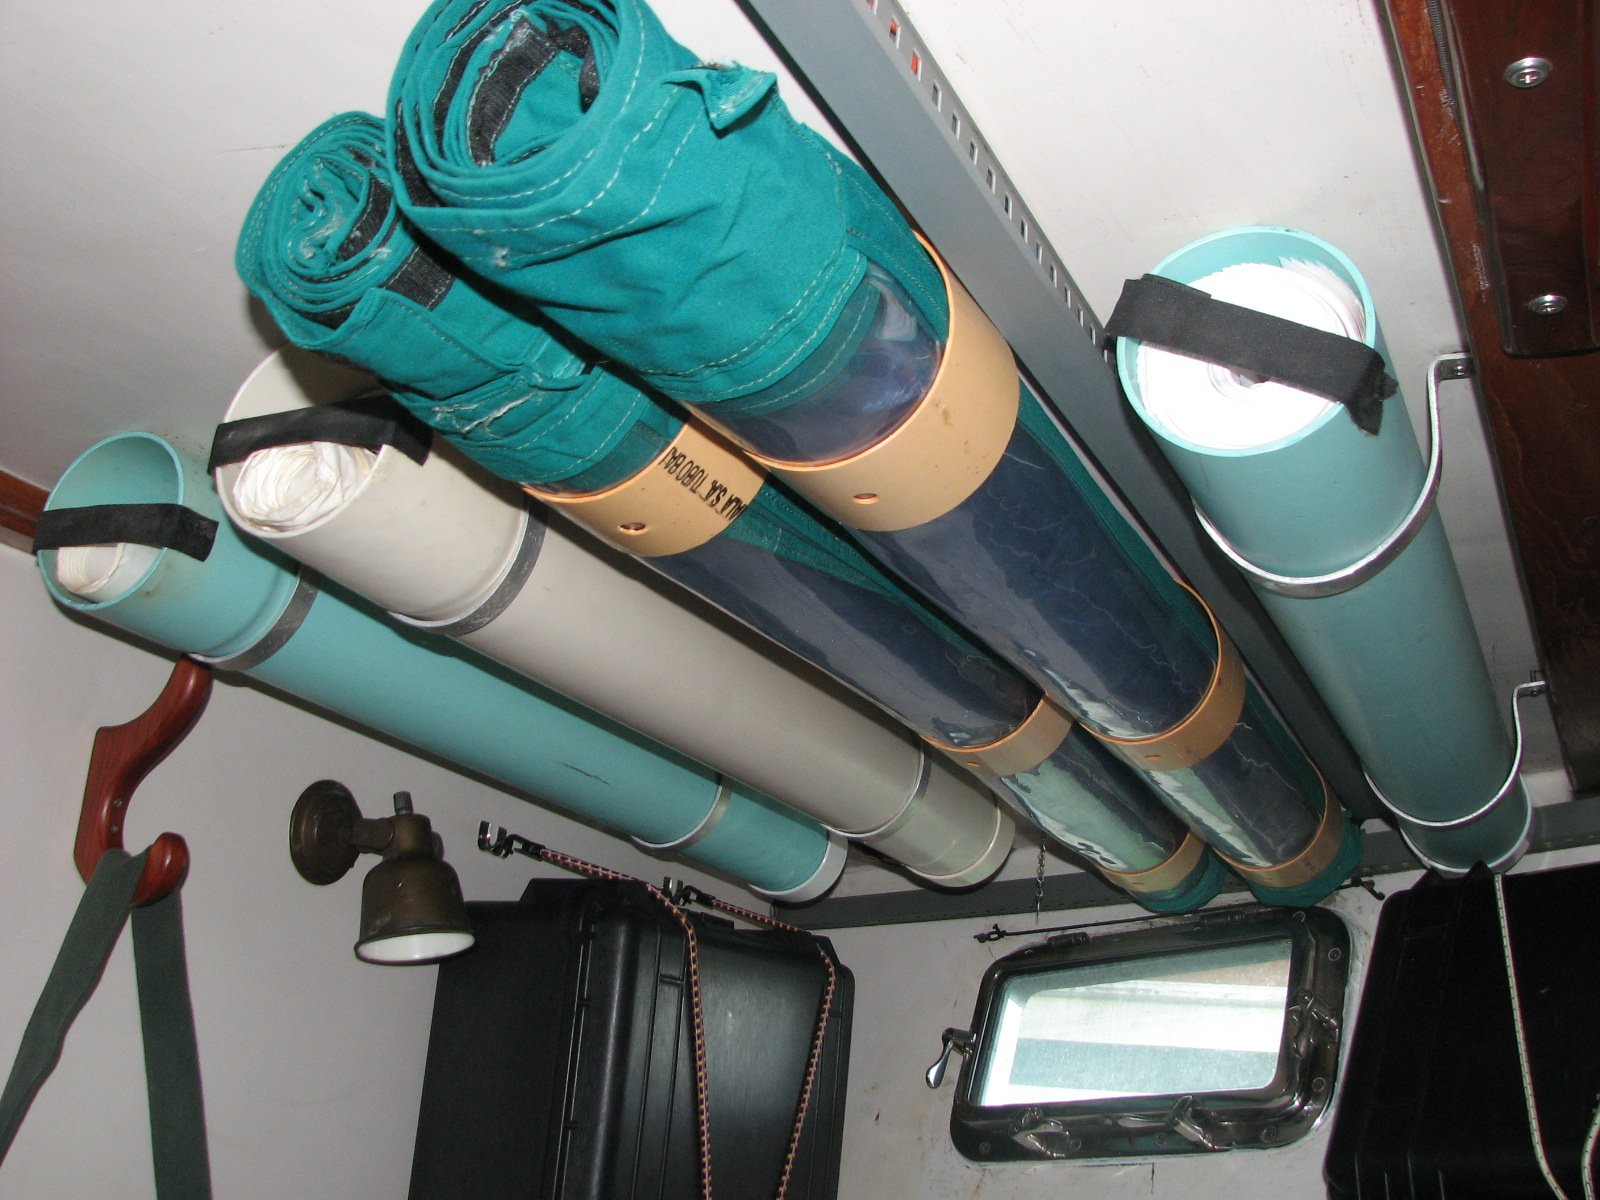
Pretty much finished off the forward cabin. I found a piece of schedule 35 4" PVC pipe in the workshop at the marina. I cut three 3-inch pieces, and cleaned them up. I screwed the three pieces to the port side overhead in the forward cabin. I rolled together the two starboard side plastic enclosure pieces and put them into the PVC pieces on the overhead. They fit very nicely, so I went back to the workshop and cut three more pieces. I got those cleaned up and screwed them to the overhead in the forward cabin. I rolled together the two port side plastic enclosure pieces and they went into the second set of PVC pieces. More stuff is now up and out of the way, and permanently stored!
Cockpit Enclosures in Overhead Storage in Front Cabin
January 28, Thursday
Started the day by working on the Air-X Marine wind turbine. I had not heard from the support person at Southwest Windpower for a few days. The last thing he had suggested could be the problem was that the turbine was not sensing the battery voltage. I decided to take the turbine apart and verify all the connections, and look for something obvious. Disassembling the unit was pretty easy, and I was impressed with the engineering put into the unit.
I took the unit completely apart and looked at the connections, the slip rings, and the brushes. Everything seemed to be in order. The only problem I found was with the bearings on the rotor, which will have to be replaced, but that problem has nothing to do with my present problem. I checked continuity with everything I could see. I then put the unit back together, and ran through the bench tests again. I got the same failure with test #3. I sent off an email to the support person with whom I have been in contact, and hope he will get back to me with some answers.
Rotor from inside Wind Turbine
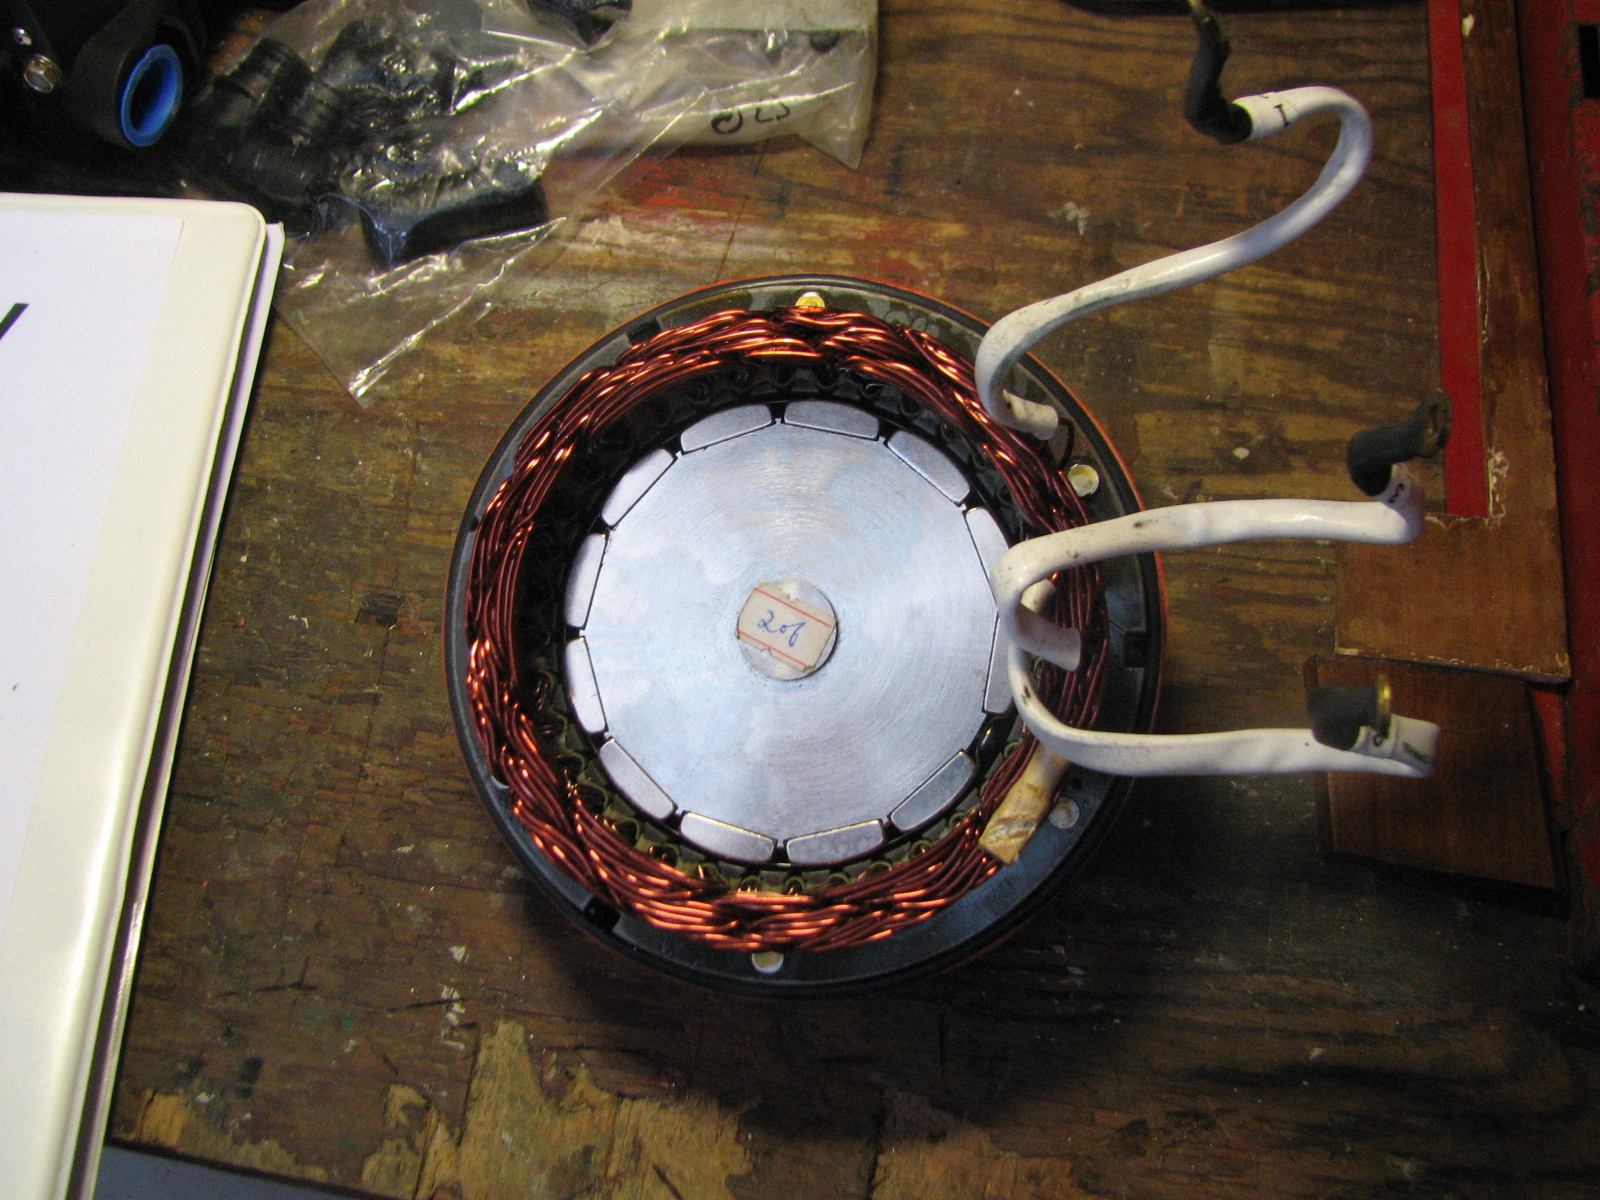
Inside of the Wind Turbine with Rotor Removed
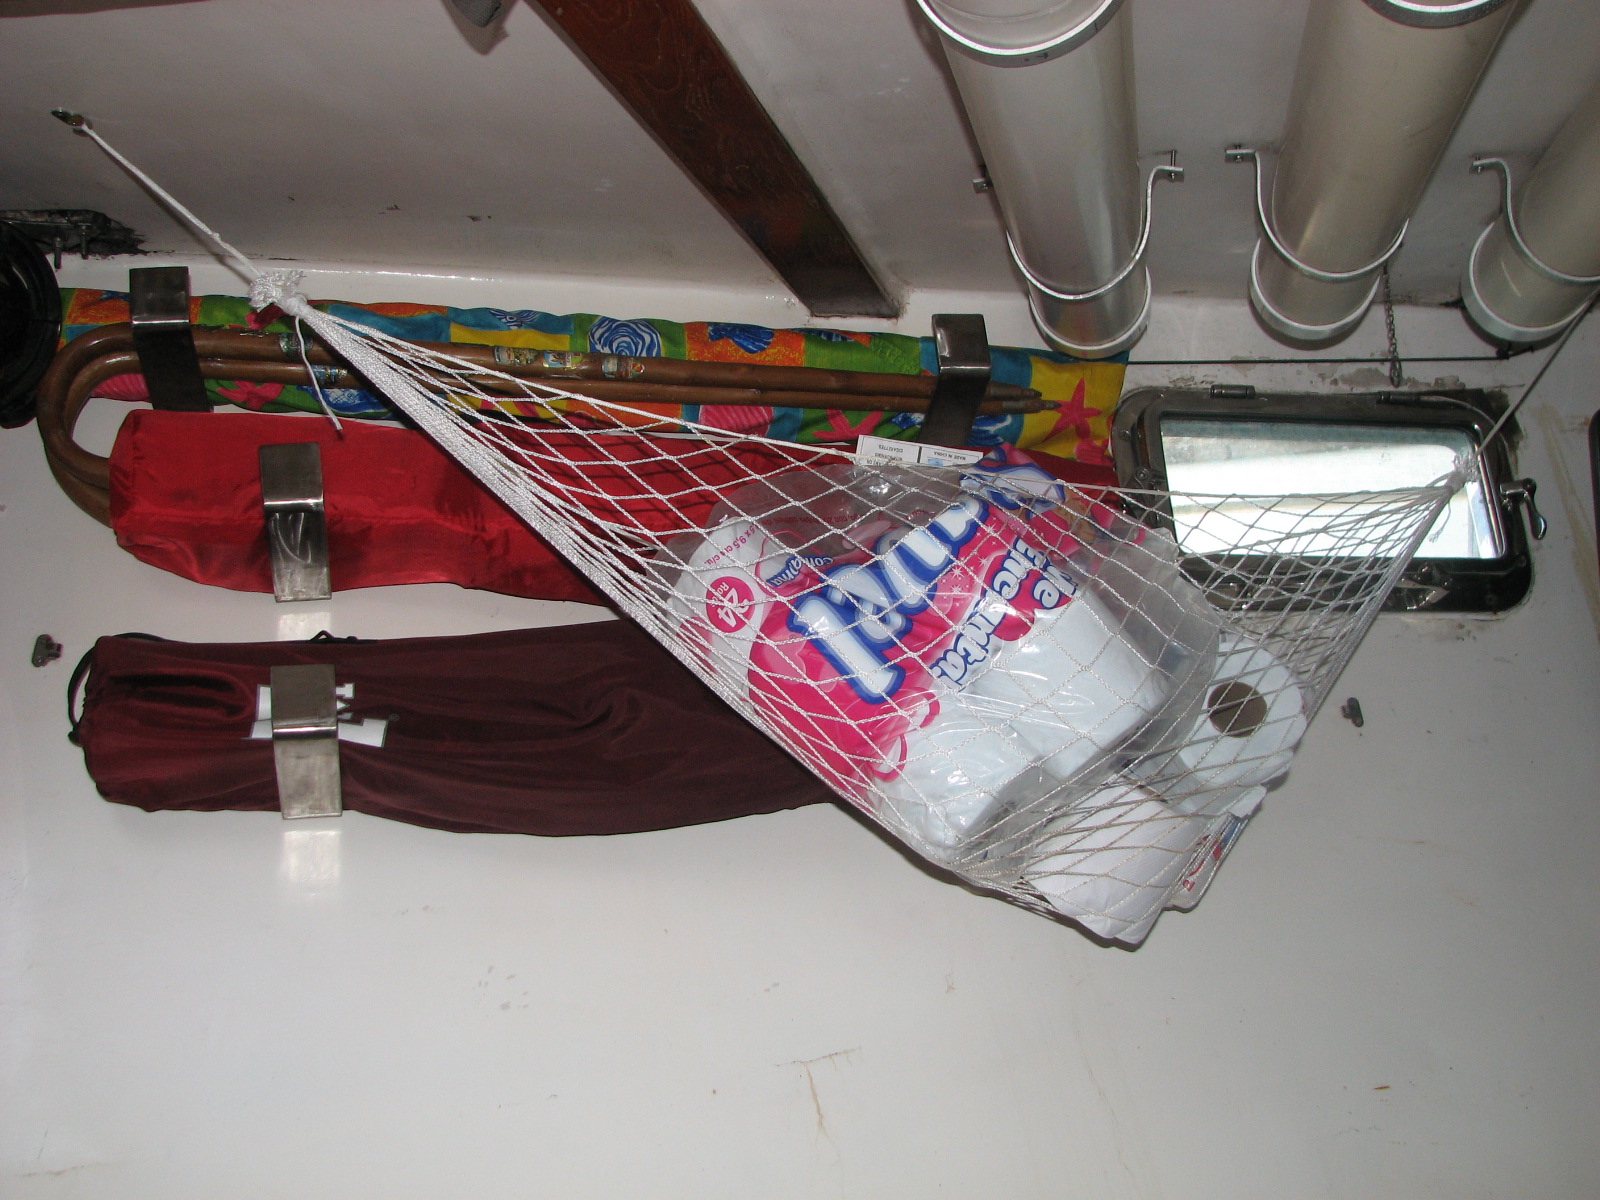
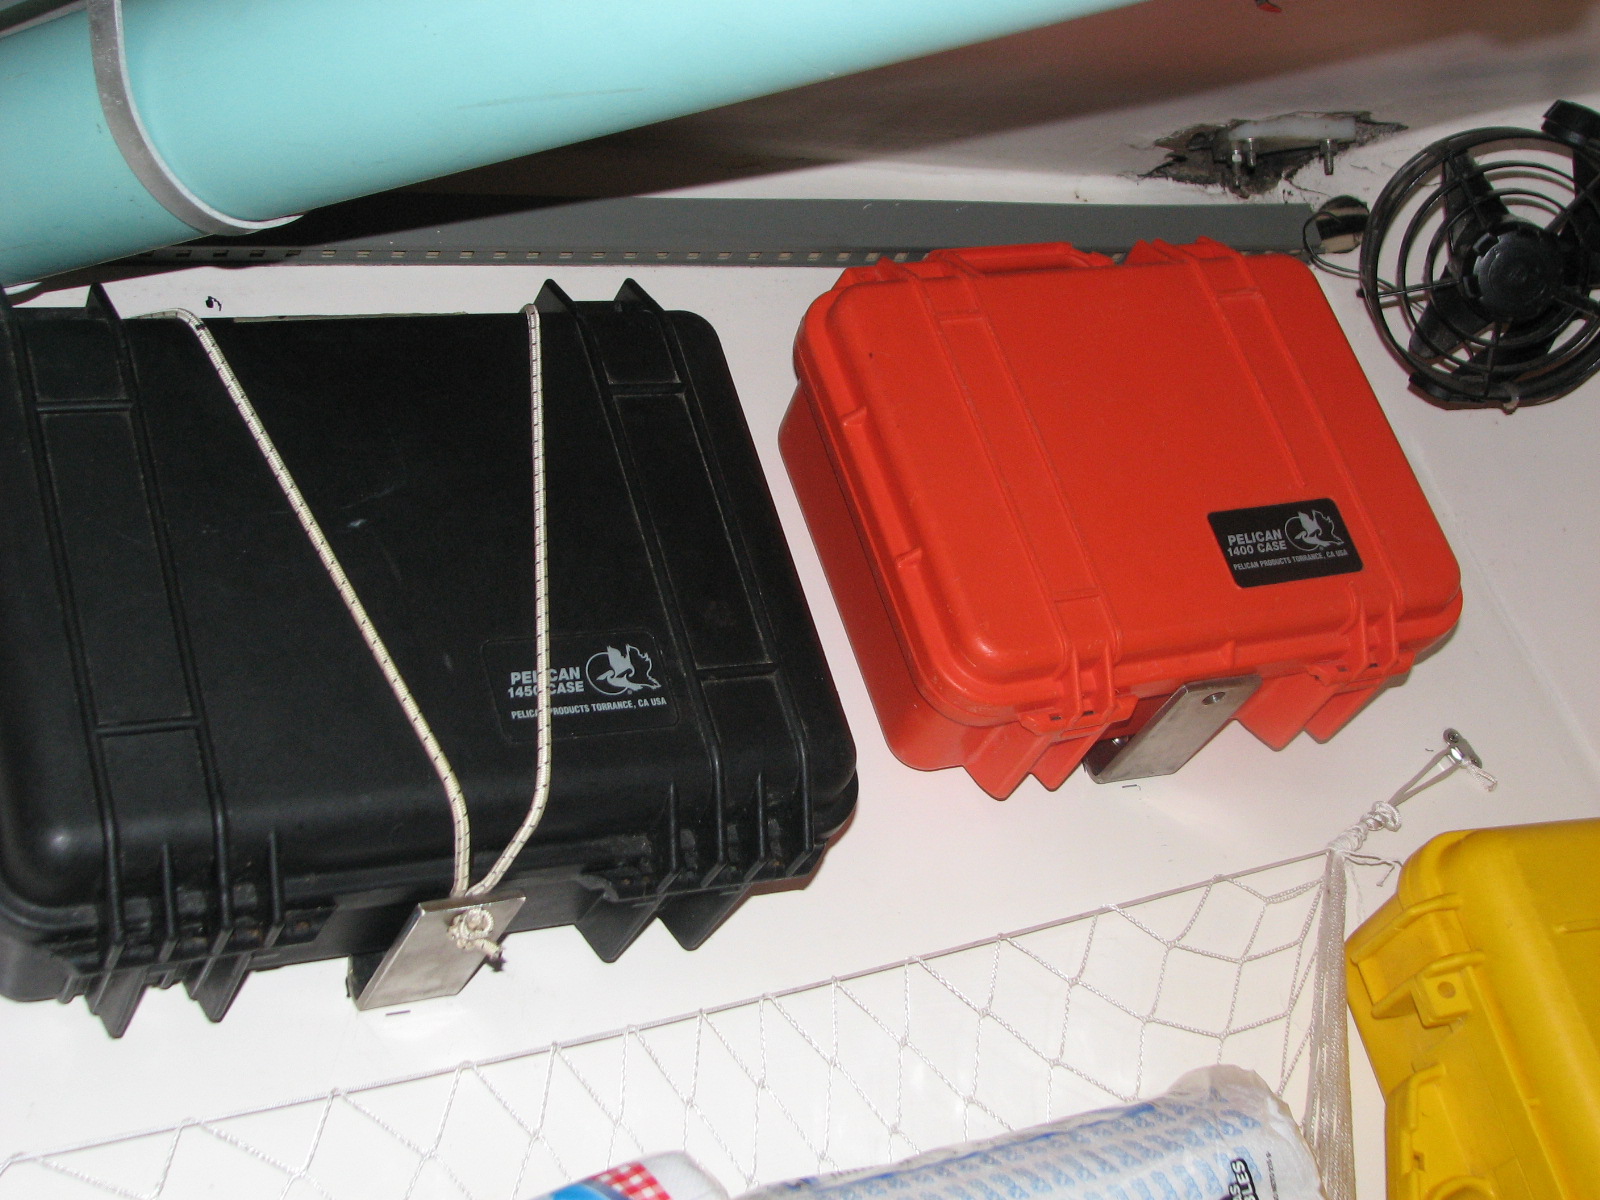
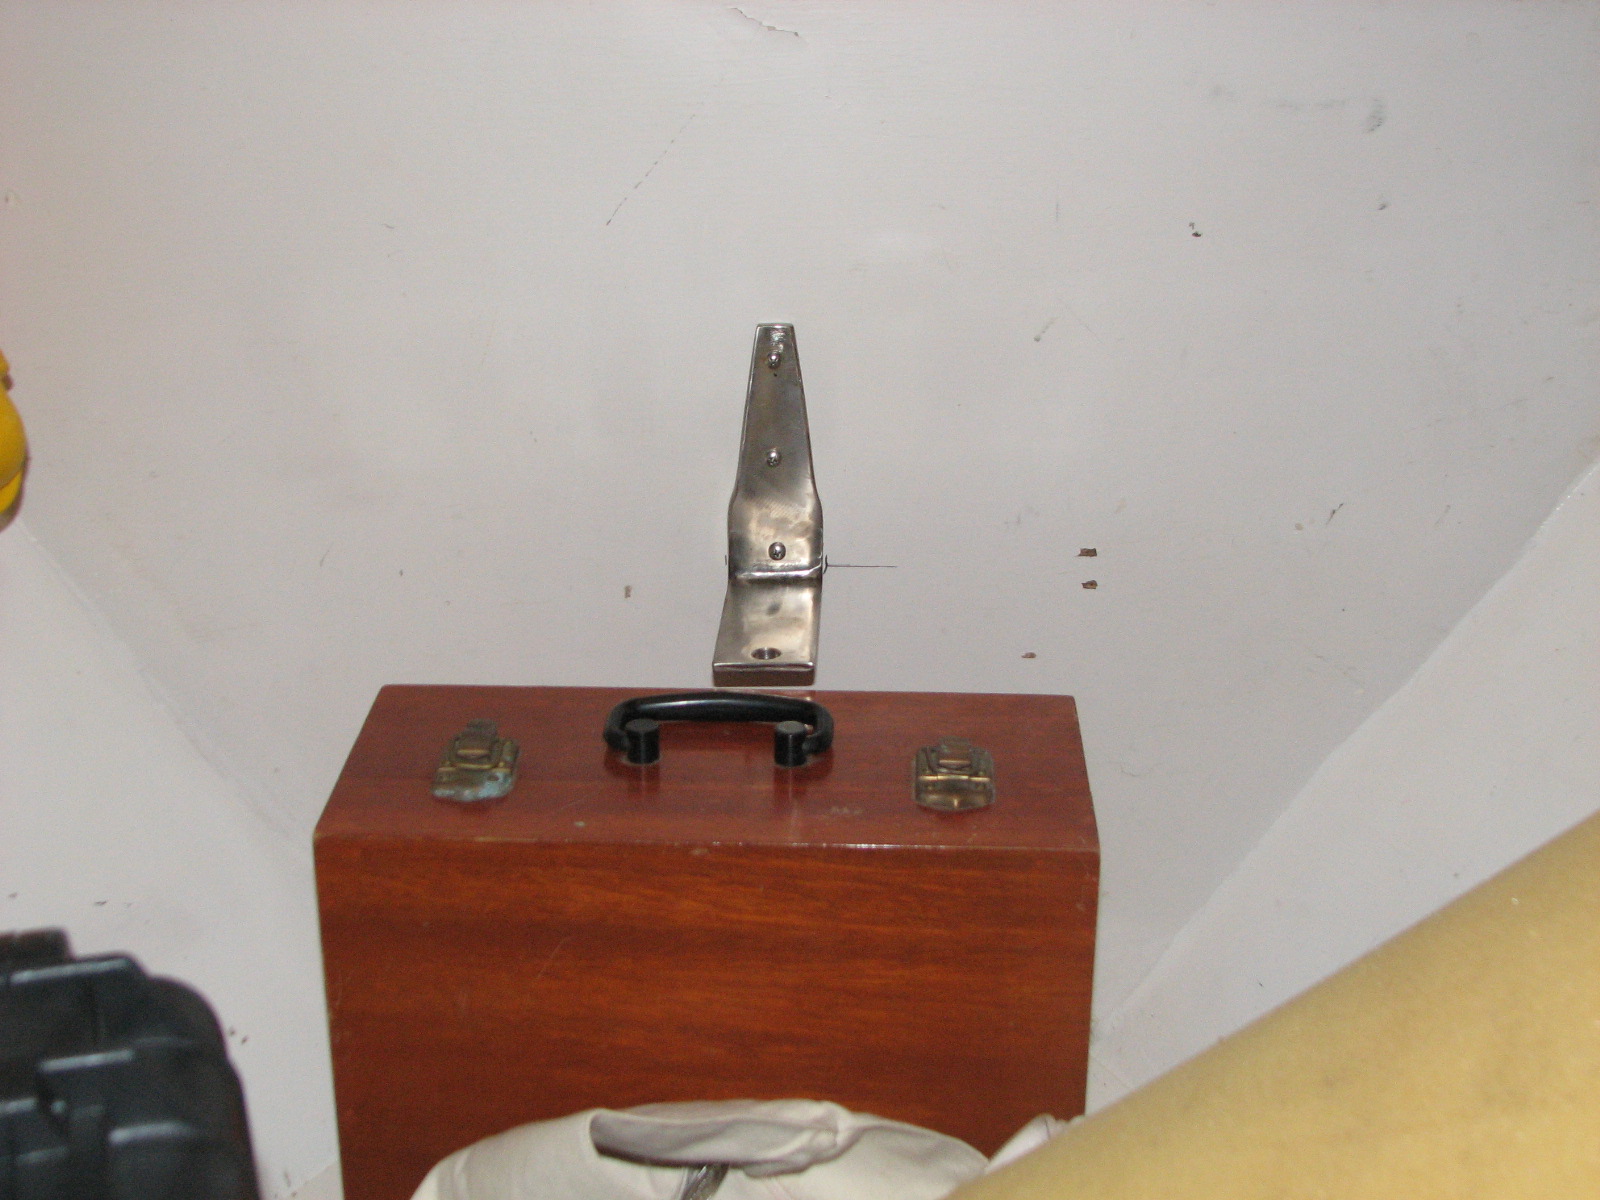
Next, I continued working on the forward cabin. I put up new brackets on the starboard side of the front cabin. I put up a new bracket for the ditch box, and replaced the mild steel brackets we had for the beach umbrella and the folding chairs with stainless steel brackets. It looks a bit crowded in the forward cabin, but with everything up out of the way, a couple can still sleep there without too much hassle.
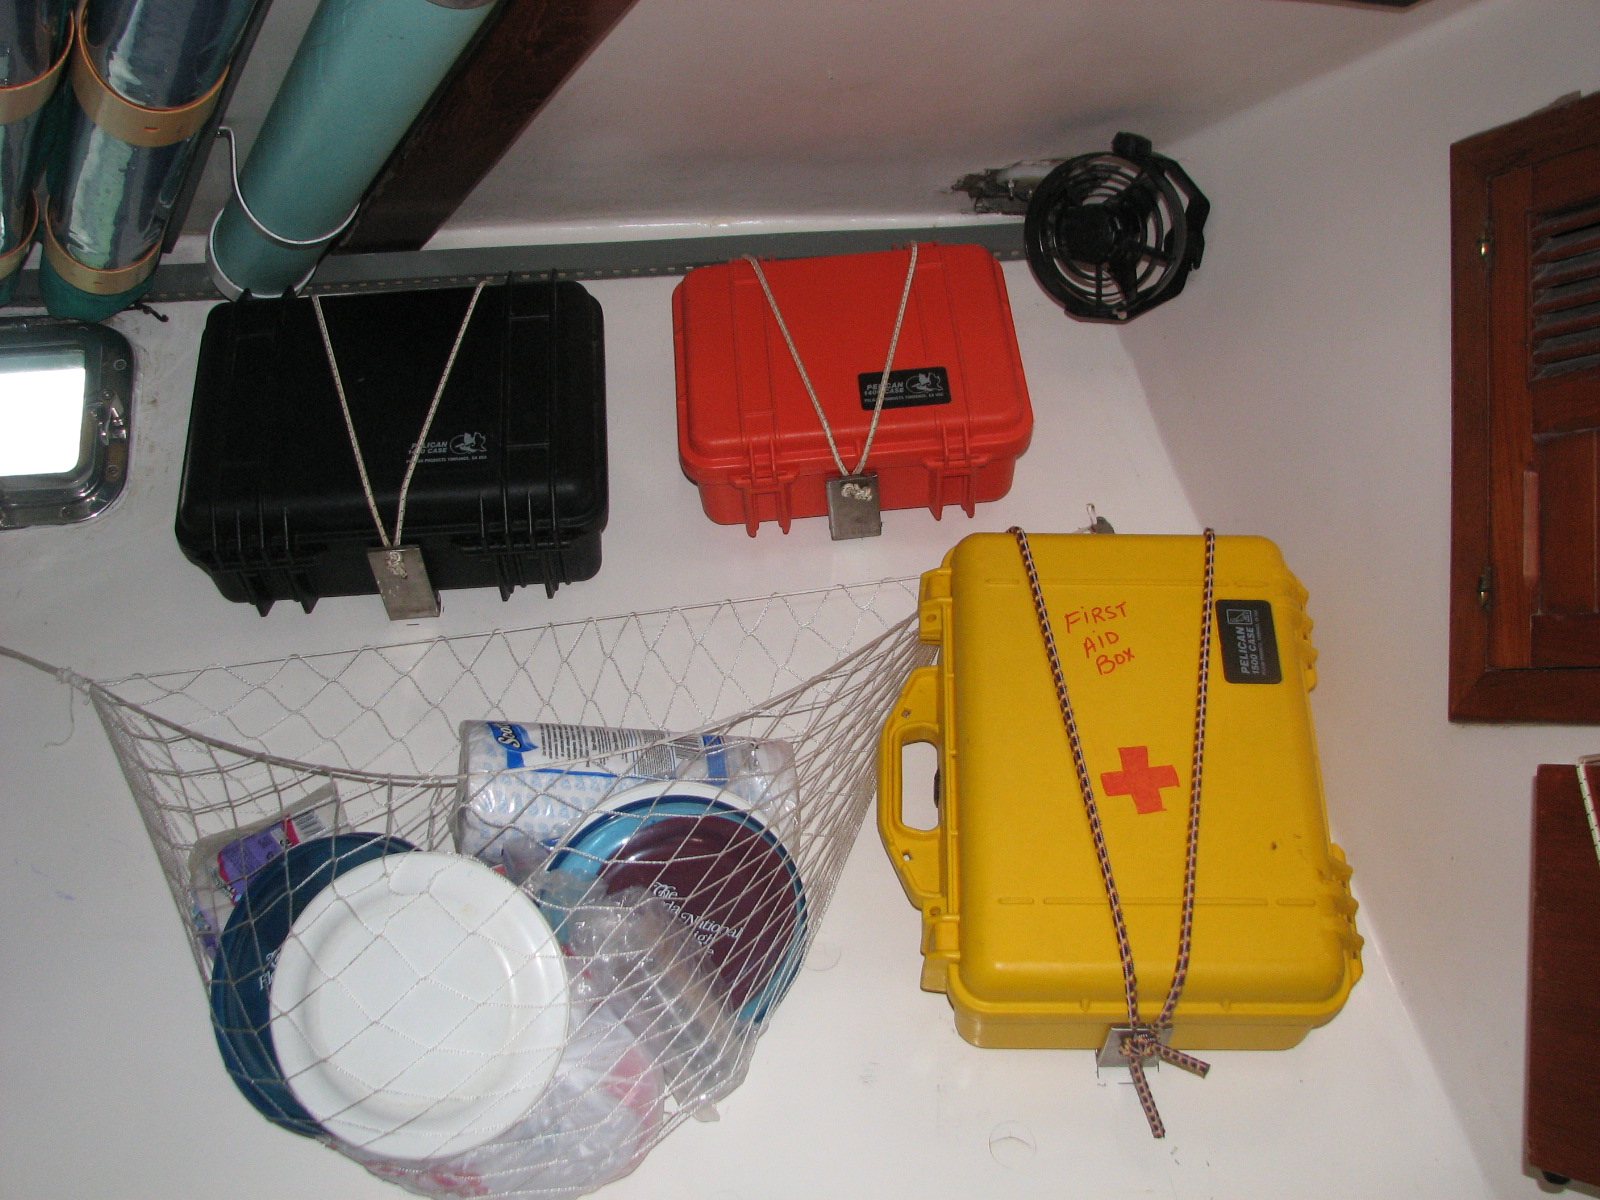
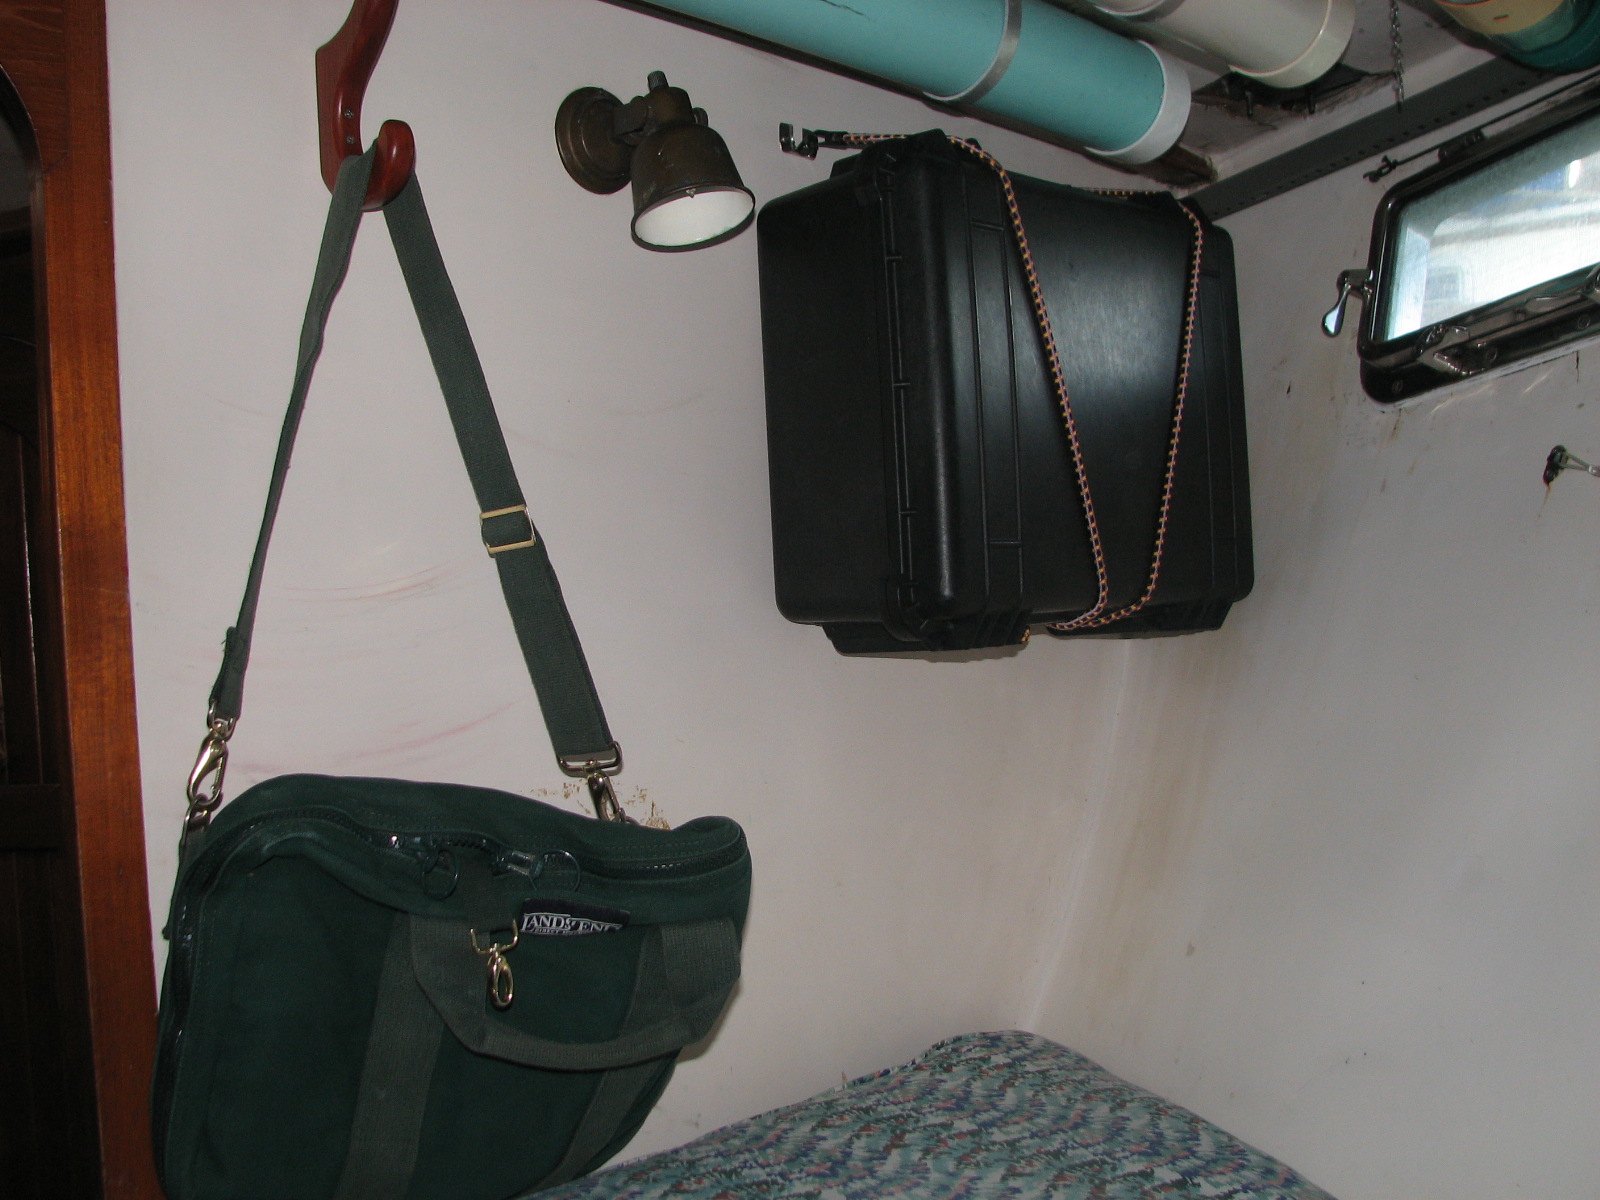
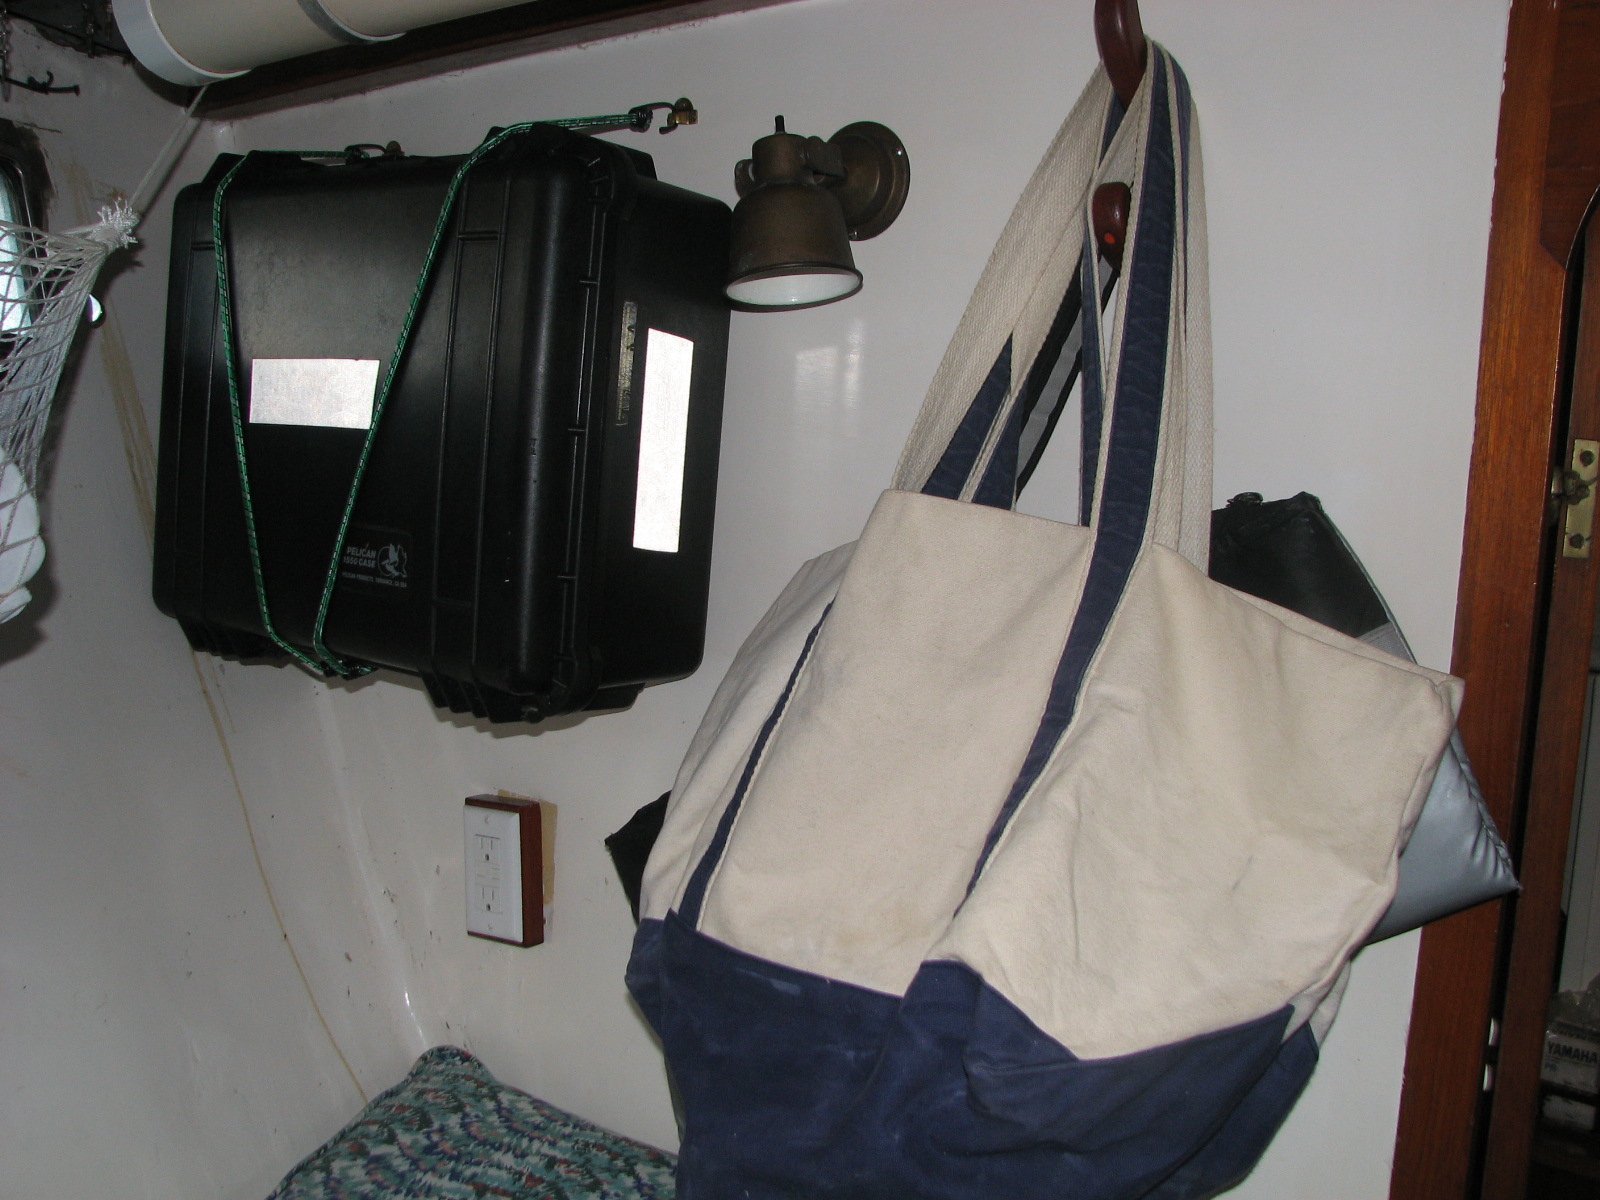
The next five pictures show the finished forward cabin with all of the Pelican cases up and out of the way.
Forward Cabin with Sextant Mounted Center (Notice Welding Helmet on Starboard Side)
Forward Cabin, Port Side - Hammock, Glass Storage (Black), First Air (Yellow), Camera (Orange)
Forward Cabin, Port, Aft Bulkhead - "General" Pelican Case
Forward Cabin, Port Side, Aft Bulkhead - Ditch Bag Pelican case, Shopping Bags
Forward Cabin, Starboard side - Umbrella, Walking Sticks, and Folding Chairs
January 26, Tuesday
I had already cleaned two of the net bags that are located in the cockpit to hold the jibs sheets, while sailing. The bungee cord used in them had failed and needed to be replaced. I re-installed two of the cleaned net bags with new bungee cord back into the cockpit. It looks so much better now. I removed the three remaining net bags from the cockpit. I trashed the old bungee cord, and put the net bags to soak in a bleach and soap solution. They will be ready to be re-installed back into the cockpit in a couple of days.
I next went to work in the forward cabin. I installed the brackets and bungee cord to hold all of the Pelican cases mentioned in the January 24 update, on the port side. I got the area all cleaned up and vacuumed. Tomorrow or Thursday I will finish up with brackets for chairs etc. on the starboard side.
January 25, Monday
Started off the day by emptying the freezer on the boat and hauling all of the contents up to the small chest freeze the marina has in the large bodega. When I got the boat freezer emptied, I defrosted it. Meaning that I chipped all of the ice off of the two holding plates in the freezer. When I got all the ice cleaned out of the freeze, I brought all of the frozen food back to the boat and re-loaded it into the freezer. During this process, we took an inventory of what was there.
Inside Freezer Box - Holding Plate on Right, Expansion Valve on Left
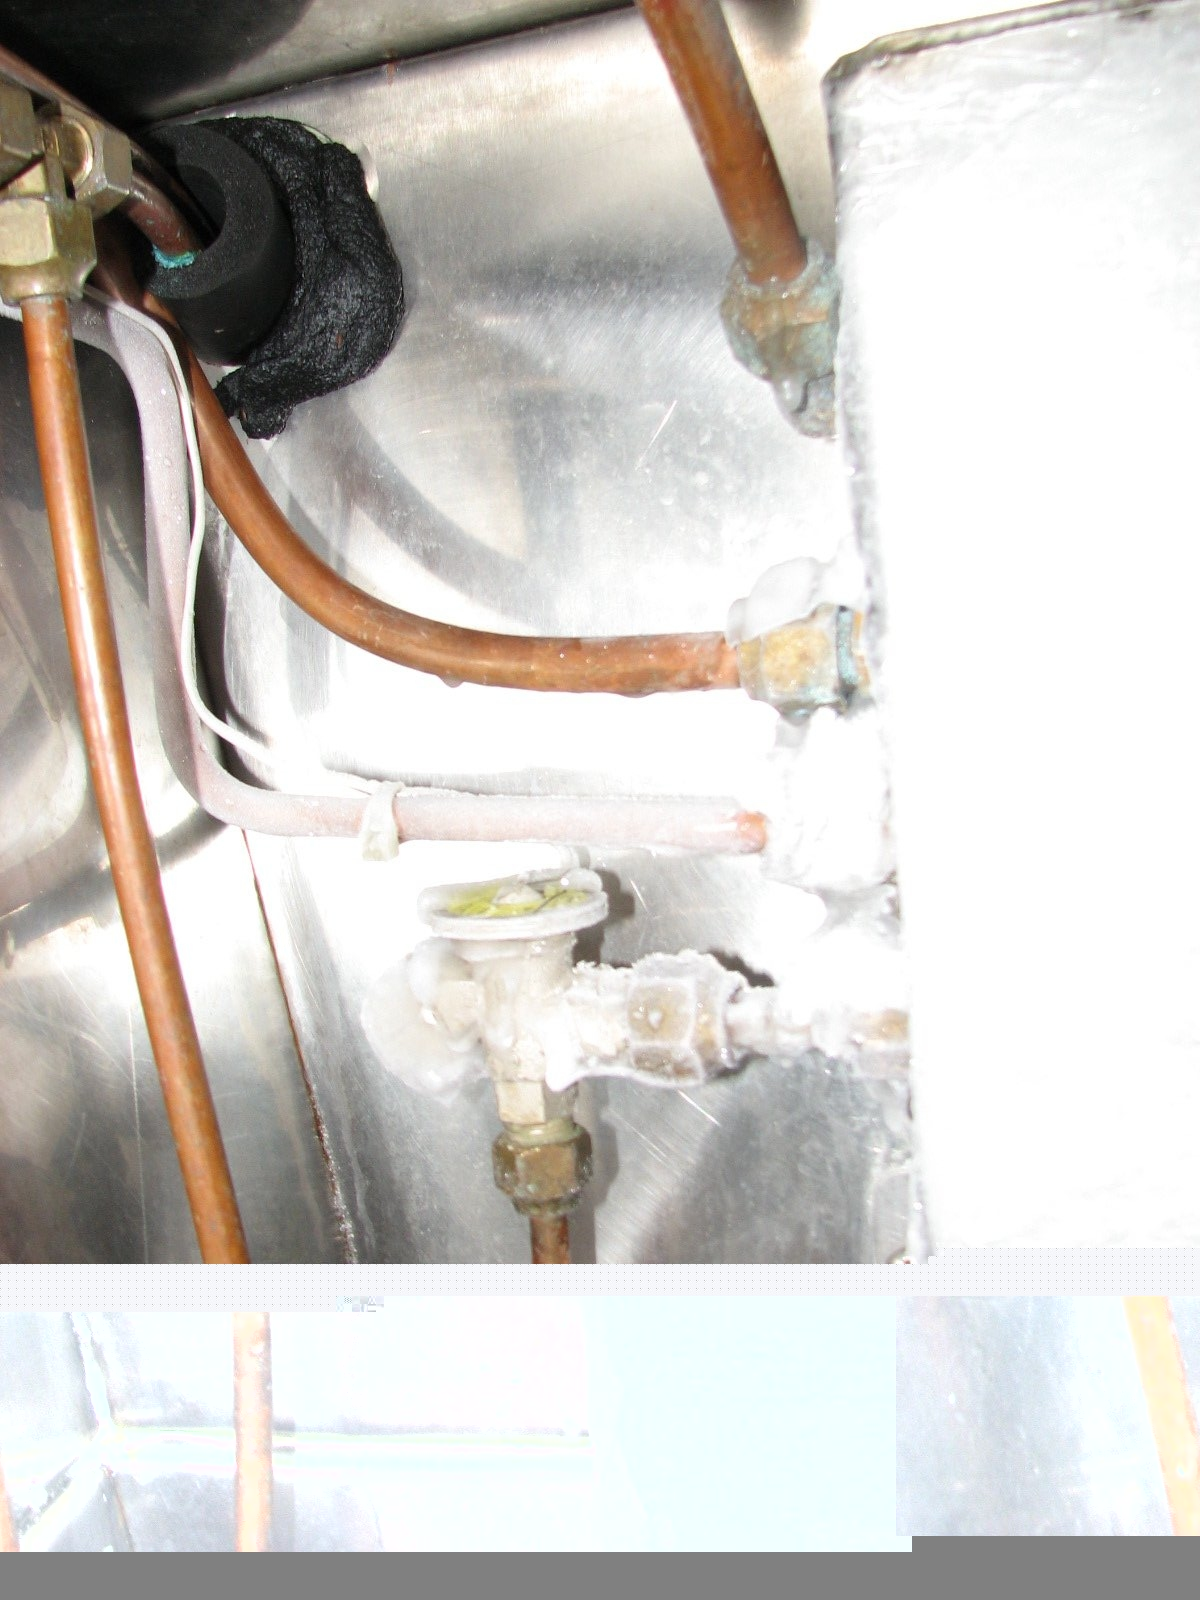
Went to lunch, then came back and worked on the Yamaha outboard. I cleaned the two spark plugs and adjusted the idle. I also checked the fuel filter on the engine. Checked out the engine and it seemed to idle pretty well. Will check again tomorrow.
When I finished the outboard project, I worked on the galley sink faucet. I took the whole thing apart, cleaned all of the parts, and washed out the filters. I put the faucet back together and re-installed it in the galley. Ran the water through the faucet and the water comes out much cleaner than it was when I started working on the system.
January 24, Sunday
Worked all day on forward cabin. Started off by cutting small, 3-inch pieces off of a piece of 3-inch diameter PVC pipe I brought from Texas. I planned to screw the pieces in the forward cabin overhead and then slide the rolled up plastic enclosures into them. After I got all of the pieces cut, trimmed and drilled, I discovered that the rolled plastic enclosures would not go into the 3 inch pieces. I will have to get some pieces of 4-inch PVC pipe.
Next, we worked on putting up brackets on the forward cabin bulkheads and hull area. These brackets are used to stow the pelican cases we have on the boat, and the sextant box. One of the pelican cases is for our first aid supplies, another is where we store our shot glasses and champagne flutes. A third is for camera storage, there is a fourth in which we are storing our computer cases. The last pelican case is used as our man-overboard ditch bag. When we are in port, we will store that case in the forward cabin, then move the case to the main salon when we make passages. Did not get the project finished as we ran out of time. Still have to get more tie-downs and bungee cord.
Black - Glass Storage, Orange - Camera Storage
Yellow - First Aid Kit
Sextant Case with Bracket over the Case
January 22, Friday
Because of the water starvation issues I am having with the watermaker, I decided to change the size of the fittings on the pre-filters. The hose size out of the lift pump and to the input of the first pre-filter is 3/4". The output of the first pre-filter, and all of the way to the input of the high pressure pump is 1/2". I was able to locate in Fronteras enough 3/4" fittings to change all of the pre-filters to 3/4". My thought was this could also be a problem.
I discovered that the second pre-filter was only able to take 1/2" fittings because of the size of the housing on the filter. I decided to take the second pre-filter out of the system for now until I can get a new filter housing that will be able to take 3/4" fittings. Having 2 pre-filters, plus the petroleum filter was always overkill, so it will not damage the membrane filter.
I ran the watermaker, for about 15 minutes, and I was still able to get the 4 1/2 GPM to the high pressure pump, with no water starvation. I would really like to get a 5 to 6 GPM continuous duty pump. When I find one, I will put it in place of the present Jabsco lift pump.
January 21, Thursday
Spent this day working on the capacity issue with the watermaker. I calibrated a big 8 gallon bucket I have. I marked the 2, 4, 4.5, and 5 gallon levels. The reason for this is the lift pump is supposed to be a 4.5 gallon per minute (GPM) pump. The first effort was to remove the hose from the input of the high pressure pump and ran the system for one minute. The result was approximately 2 2/3 gallons of water. That answers the water starvation question, it is!
The second test was to take the hose off of the input to the first pre-filter. This is measuring the output of the lift pump. We ran the pump for one minute and the result was 4 1/2 gallons of water. This is good news. The pump is working properly. Just for information, the lift pump runs on 12 VDC, and the watermaker high pressure pump runs on 115 VAC, so I do not have to run the high pressure pump to do these tests.
The third test was to take the hose off of the input to the second pre-filter. This has the water running through the first pre-filter. We ran the pump for one minute and the result was 4 1/2 gallons of water.
The fourth test was to take the hose off of the input to the petroleum filter. This has the water running through the first and second pre-filter. We ran the pump for one minute and the result was 2 2/3 gallons of water. Removed the element in the second pre-filter and ran the pump for one minute and the result was 4 1/2 gallons of water. Changed the element in the second pre-filter and ran the pump for one minute and the result was 4 1/2 gallons of water.
For the last test I removed the hose from the input of the high pressure pump and ran the system for one minute. The result was approximately 4 1/2 gallons of water. I then ran the watermaker for about 20 minutes, and the system did not starve for water. This is good news
January 20, Wednesday
Installed the new Jabsco lift pump for the water maker and the raw water washdown system. I ran the water maker for about 45 minutes, but the system is still starving for water. I do not think it is the pump, but the filters in the system keeping water from flowing. At least this pump did not fail after 20 seconds of operation. Will check the filters tomorrow
I rebuilt the old Jabsco lift pump. I put in the new parts for the pump, but the old pump parts seemed to be in really good shape. I decided to keep the old parts for a real problem.
January 18, Monday
Removed the port wind turbine from the mizzen mast. Brought the wind turbine down to the garage on Dream Away, and did the three bench tests listed in the Users Manual. Test 1 & 2 were successful, but test 3 failed. We had a condition called "clogging". I sent an email to the person with whom I am working at Southwest Windpower. Will have to wait and see what he has to say.
Bench Test 3 Set Up on Work Bench in Garage
Finished cleaning the davit spreaders and all of the hardware. Put the spreaders back together and re-installed them back on the dinghy davits.
January 15, Friday
Continued cleaning and polishing the davit spreader bars and hardware.
January 14, Thursday
Started working on the dinghy davits. As mentioned before, building the dinghy davits was a learning experience in many ways. One thing I learned was to not use a steel wire wheel to clean up stainless steel. When you use a steel wire wheel, the stainless steel looks great for a few days, but then the carbon steel that was deposited on the stainless steel begins to rust, and looks really bad. Needless to say, the davits look pretty bad after the trip down here from Texas. I have decided to clean up all of the parts using aluminum oxide sand paper and flapper discs. I will start the process with the parts that are removable from the davits.
I removed the spreader bars that are used to actually lift the dinghy. I took the spreader bars to the workshop, removed all of the hardware, and started the polishing process. The point now is to remove the rust and smooth out some rough spots. Actually, polishing the stainless steel will take a lot more effort.
January 13, Wednesday
I then took up the hatch from the galley floor, and took it to the workshop. I cleaned up the bottom of the hatch, cut out the proper-sized soundproofing/heat shield, and stuck the soundproofing/heat shield to the bottom of the hatch. I finished the installation with aluminum tape around the outside edges of the soundproofing/heat shield. I then used self-tapping screws to hold the round roofing discs to the hatch bottom to help support the soundproofing/heat shield. See picture of garage hatch under entry for January 12.
I now have all of the hatches surrounding the engine room fitted with soundproofing/heat shield on them. This should help with noise, and keep heat from escaping from the engine room into our living area.
January 12, Tuesday
I removed the barrier from under the companionway hatch, and took it to the workshop. I had soundproofing/heat shield material on the bottom of this barrier, but it had fallen off in the distant past. I cleaned off the bottom of the barrier and the cut a piece of soundproofing/heat shield. The soundproofing/heat shield had its own adhesive on the back of it, so all I had to do was apply the soundproofing/heat shield to the bottom of the barrier. I finished the installation with aluminum tape around the outside edges of the soundproofing/heat shield. I then drilled holes in the barrier to hold the round roofing discs that help support the soundproofing/heat shield. I am sure this new arrangement will hold.
Top side of Companion Way Hatch in Place
I brought the barrier back to Dream Away, and put it in place. I then took the hatch from the garage floor, and took it to the workshop. I cleaned up the bottom of the hatch, cut out the proper-sized soundproofing/heat shield, and stuck the soundproofing/heat shield to the bottom of the hatch. I finished the installation with aluminum tape around the outside edges of the soundproofing/heat shield. I then used self-tapping screws to hold the round roofing discs to the hatch bottom to help support the soundproofing/heat shield.
Garage Hatch with Soundproofing/Heat Shield Installed. Galley Hatch and Aft Cabin Hatch are Identical
After taking the garage hatch back to Dream Away, I went to the work shop and cut out some round pieces of very thin aluminum to be used as roofing discs. I will use these discs on the engine room doors to support the soundproofing/heat shield that is already installed.
January 11, Monday
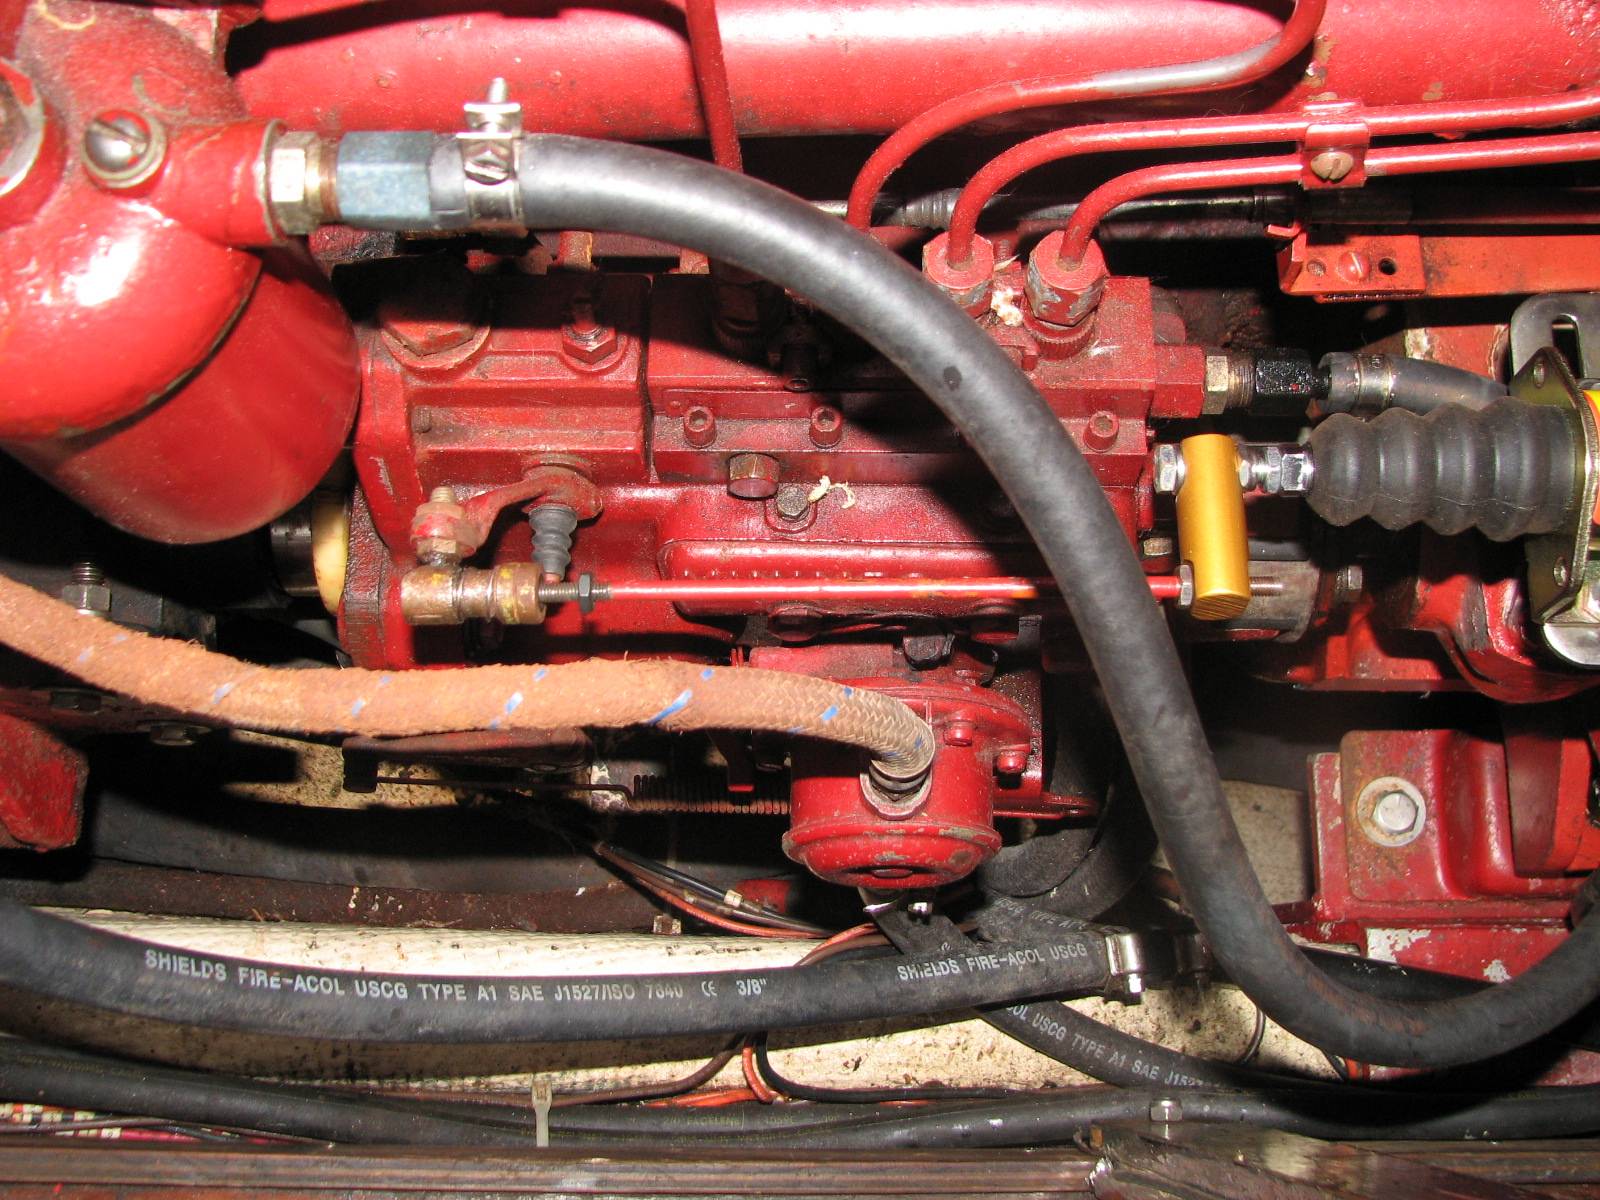
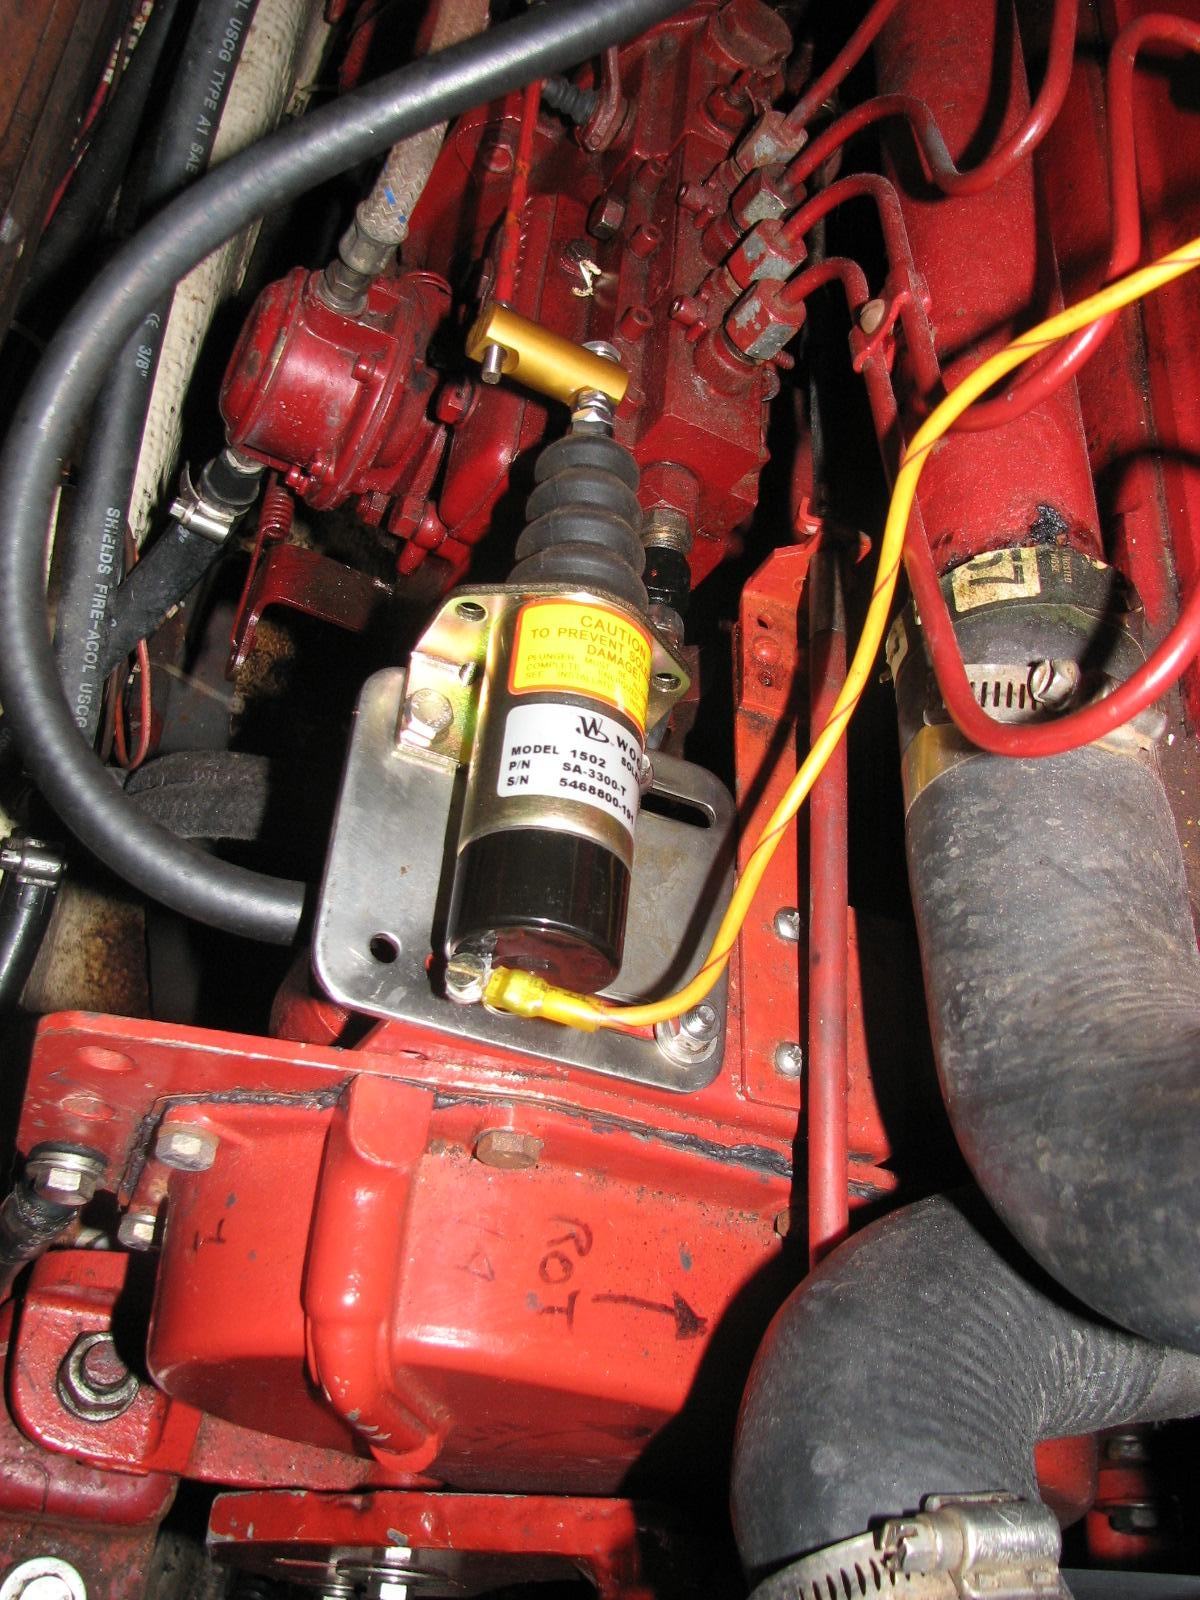
The stop solenoid on the main engine would not work reliably. Before I left Texas, I ordered a new stop solenoid to replace the original. Naturally, the old model was no longer made, so the new one would take some engineering to get it to fit. Since I did not know what "engineering" would be required, I put this project off until we reached Guatemala.
As it turns out, there was not a lot of "engineering" required, and I had all of the tools I needed to complete the job. I was able to find a piece of stainless steel in my stash of metal goodies, and it fit onto the mount with out drilling any holes. I got the solenoid mounted, and verified operation. Then I cut the shaft to the proper length so the solenoid actuates to shut off the fuel supply out of the injector pump. I used a die to cut new threads on the shaft, installed the shaft, and checked out the operation.
The new solenoid works great. In the near future, I will run the main engine for several hours to make sure the solenoid operates after getting hot.
End of Solenoid with Actuator Rod Going to Injector Pump
Solenoid Mounted on Main Engine
January 9, Saturday
The sound proofing/heat shield had fallen off of the hatch in the aft cabin floor. I took the hatch up to the workshop at the marina. I had to clean off the glue and other material from the bottom of the hatch. I got the cleaning done, and masked off the area so I could spray on contact cement. I sprayed on the contact cement, waited the required time, and put the soundproofing/heat shield back on the hatch. I removed the masking tape from the hatch, and then used aluminum tape around the outside edges of the soundproofing/heat shield to help keep the soundproofing/heat shield from falling off again.
I then used round roofing discs like the ones I had used in the overhead of the engine room. I put the roofing disks on the soundproofing/heat shield, and ran a screw through the disk, then through the soundproofing/heat shield, and into the hatch. All of this should prevent the soundproofing/heat shield from falling off again. See a picture of the garage hatch under the entry for January 12.
January 8, Friday
One of the hold-downs for the water-maker membrane filter had broken. I cut some pieces of rubber insulation, then put the rubber insulation between the filter and the bulkhead. I then re-fastened the hold-downs for the membrane filter. The membrane filter is back where it should be, and does not vibrate as much as it did.
January 7, Thursday
We took the roll-up dinghy Paul had left in Texas, and I had brought back to the Rio, over to Tijax. That was a fun exercise, getting the dinghy and parts into our dinghy.
Moved the remainder of Paul's items over to his boat, and also did another 45 minute stint of pumping his bilge.
Cleaned out our forward cabin, but found too much water in it. I have some leaks to fix. I guess we will just have to stay here on the Rio, so I can track down the leaks and fix them. It would be very difficult to repair leaks while we are cruising. I just would not get the necessary time required.
Cleaned the stainless steel cleats and stanchions on the forward end of the boat. Also, washed the cushions from the forward cabin.
January 6, Wednesday
Started to empty out the forward cabin! Delivered the mildew packets to the manager of Monkey Bay Marina. We had brought 144 packets down with us from the states for him. We also moved some of Paul's stuff to his boat. Paul's boat is right next to Dream Away, so I went over to Paul's boat, and Kitty handed me the stuff, and I took it down inside Paul's boat. I also pumped the bilge in Paul's boat for 45 minutes.
January 5, Tuesday
Put in 45 gallons of diesel fuel from the on-deck Jerry Jugs. Cleaned out the on-deck water Jerry Jugs. Also, cleaned the areas under the on-deck Jerry Jugs.
January 3, Sunday
I went into the electrical spares locker, and retrieved the old Hella fan that I had removed from the aft cabin about two months ago. I put the Hella fan in place of the Caframo fan, and at least we had good air movement, just a bit noisy!
December 27, Sunday
During the night, we were awakened by the smell of an electrical fire! We jumped up and found the source of the smell, which was not a fire, but turned out to be a new Caframo fan I had installed in the aft cabin to replace the old Hella fan that was making a bit of noise. The Hella fan had been in use for well over eight years, and it still worked, just a bit noisy. The Caframo fan was about two months old at this time. When I purchased the Caframo fans, I purchased three of the Bora units. Two of the units were in the aft cabin, and third was a spare because I had not yet installed it.
I got the third Caframo fan out of the storage locker, and installed it in place of the unit that had burned up. When I turned it on, the blades on the new fan hit the cover around the blades, and made a terrible racket. This is a new unit, fresh out of the box! I backed out the screws holding the blade cover, and the fan was able to rotate without hitting the cover. Even better news, the fan speed was slow, and it did not change pace when you went through the three speeds. New out of the box, the blades hit the cover, and it will not move air. Great for a $60.00 fan!! I was so upset, I just left the new broken fan installed!
Around 2:30, about an hour after I had started the gen set and was running the watermaker, the generator shut down by itself. It had overheated. I discovered that the impeller for the raw water pump had broken, and was in pieces. We had no spares. I decided to install the Jabsco raw water pump to see how bad it leaked, as I knew the seals were bad on it. This pump leaded so badly that I could not leave the sea cock open. This meant that we were without a generator, which also meant that we could not make fresh water.
December 25, Friday
Christmas in Placencia, Belize. The only work done today was emptying three of the water Jerry Jugs into the starboard water tank. The remainder of the day was eating and reading and relaxing!
December 24, Thursday
Fabricated two battens, and installed them under the stove in the galley. We put the stove-top cutting board under the stove when we use the stove. Great idea on a starboard tack, but on a port tack the cutting board was sliding out from under the stove onto your feet. These battens will prevent the cutting board from sliding out from under the the stove while using the stove on any tack.
December 21, Monday
Re-installed the X-Gate software on the Windows XP virtual machine. While I was doing the installation, I figured out my COM port problem. When I originally installed the X-Gate software, I used COM port 3. Later, I changed the USB-to-serial converters, when I installed the the AIS receiver. Windows XP is not smart enough to follow the device. Windows assumes it is a completely new USB device and assigns a new COM port to it. The USB-to-serial converter for the Iridium modem was on COM port 5. With the installation of the software, the software found the USB-to-serial converter on COM port 5. We were then successful with sending email out using the Iridium phone as a data modem. It was a great relief to know this feature was functional.
I installed the spacers I fabricated yesterday onto the catches for access to the air conditioning and ice maker compressor area. This installation fixed the problem with the doors to the compressor area.
December 20, Sunday
I tried to send an email using the Iridium phone as a data modem, but had a problem with the COM port in use. I could not come up with a solution. Will work on the problem tomorrow.
Removed door catches on the doors that allow access to the air conditioning compressor and the ice make compressor. Since I repaired the the main mast step, and put the step back where it belonged, some of the door frames in the area went back to their original alignment. The bad news is that the previous owner had trimmed the doors so they would fit into the frame as the mast step was moving. Anyway, the doors to the compressor area would not latch shut. I fabricated some parts that would allow the doors to latch on the proper catches.
December 18, Friday
Started the water-maker and cannot get the high-pressure flow over 600 PSI. Checked the second pre-filter and it seems to be OK. According to the flow gauge, I am getting about 1.7 to 2.0 GPM through the membrane filter. I took both of the pre-filters out of their cartridges, but this did not seem to effect the flow very much. I still suspect the lift pump as the problem. I also replaced the petroleum filter in the system, and it did not change water flow.
December 17, Thursday
Replaced the first water-maker filter in the system. It is a 30-micron filter. It seems as if the high pressure pump on the water maker is starving for water. This seemed to help the problem, but I am still not happy with the production.
December 15, Tuesday
The nut holding the rudder angle indicator on the rudder post had loosened. From the autopilot control head, we could not "see" where the rudder was in relation to the boat, so it was confusing. We adjusted the rudder angle indicator and tightened all of the bolts on the rudder post.
Ran the generator and the water-maker for 1.5 hours.
Tightened some of the turnbuckles in the rigging. Some of the rigging was a bit loose, so it needed attention. I could only tighten the mizzen standing rigging and the back-stays on the main. The other turnbuckles will have to be adjusted when we get to the Rio. Because of the safety netting on the life rails, I cannot get to the turnbuckles for the main shrouds. The waters are a bit too rough to do the adjusting from the dinghy.
December 1, Tuesday - December 12, Saturday
I did not make log entries during this period, not even in my written log book. Most of the time was spent just hanging out and getting ready to sail from Isla Mujeres to Belize. We left Isla Mujeres on the morning of the 12th of December.
November 30, Monday
Started off the day by finding a scrap piece of stainless steel plate to use for the Iridium external antenna mount. I got the piece bent over, and drilled out, so I could bolt the piece to the life rail, and then bolt the antenna base to it. Got it all fabricated and installed on the life rail. Next was drilling a hole in the hull-to-deck joint in which to run through the antenna cable.
I got the hole drilled, the cable run through the hole, and connected the cable to the antenna. Next was the test. I called Stacy with the phone, and was successful. We were able to talk using the handset, and using the speaker and microphone. It was great to have the Iridium phone completely working and checked out.
I then sealed the hole where the cable came through the deck, and put away all of the tools and gear I had out. Sat back and enjoyed an adult beverage!!
Iridium Antenna Mounted on Rail
November 22, Sunday - November 29, Sunday
Wow, a whole week gone, and I did nothing. As it turned out, I had a case of Dengue Fever. I was pretty miserable, and pretty much was down and out for the week.
November 21, Saturday
We went over to the sail makers and picked up the sails. When we got back, I packed away the stay-sail in the storage room, and then I bent on the mainsail. I could tell, as I was laboring to get the mainsail on the boom and all situated, something was not right with me. I was very very tired, and finally quit after the main sail was completed.
November 20, Friday
We accompanied friend Jim to the ferry landing in Isla, and saw him off. We were sorry to see him go, but also understood he needed to get back to his family for the upcoming holiday.
We went to the bank and got cash, then were off to the sail maker, and paid her for her work. We scheduled another visit for tomorrow, the 21st, to actually pick up the sails. I wanted to get her paid early so that we could pick up the sails whether or not she was there.
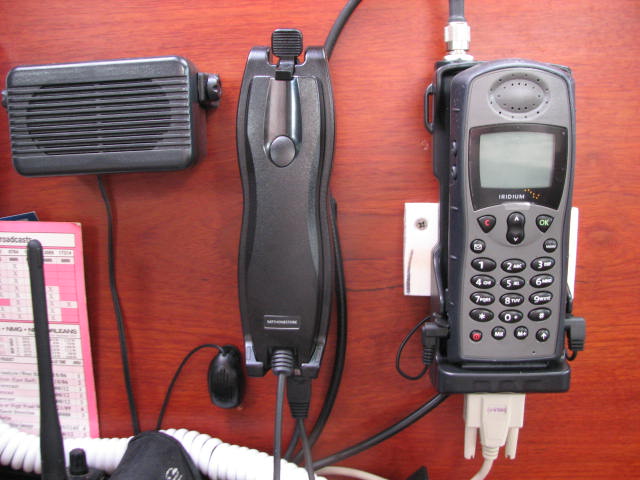
We went back to the boat, and I got busy finishing the Iridium phone installation. I did not like having the navigation station all torn apart. I finished the physical installation of the Iridium satellite phone. I checked the system out as far as power went, and was very happy that everything worked. We ran the external antenna wire from the phone, in the navigation station, to the aft cabin. We got the cable run and dressed into the wiring harness. I put the navigation station back together, and verified operation of all the electronics that were removed.
The only outstanding item to complete the Iridium installation is running the antenna wire through the deck, and connecting the wire to the external antenna.
Iridium Satellite Phone Installed on Navigation Station Door
November 19, Thursday
We started the day by removing the Samsung monitor from the navigation station, and then clearing out several other items so we could install a barrier on the overhead of the navigation station. This would funnel any future leaks to the side or back of the navigation station, instead of onto the electronics.
We could not find anything to use on the boat, so Jim and I went into the colonia, and found a carpenter's shop where we found a nice piece of veneer that could be used on the navigation station overhead. This piece of veneer was 3.5' by 7.5', which was too big to fit into a taxi, so Jim and I had to walk the piece back to the boat.
We squirted in the canned foam we purchased yesterday, around the bolt hole openings above the navigation station. I also drilled some additional holes to add more foam to the area. All of this is meant to prevent leaks from dripping down into the navigation station electronics.
Jim got busy measuring and cutting the veneer. I was busy removing all of the pieces for the Globalstar satellite phone installation. We got the piece of veneer fitted into place, then took it out and soaked the top side of the veneer with epoxy. While the foam and epoxy were setting up, we had lunch.
Kitty found a nice Lock-N-Lock box in which we could store all of the Globalstar parts. If they ever get their satellite constellation back up, we might be able to use the phone again, or to sell the system to someone in the future.
After lunch, we started the Iridium installation. The installation went pretty smoothly, and we had made good progress by the end of the day. Each piece had to have some custom fabrication for it to fit into the area of the navigation station in which it was required. We finished up a bit early, as Jim is leaving tomorrow, and we wanted to have a relaxing last night with him.
November 18, Wednesday
Started off the day by replacing the weatherstripping on the aft deck box. The old weather stripping was not keeping water from running into the box, so we got that repaired.
Next, we replaced a defective wire on the starboard cockpit candy light. Now we have both cockpit candy lights working.
Jim and I then repacked the forward deck box to try and make more room for sail covers and lines, but I am not sure we made any progress. The exercise did keep us busy for an hour or so!
We went into town and purchased a can of foam with which to start repairing the navigation station. We also checked with the sail maker. She has all of the sails finished, so now I have to get her money, and pick up the sails.
The forward cabin is all straightened out, so we moved all of Paul's stuff, and also Johns mildew stuff into it. It is nice to just have our dinghy stuff in our dinghy. Also moving close to 100 lbs off the extreme stern is a good move!!
Next, Jim and I got out all of the Iridium Sat phone parts and accessories, and decided how we were going to do the installation. I think the installation will look good when finished, but, of course, nothing from the Globalstar installation can be kept!!
November 17, Tuesday
Today was the day of more pumps. I had two freshwater pumps on which we had to replace the pressure switches. The good news is, I had the spares for these two pumps, so they both got repaired. We took the old, standby pump out of the system, and installed one of the newly rebuilt pumps, which worked great, and is still performing as it was originally designed.
Not so the new Jabsco lift pump we picked up in Galveston just before we left on the Gulf crossing. We installed the brand new pump, and it ran about 10 minutes before it started popping the circuit breaker, and finally blew the fuse. How completely frustrating. Back in with the old pump, that at least functions. Now making all kinds of arrangements to find an old model pump, and get it delivered to him so Paul can bring it to me in the Rio. Also made arrangements for Jim to take the second new failed pump home with him, so he can deliver the pump to a West Marine store, and then have the pump sent to Jabsco so they can see what the problem is with newer better pump!!
We also bent on the mizzen sail, and got the sail cover put on.
November 15, Sunday, and November 16 Monday.
We went on a trip to the interior city of Merida.
November 14, Saturday.
Today we finished tightening all of the bolts on the bowsprit attachment points. We tightened until we had a good flow of excess roof mastic coming out all the way around. We then trimmed off all the excess roof mastic.
Next, we masked-off the name boards, one at a time, and then put a good coat of sealant all the way around them. It was really helpful having Jim there working with me. The angles were very difficult with me sitting in the dinghy, trying to squeeze out the sealant. Jim was able to move me around in the dinghy, so I could get the sealant where it needed to be. When we finished, and got all of the masking tape off, the job looked very professional.
We then tackled the Hurricane Wilma damage on the port side of the forward cap rail. This damage looked like it might very well be the culprit for the leaks in the navigation station. I was able to put a lot of sealant into the area as a temporary fix. I have planned to fix the problem when I get to the Rio, and this area will be the first I do when I get to there.
Jim and I then finished working on the dinghy davit lifts. We were able to make very good progress, and the dinghy will be even more secure during a passage. We then put the dinghy back on the davits, and put all of the gear back into the dinghy. We wanted to get it all secured before we left on our planned trip to Merida.
November 13, Friday
Today we started on re-bedding the bowsprit attachment points. During the passage we had several leaks in the forward cabin, from some very strange places. We also had some leaks over the navigation station that caused the Apple keyboard to die, and we lost some viewing space on our Samsung monitor.
I am sure the leaks in the forward cabin are not under the cap rail, but the water came out in cracks in the liner of the forward cabin. Not sure of the source, but we decided to re-bed the bowsprit attachment points, and to seal the forward name boards in case they were the culprit.
We started by removing the fore-stay from the bowsprit, and loosening the bob-stay. Then we removed all of the bolts and nuts at the attachment points. We were able to spring the bowsprit away from the hull enough to clean off the parts, re-apply lots of roof mastic, and then put it all back together. We found possible evidence of some leaking around the attachment points, but by the time we were done with the port and starboard side, we were sure that there would be no leaking there. We tightened up all of the bolts, but not too the maximum. We will tighten all of the bolts tomorrow after letting them all sit over night.
Jim and I then put the fore-stay and bob-stay back into position, and tightened up the turnbuckles.
When I go out for coffee in the morning, I usually sit on the front deck box while "walking" P-N-B. From there, I noticed I had put the main mast intermediate stays on the inside of the life rail, instead of outside where they should be. Jim and I moved the intermediate stays outside the life rails, and straightened up the life rail stanchions that had been slightly bent. It was the bent stanchions I noticed first that brought the problem to light.
Another problem Jim and I wanted to address was the mechanism used in raising the dinghy up on the davits. We wanted to get the dinghy higher on the davits, to prevent the dinghy from getting pooped while in the davits. We decided we could raise the dinghy about six inches by removing some of the lifting hardware, and moving some other hardware around. We started this process on the port lifting bar, and will finish tomorrow.
November 12, Thursday
Today was a tourist day for us. We rented a golf cart for the day and toured the island. We did use the golf cart to take the Genoa and the stay-sail over to the sail maker. We had a great time today, just playing tourist.
November 11, Wednesday
Today was Veterans Day, so the Marine Corps flag was left up!
Today was gen-set pump day. During the passage, I had noticed the raw water cooling pump on the gen-set was leaking. With the rough passage, there was no way Jim and I could get the parts out of storage and fix the pump. I just let the leaking water go, and planned on repairing the problem when we got to Isla. Also, the weather was so rough, we did not need to run the water maker. Nor was there a problem with electricity. The high winds and the wind generators took care of that.
Anyway, I got out all of the spare parts and pumps I had for the gen-set. Jim and I removed the raw water pump from the gen-set. This is when I discovered a few problems with the Northern Lights raw water pumps. Northern Lights has three different raw water pumps for my model of generator. I have a spares kit for a pump I do not have!! I have a brand new Johnson raw water pump, but no spare impeller for that model. I have two Jabsco raw water pumps, and three spare impellers, but no spares kit. What a conundrum, and not the best time to discover the problem.
Jim and I tried to get one of the Jabsco raw water pumps repaired, but did not have the necessary parts.
At the end of the day, we installed the new Johnson pump onto the gen-set. This pump works great, and does not leak, so if the impeller holds together, I will be golden until we get to Guatemala. We put one Jabsco raw water pump back together, and it can be used, but it still leaks water when running. I will attempt to sell the spare kit I have for the non-existent pump when I get to Guatemala, or on Ebay when we get back to the States.
Will work on getting Jabsco spare parts sent to Paul, so he can bring them to Guatemala when he comes to the Rio.
November 10, Tuesday
Today was the Marine Corps birthday, so the flag was up all day!
We continued with the cushion and sail washing and drying. While folding the stay-sail, I noticed a small rip in the sail so decided to take the stay-sail to the sail maker. We also continued with washing and drying lines on the boat. The official check in-process also continued.
We emptied the forward cabin. Kitty cleaned and dried that area, and we continued to dry the forward cabin cushions. The problem with the drying process was the rain. We kept having little rain squalls, so things were not getting dried. Eventually it all worked out.
November 9, Monday
Today was spent moving everything from the condo back to the boat. We also had to start the checking-in process for Mexico. We took the Genoa and the mainsail to the sail maker. The sail maker said the Genoa was too dirty, so we brought the sail back to Dream Away, and washed it the sail in the marina yard. We also washed off all of the lines used to secure the boat for the hurricane. We washed all of the cockpit cushions, and started the drying process. We also washed the two forward cabin cushions and started that drying process.
November 8, Sunday
The early morning weather report on Ida was not good. It was going to be a hurricane of 90 mph, and will pass very close to Isla Mujeres. We decided to move into one of the cement condos here at Marina Paraiso. This meant hauling several loads of food, utensils, personal effects, ship's papers, and computers up to the condo.
Jim and I also made sure there were at least two dock lines on every cleat on Dream Away, and I wanted to be sure I did not leave a dock line in the line locker that could be tied somewhere.
As it turned out, the hurricane was not much of an event, so we just hung out at the condo and relaxed.
November 7, Saturday
We docked at Marina Paraiso around 0900. Because of the rough passage, and the impending arrival of Tropical Storm Ida, we spent the entire day cleaning up the boat, both topside and down below. We removed and folded all of the sails, and removed everything that could act as windage. Jim and I also made sure we had plenty of extra lines out.
By the end of the day, we all enjoyed a wonderful hot meal, thanks to Dianna, and we all had a great shower, which made everything seem better.
November 1 - November 7
Made the passage from Galveston to Isla Mujeres, Mexico. All covered in the Dream Away Update.
November 1, Sunday
Jim and I got the dinghy unloaded and into the water. We took Kitty over and dropped her off so she could get some last minute groceries, then Jim and I went to the other end of the Bayou. Jim watched the dinghy, while I went to the West Marine store. I swapped the defective pump for a new one. and headed back to the dinghy. We then picked up Kitty and her groceries, and went back to Dream Away. We loaded the dinghy and secured it, and headed out
We eventually passed the Galveston jetties around 1500 in the afternoon.
October 31, Saturday
This morning was spent getting all of the remaining stuff packed onto the boat. I had decided to put all of Paul's electronics into a big Pelican case, and tie it down on deck. I also tied down friend John's stuff we were taking to him in Guatemala. We put all of Paul's dinghy stuff into our hard dinghy that was hanging from the dinghy davits. We finally got everything stowed away, and all of the dock lines ready to pull in. I had planned to leave the dock around 1000, and we finally got under way around 1140, with "Freebird" playing on the stereo.
It was an uneventful trip down the ship channel, and into Offatt's Bayou. We got anchored. While we were doing the anchoring dance, the new Jabsco raw water washdown/water maker lift pump died, after only three total hours of use. It looks as though I am forever going to be a quality control person for various marine parts companies.
Jim and I went down below and changed out the pump, and put the original back into place. We called West Marine in Galveston, and they had a new replacement pump. They were just closing, so we made arrangements to pick the pump at 1000 tomorrow, the first of November.
We spent the remainder of the day settling in for the passage, and Kitty and I listened to the Lynyrd Skynyrd concert that was going on over at Moody Gardens. Overall, it was a satisfying day, and we are on our way cruising again.
October 30, Friday
Started the day by going over to the shop and loading up all of the scrap metal I had been saving for the past three years. This consisted of aluminum, stainless steel, copper and bronze. Kitty drove the load over to scrap metal place. I stayed at the shop and moved all of the remaining trash to the front of the shop and swept out the balcony and the floor. When Kitty returned, she had $119.00 in her pocket from the scrap metal. We loaded the truck full of trash, and headed back to the marina.
We off-loaded the trash into a dumpster. Kitty then went off to both airports, IAH and Hobby, to pick up our crew people. It was my turn to get busy changing filters. I got out all the necessary parts, tools, buckets, and oil soak pads to do the job.
I started with the fuel filters. I drained the main engine Racor filter and changed the element. I got that all cleaned up, and then drained the Racor filter for the gen-set and changed the element. I got this all cleaned up, and then started the gen-set. I let it run for about 30 minutes to get the oil hot and to make sure there were no air leaks in the fuel system. I stopped the gen-set and started the main engine, and ran it for about 30 minutes for the same reason.
With the Amsoilsystem, it is not necessary to change the oil in either engine, but I had decided to change both the full-flow filters, the by-pass filters, and the oil, so I would be starting out fresh on all accounts. Like everything else on the boat, it was easier said than done. The difficult part in changing the oil and filters is to keep from spilling the dirty oil anywhere. I was able to get it all done, and everything cleaned up and ship shape, in about four hours.
I finished up that project pretty much as Kitty arrived with Diana and Jim, our crew. I grabbed Jim, and we loaded all of the oil stuff into the truck, then we went over to Al's shop. I had asked Al if he would dispose of the oil and filters for me, as I knew I would not have time to do it before we left. I dropped off all of the oil stuff in Al's shop, then went over to my shop. We loaded all of our friend Paul's stuff into the truck and got the last load of trash. The storeroom/shop was now empty. I have been using and working out of that shop for 18 years! It was an emotional moment.
We went back over to Dream Away, put all of the trash into a dumpster, and put Paul's stuff on the dock to be loaded onto the boat in the morning.
A bunch of folks were coming over to say their farewells, so I wanted to get cleaned up, and share a bottle of Zaya with good friends. The person who committed to purchase the truck did not show up, but friend Troy picked up the slack and purchased the truck. It was a really low price, but I needed to get rid of the truck. Hopefully it worked out for both of us.
