Maintenance Log December 2010
December 31, 2010, Friday.
Went to
the shop and brought the three pots of mixed gelcoat back to Dream
Away. Mixed the catalyst into the first pot, and started rolling the yellow gelcoat on the deck. At once
I discovered a problem. The yellow gelcoat did not cover the darker
colored spots on the deck. I used the remainder of the first pot with
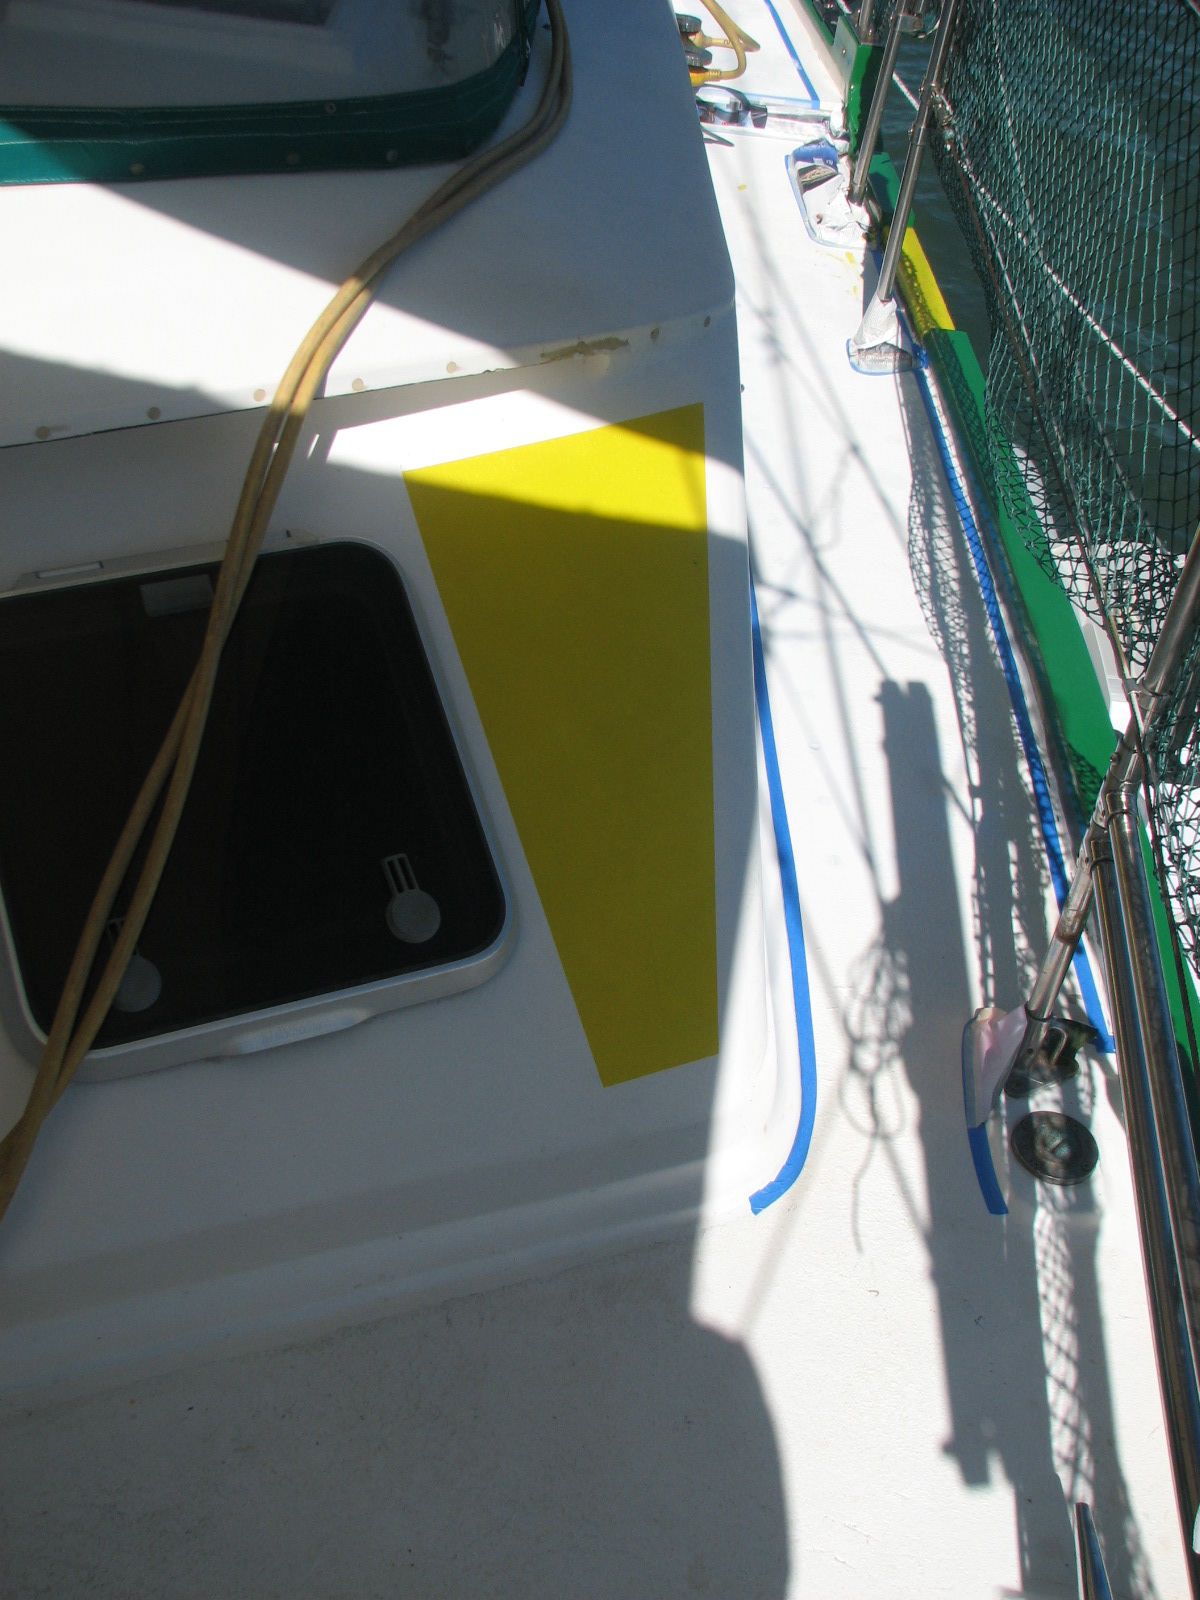
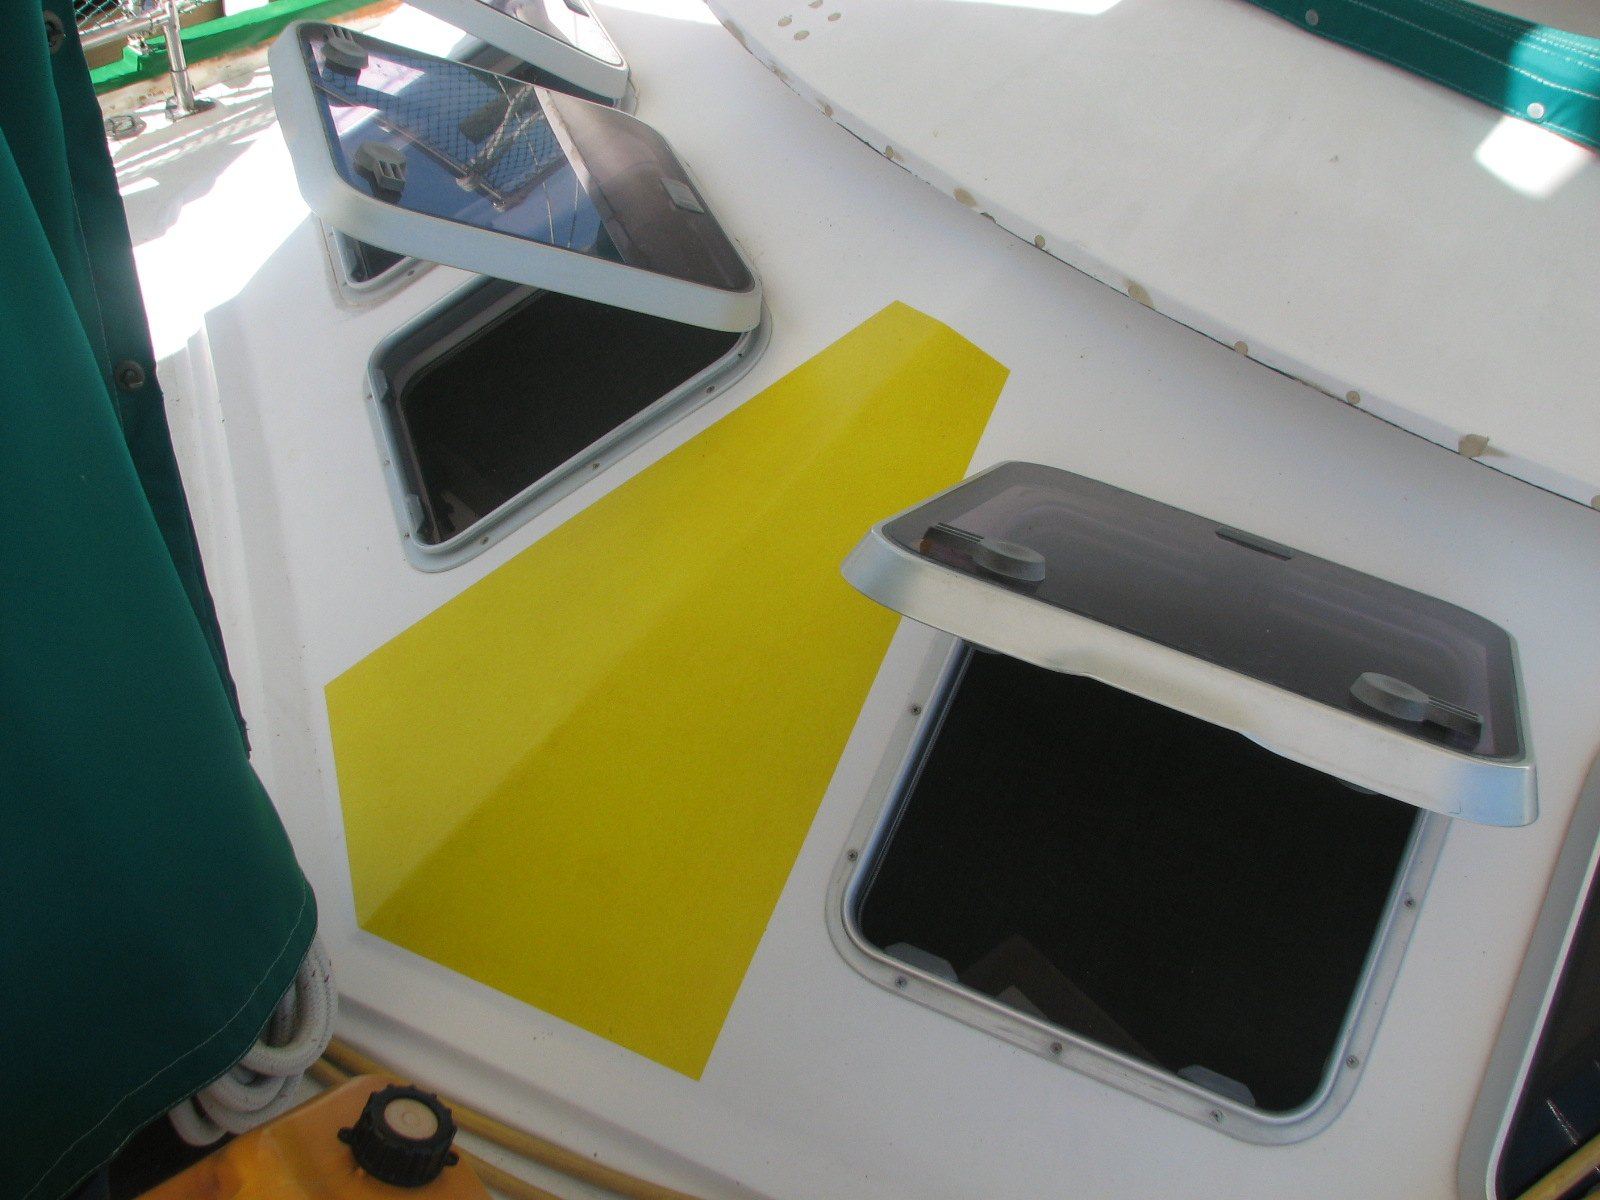
catalyst already mixed on the front part of the main cabin dog house. I
have always wanted non-skid in those areas because it is so slippery,
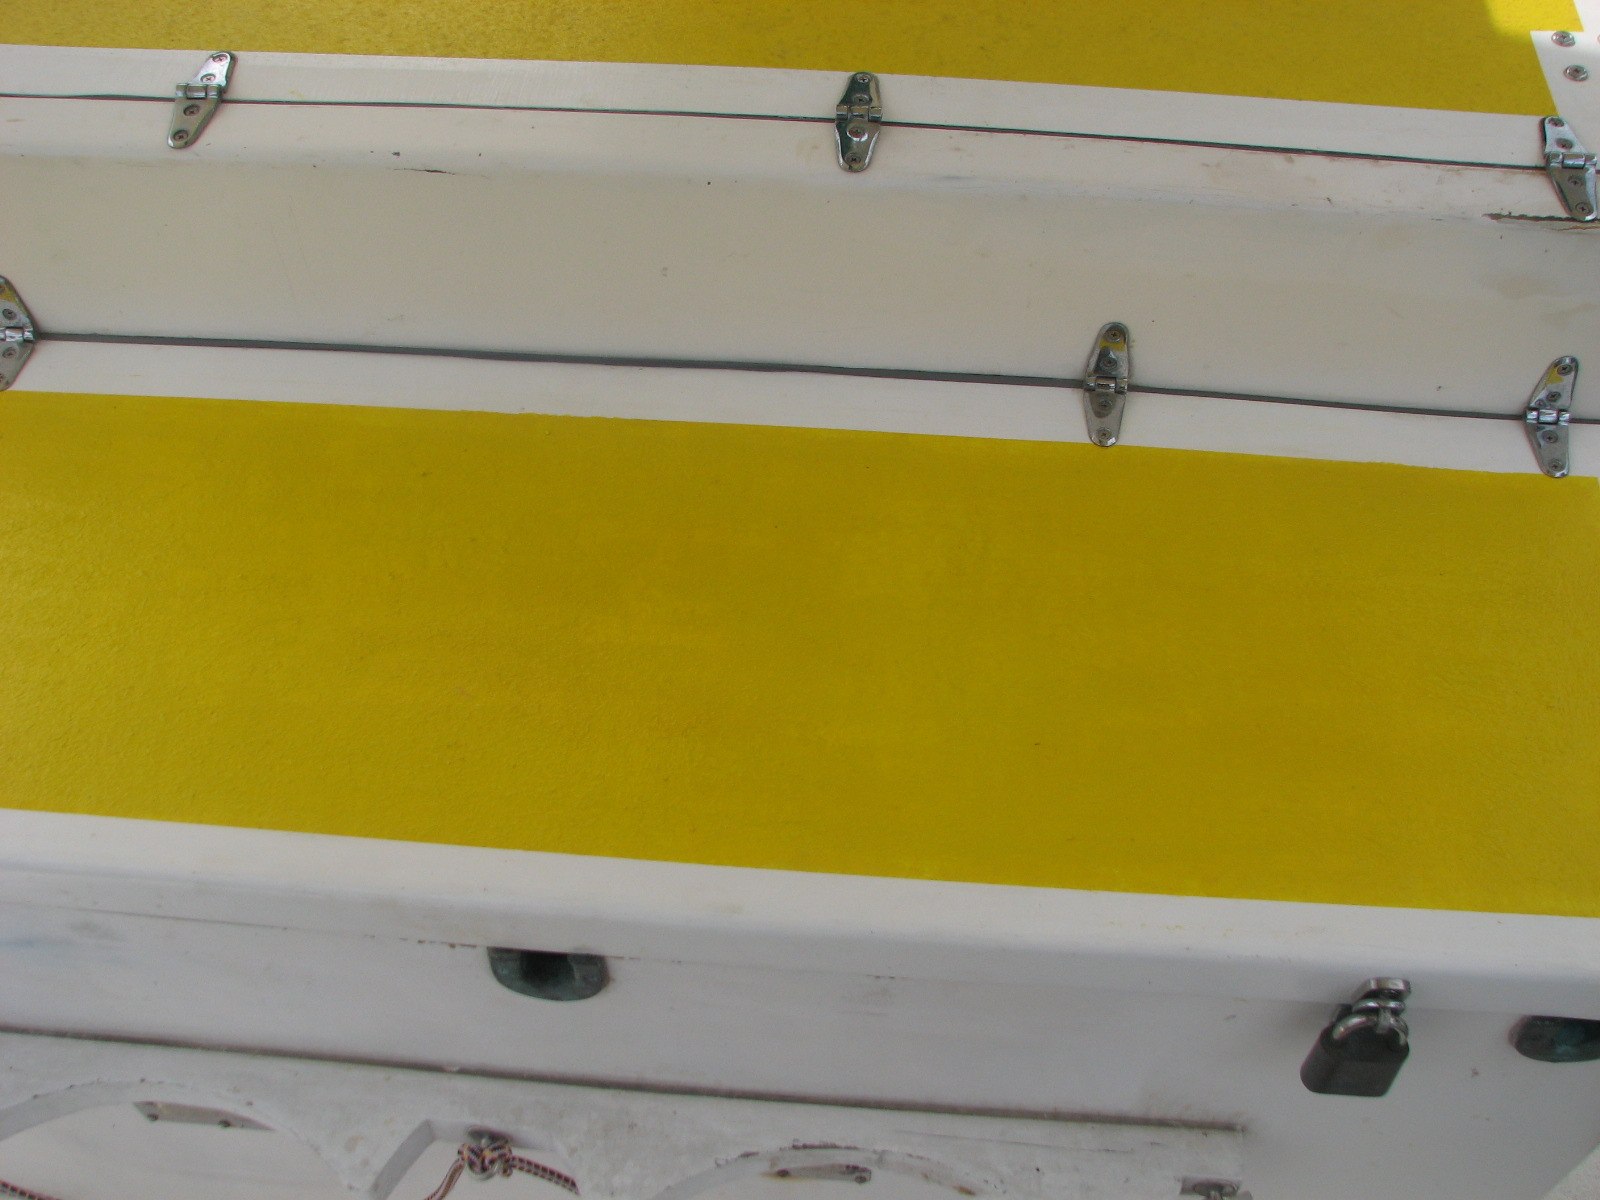
and could cause a real problem. I also rolled on the
remaining mixed yellow gelcoat on the after deck box lid. I did not do
good coverage for this lid and had prepared the lid in case I had too
much yellow gelcoat with catalyst already mixed in. Now the after deck
box lid is really safe to walk on.
I immediately went to plan B. I
went back to the shop and mixed up a pot of white gelcoat, mixed in the
catalyst, and painted the white gelcoat over the patches and
discolorations. The white gelcoat did a great job of covering the
patches and discolored areas. It took about an hour for the white
gelcoat to set up. I then went back to mixing the catalyst with each
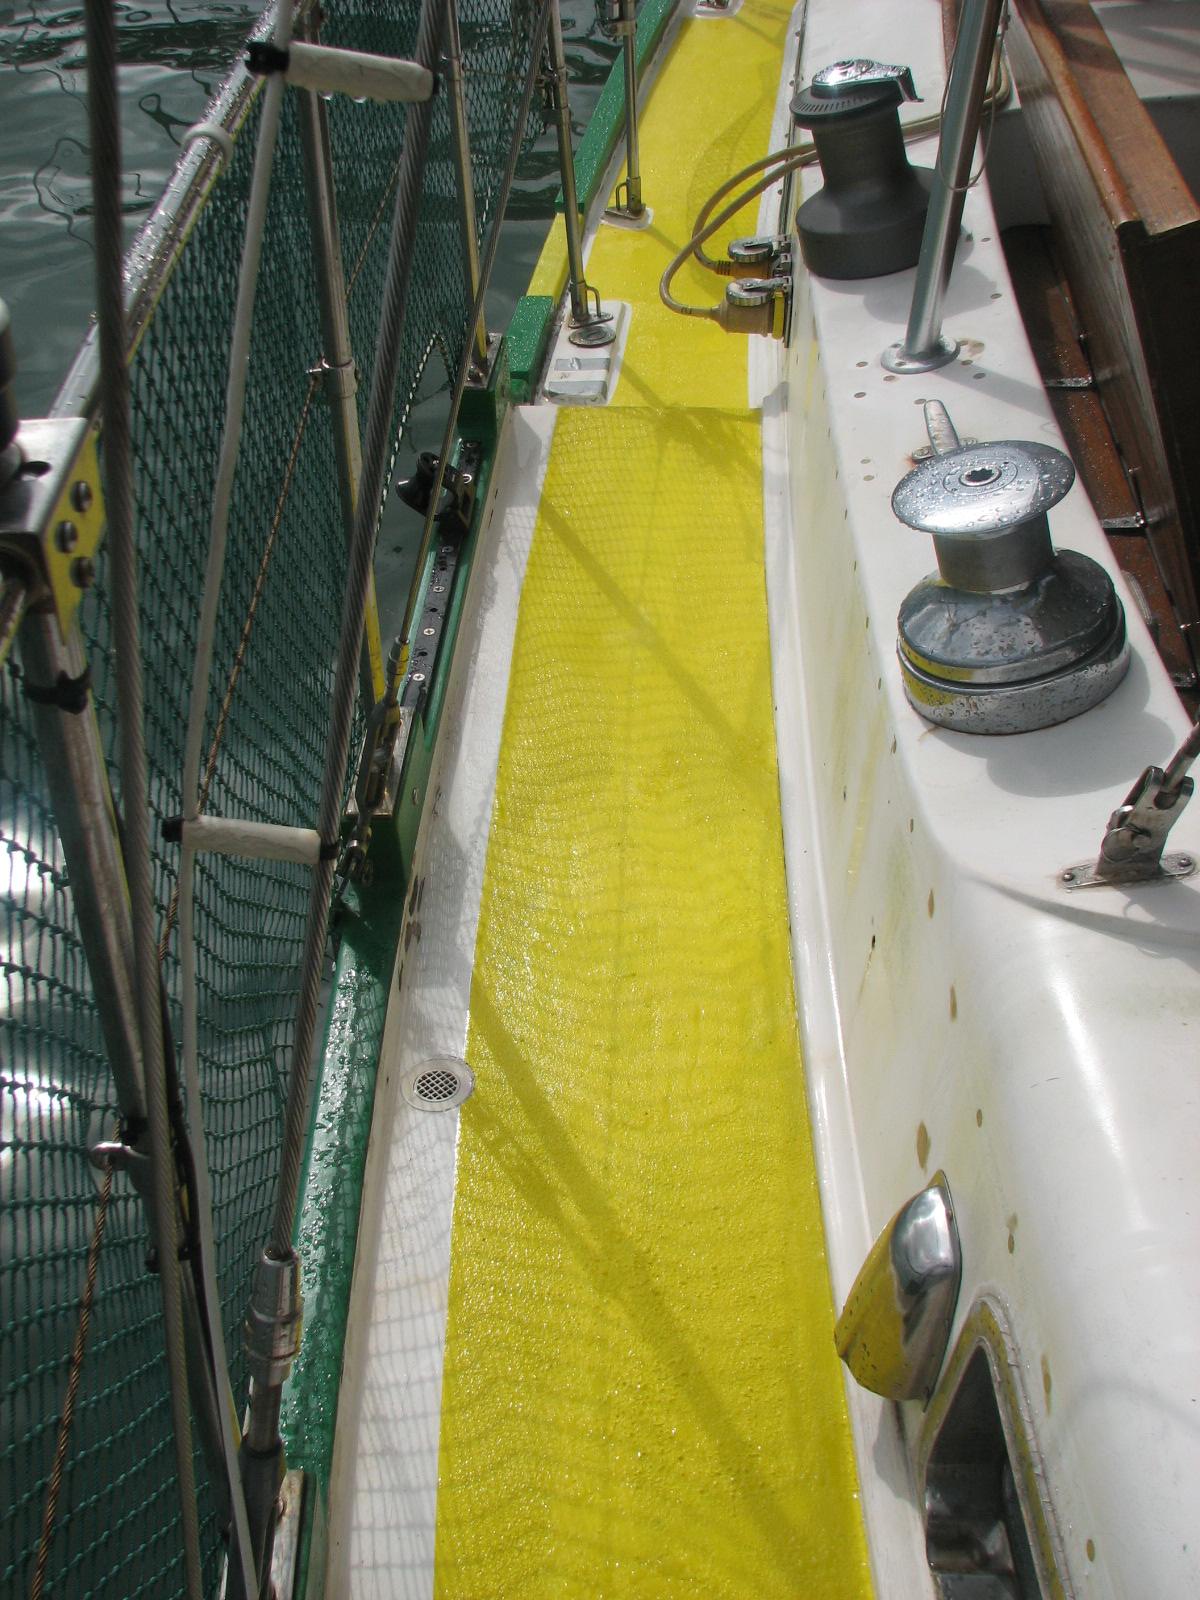
pot of yellow gelcoat, and rolling the yellow gelcoat onto the deck.
Yellow Non-Skid Gelcoat Covering White Gelcoat
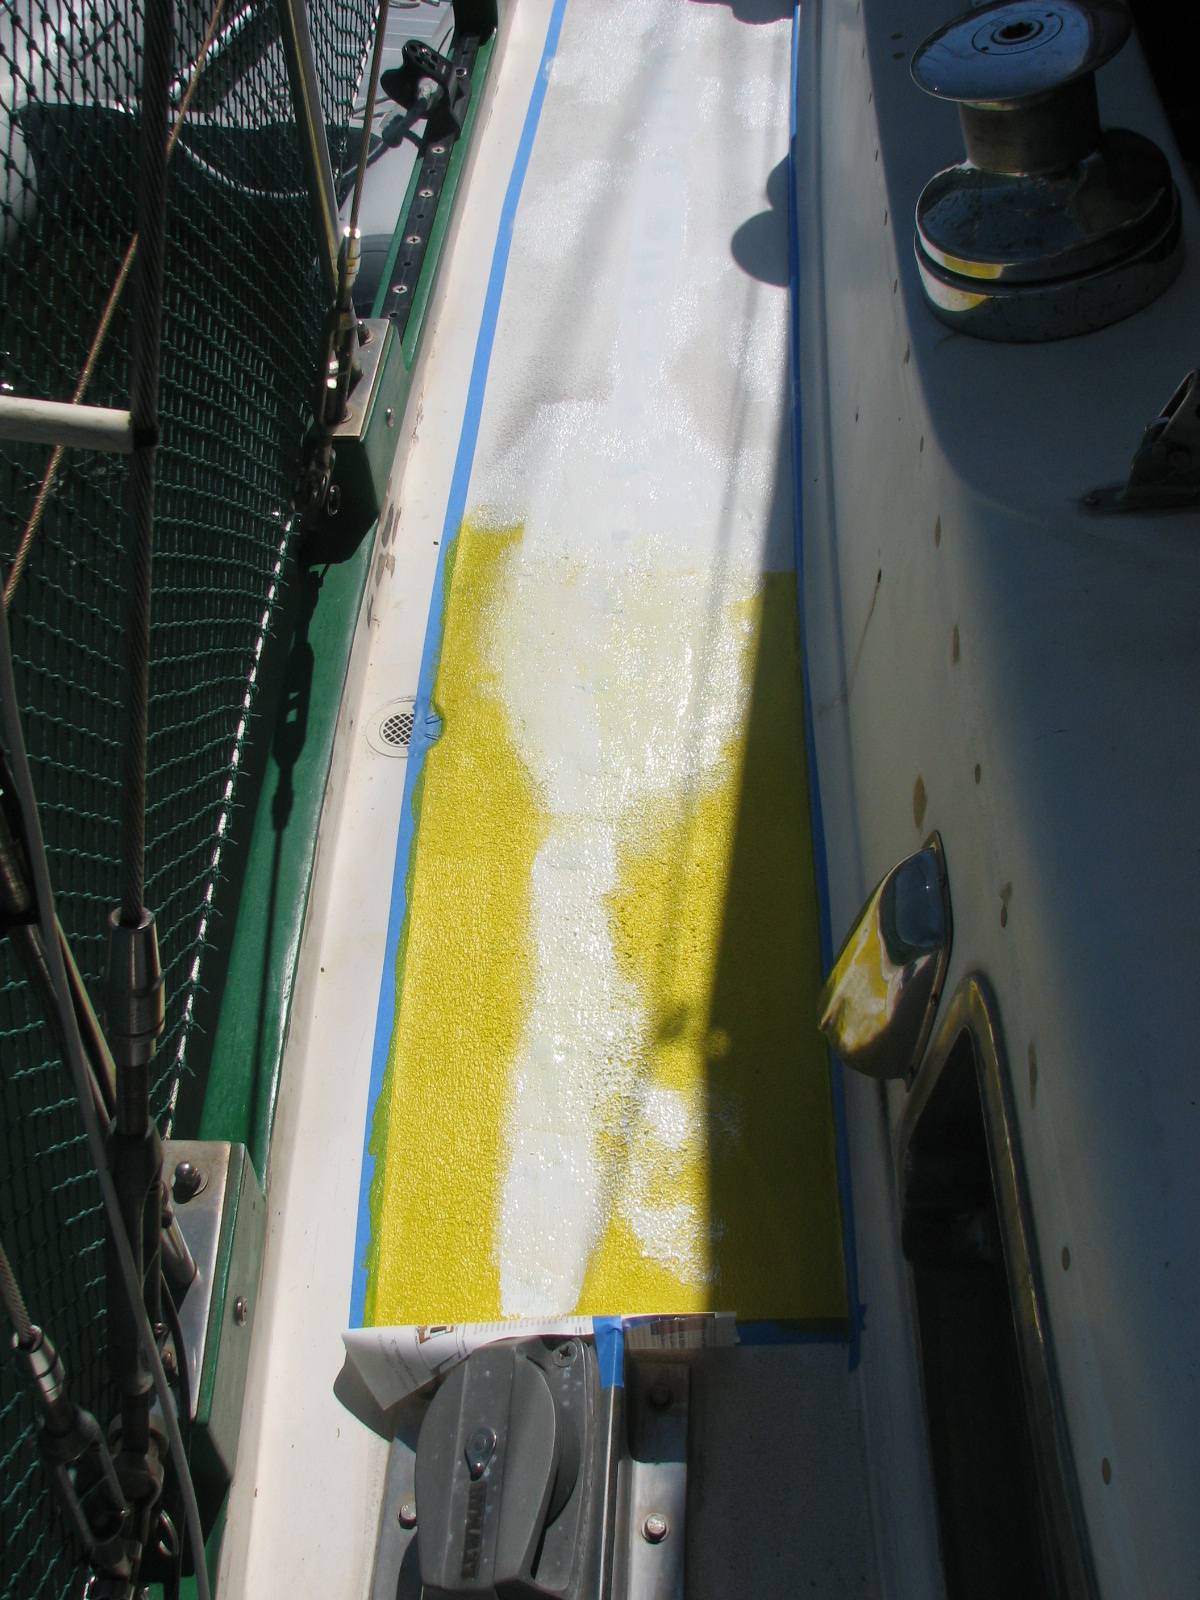
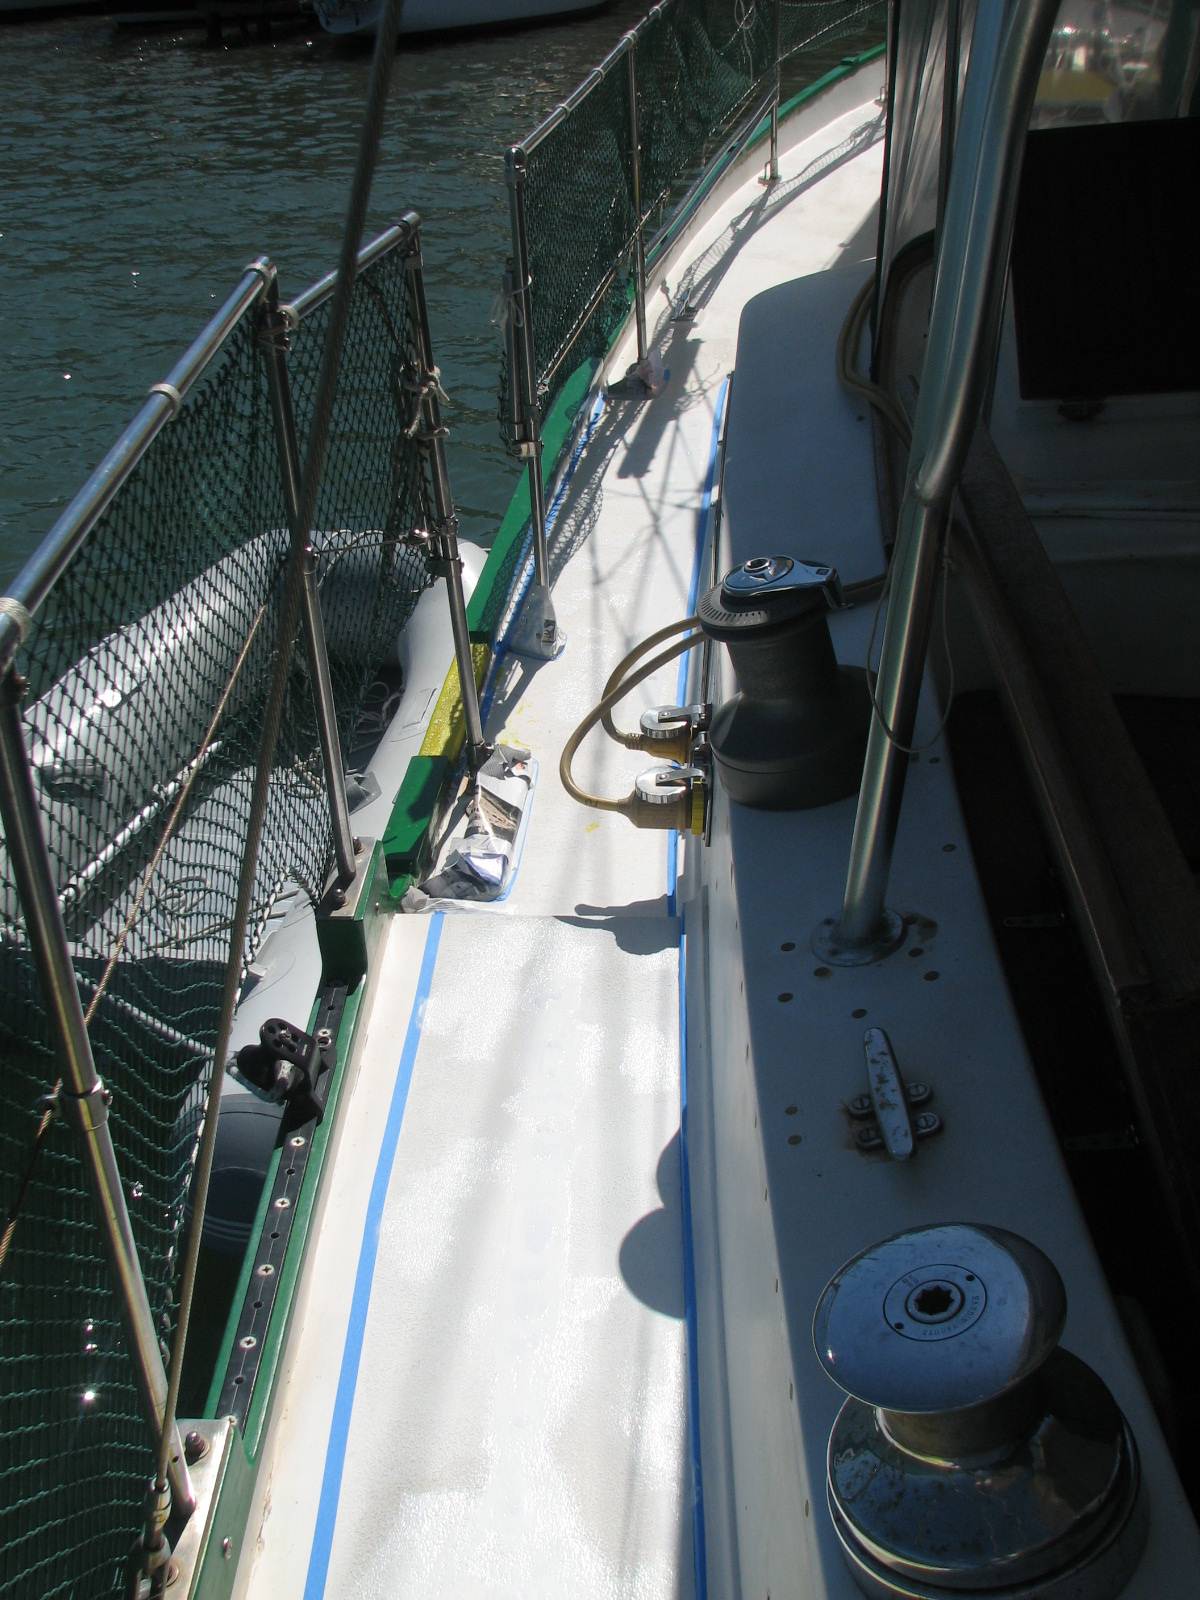
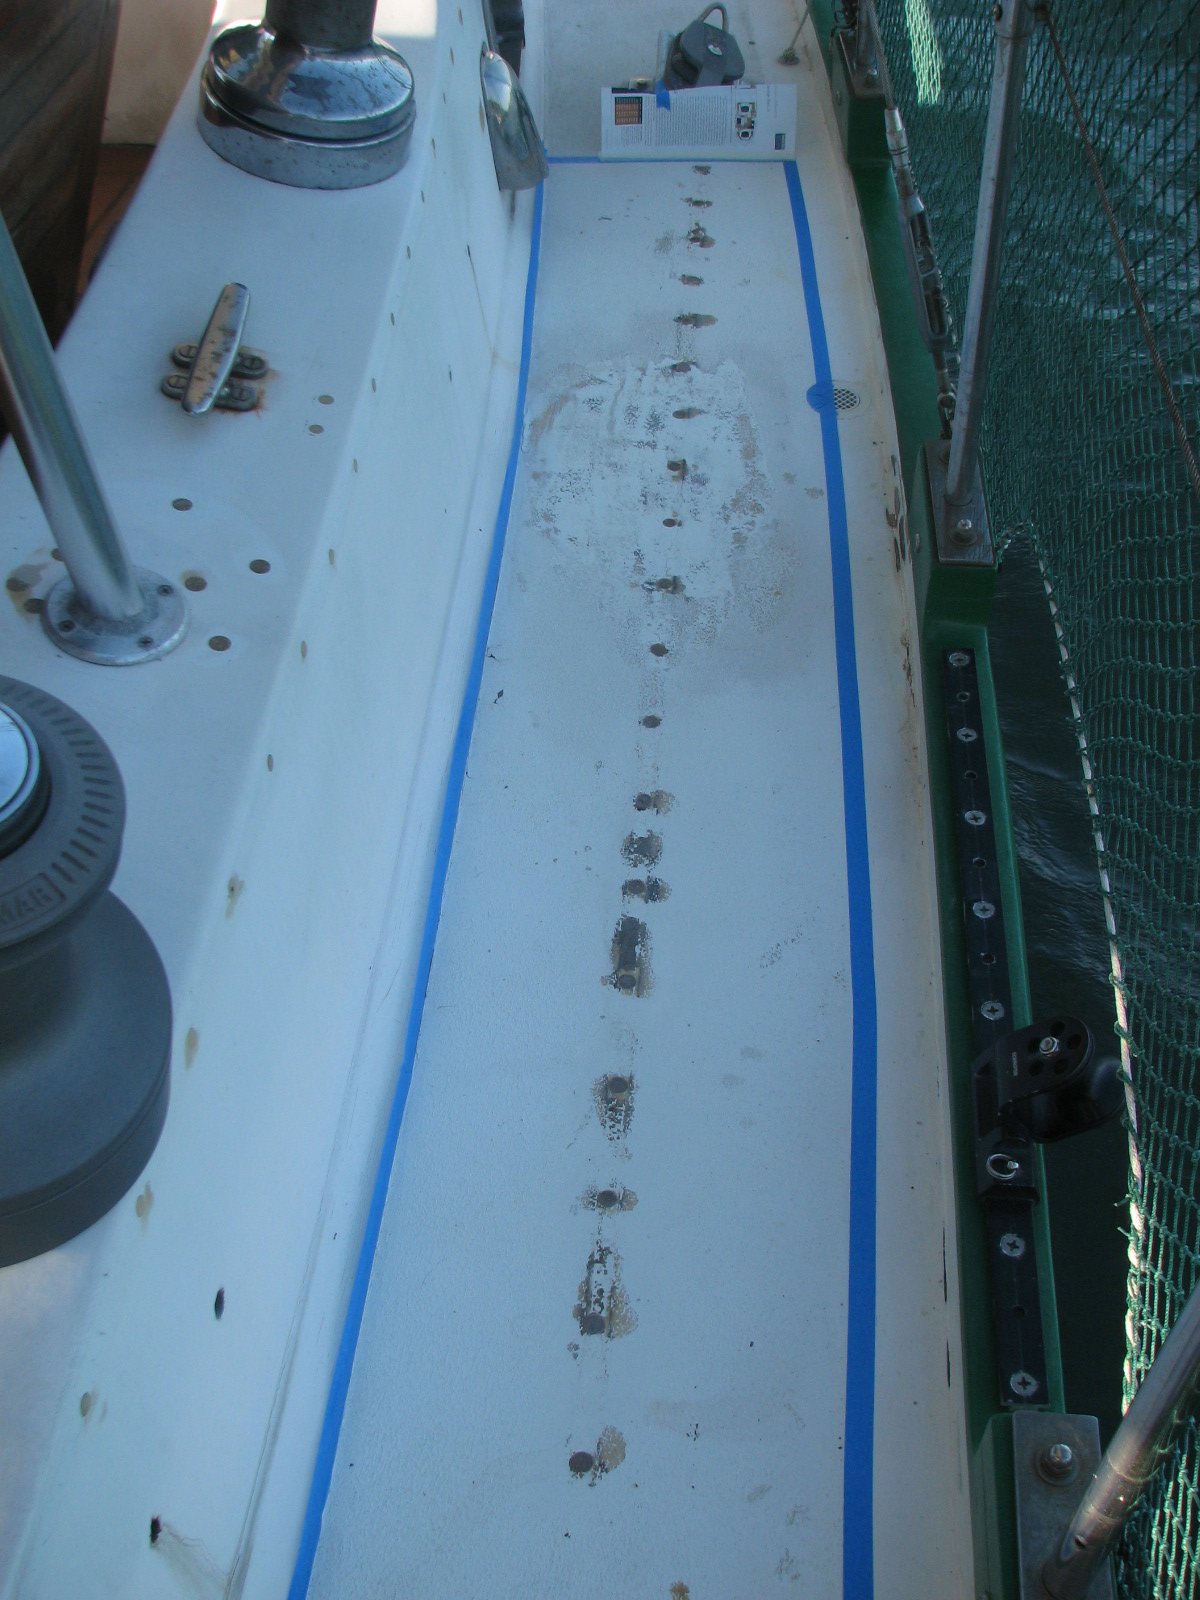
Masked-off Deck Area With White Gelcoat Applied
Yellow Gelcoat Rolled On Port Side Of Deck Area
Outer Portside Main Cabin Dog House With New Non-Skid Applied
Center Main Cabin Dog House With New Non-Skid Applied
After Aft Deck Box Lid With New
Non-Skid Applied
I applied the third coat of paint on
dinghy oar. It now needs to dry completely, and I can put it
back into the dinghy and start refinishing the second oar.
We had decided to replace
the material on the main cabin settee cushions. We had contracted with
a local person to do the work, and the price was very reasonable. The
person, Luis, had come by several days ago and picked up the old
cushions. We had previously selected the material. Kitty was very
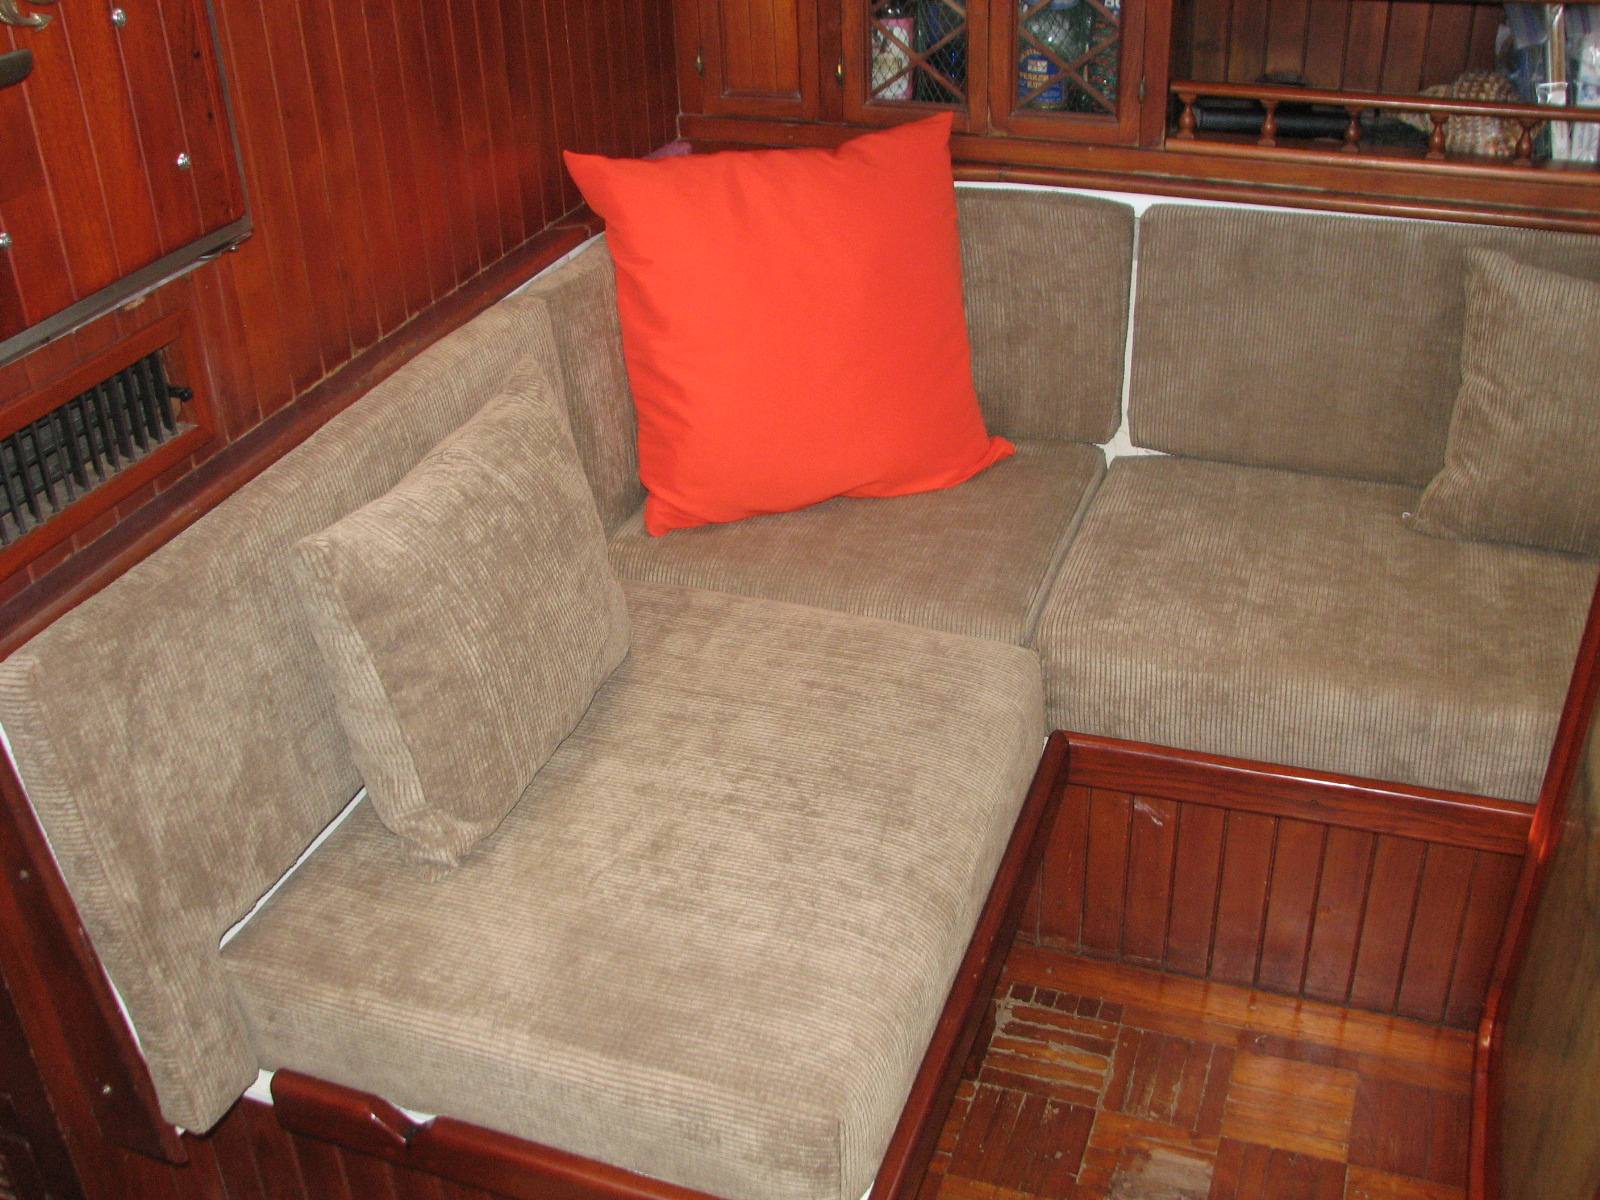
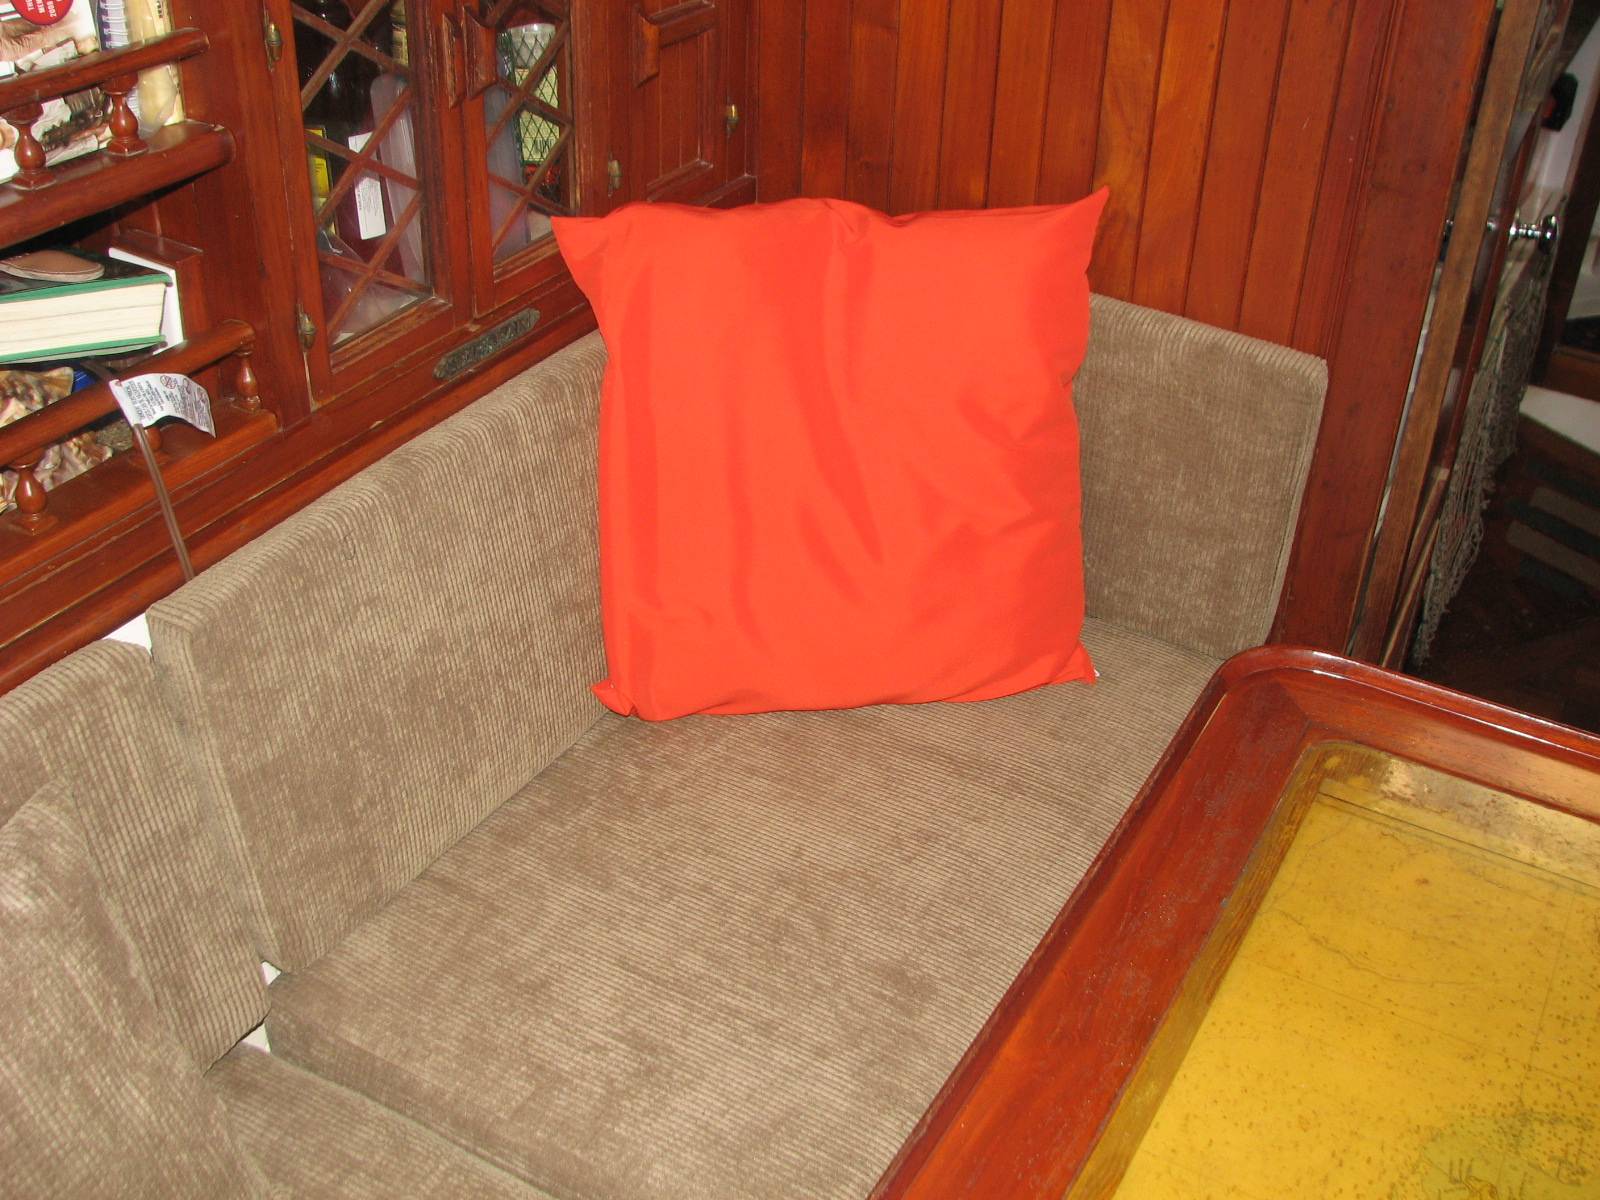
pleased with the selection, but I had concerns. Luis showed up with the
new covered cushios, and two extra pillows we had requested, in "my"
color. It turned out to be an outstanding choice.
Forward Main Cabin Settee With New Cushions And Orange Pillow
Aft Main Cabin Settee With New Cushions And Orange Pillow
Kitty pointed out to me that I
had to put the yellow gelcoat non-skid on the top of the SCUBA
compressor cover. I agreed it had to be done as a safety issue, and the
box had to be patched and cleaned up so it was not such an eyesore. I
took the cover up to the shop to start work on the repairs. I covered
the compressor with a tarp while I am doing the work in the shop.
First repairs done to the box was
to put more fiberglass on the corners to help with overall
reinforcement.
December 30, 2010, Thursday.
Had to
go into Fronteras today to do some shopping and drop off and pick up
laundry from the Backpackers Hotel.
When we got back to Dream Away, I
got all prepped to paint the shear stripe on the bad areas I am trying
to fix. I got the areas painted, and it appears I will have just enough
paint to get a second coat on the damaged areas. For sure the next time
I leave the US, I will bring enough Easypoxy Kelly Green
paint, and Nyalic
protectorant to put at least three coats of Easypoxy Kelly Green
paint and three coats of Nyalic
protectorant on the complete cap rail and shear stripe.
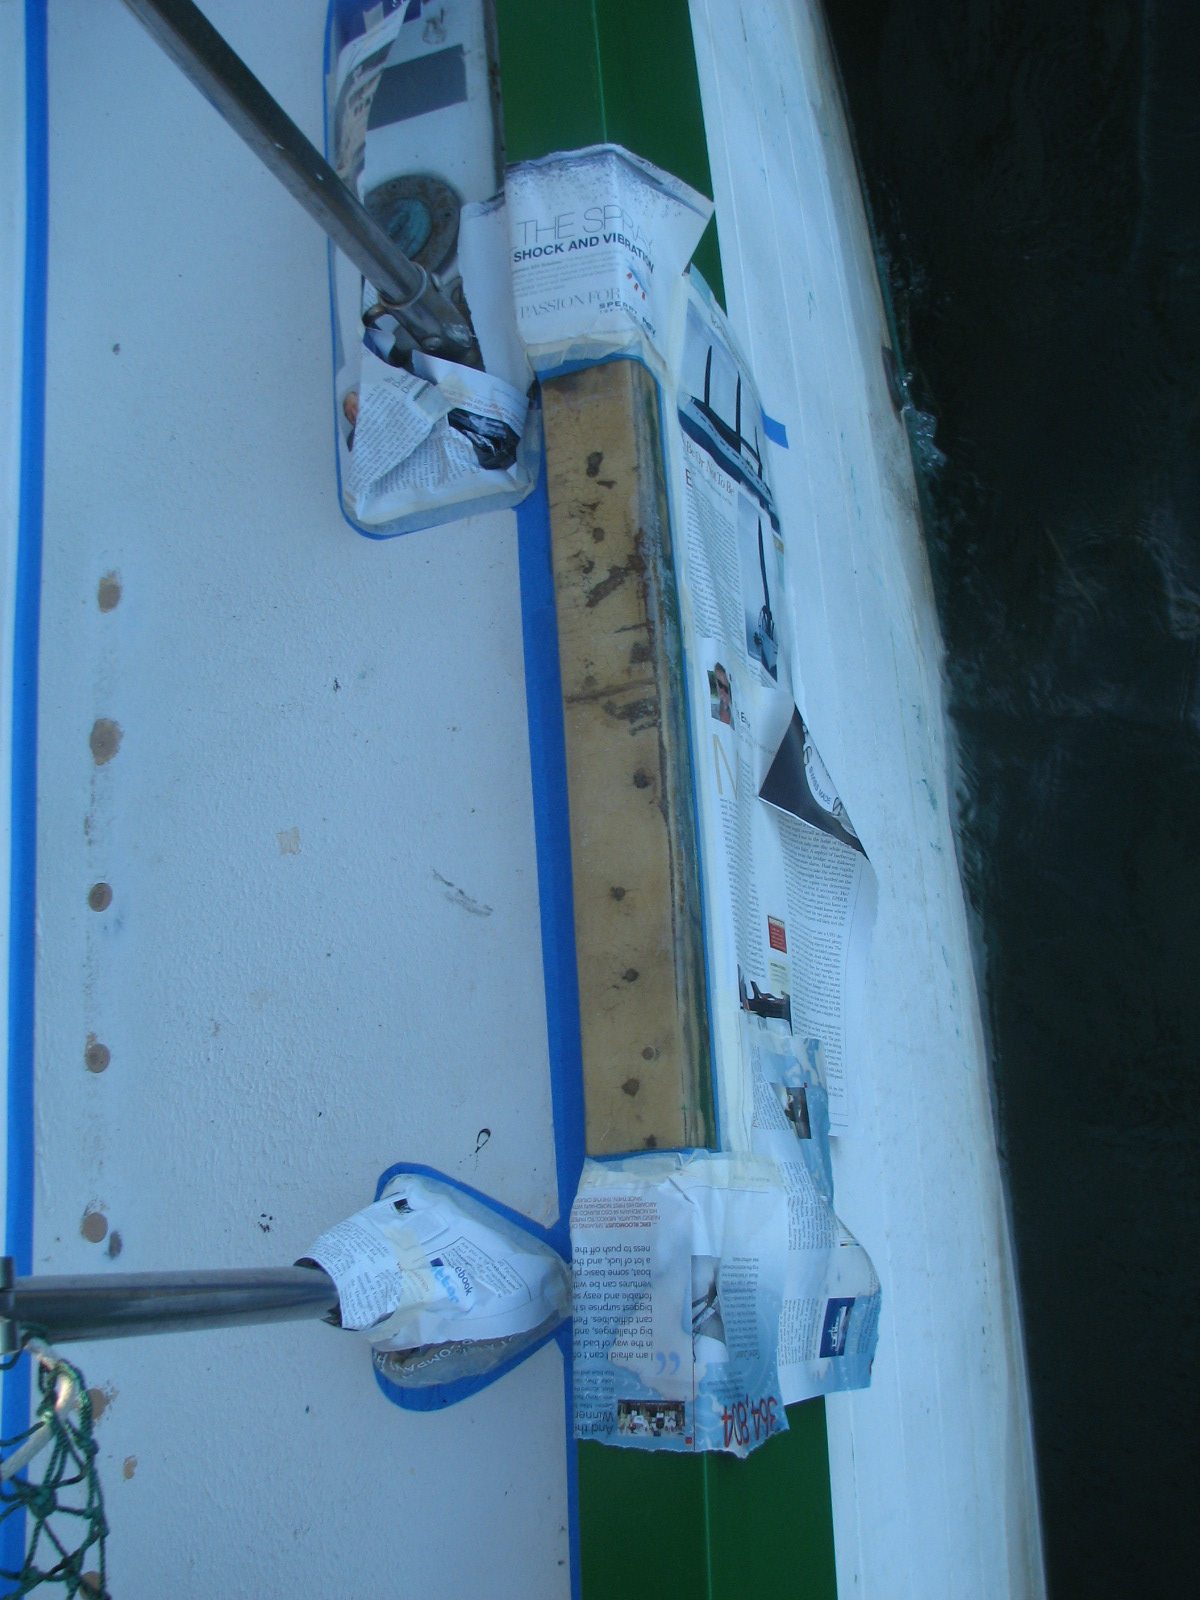
I finished the masking of the
area I am going to roll on gelcoat non-skid on the port side and part
of the front of the main cabin dog house. I also went ot the shop and
mixed up three pots of gelcoat to roll on tomorrow. The pots are made
up of 5 oz of gelcoat, 1 1/4 oz of wax (styrene), 1 1/2 oz of cabosil
and 1/2 oz of talc. It is all ready to go on tomorrow.
Port Side Dog House And Deck Masked-off For Gelcoat Application
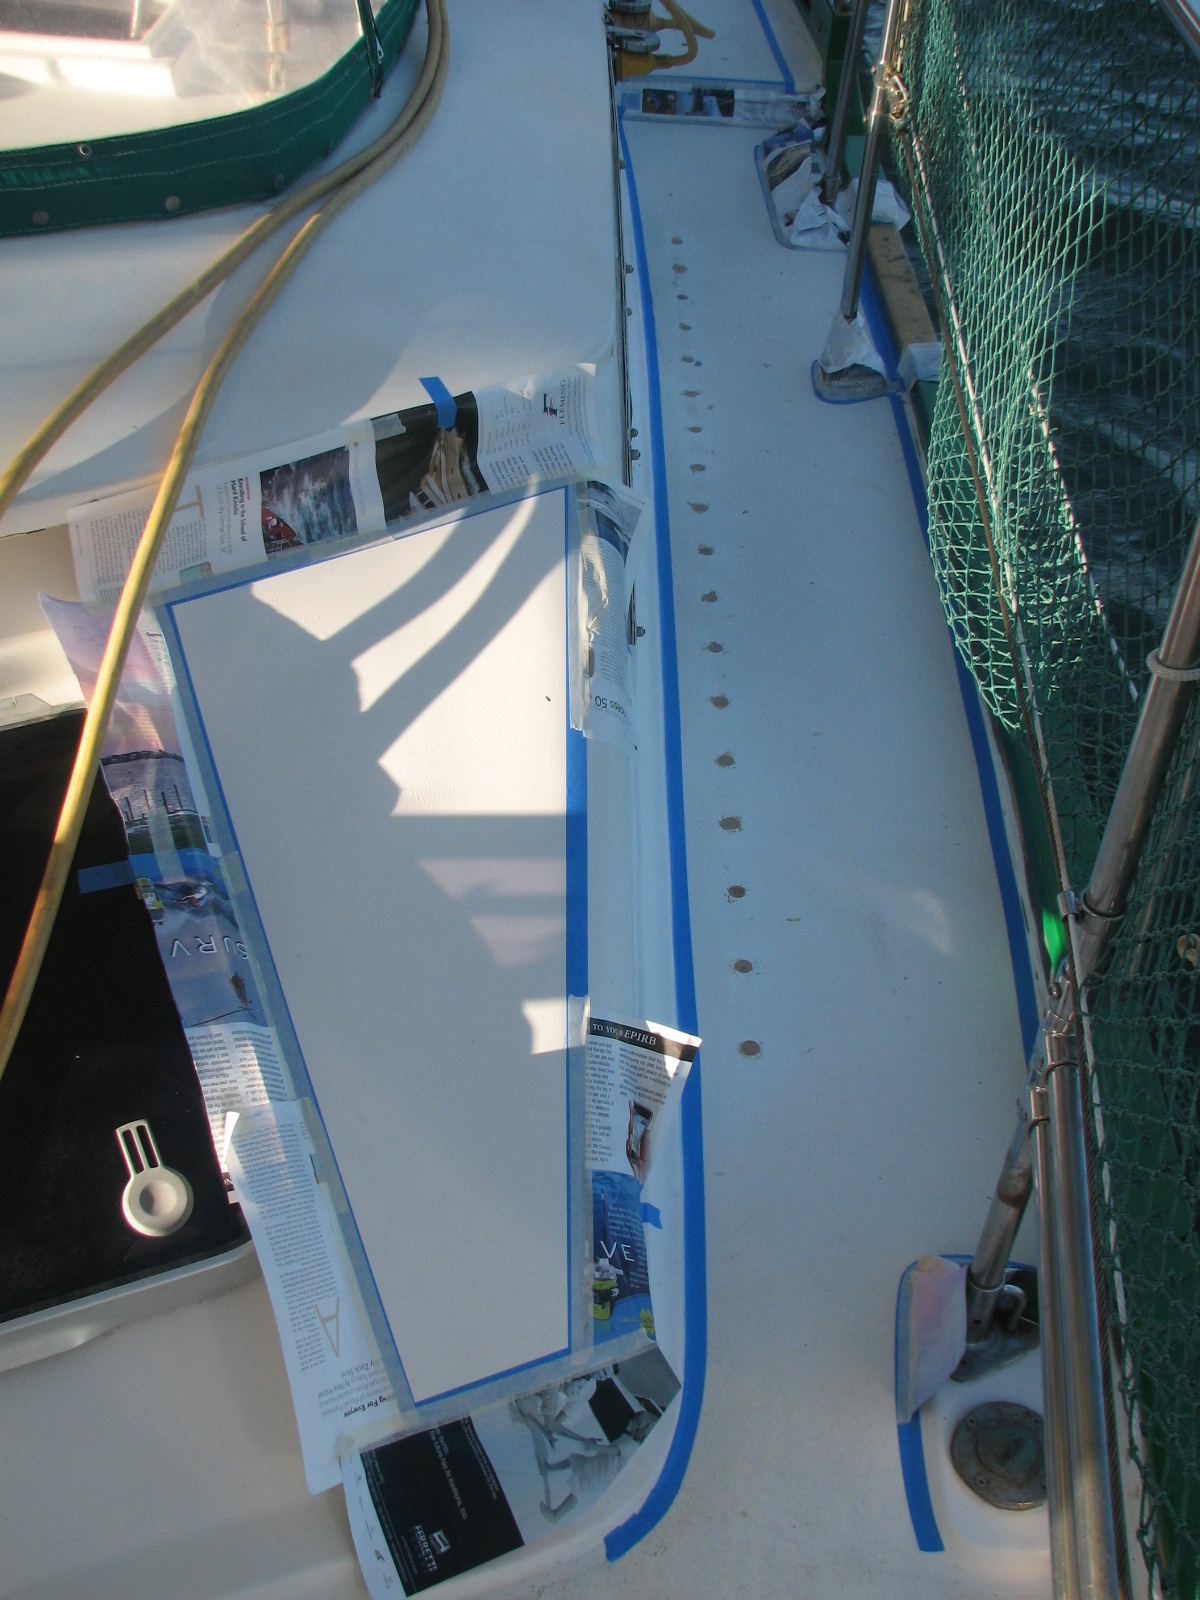
Port Side Gate Area Masked-off
Port Aft Deck Area Masked-off
December 29, 2010, Wednesday.
I
applied masking tape to the shear stripe
in preparation of paint application when we have a great sunny day,
hopefully tomorrow. I also started masking the deck for the gelcoat
non-skid application.
I put an application of putty on
the repaired deck box area. I then finished applying fiberglass in the
hole behind the anchor windlass. Another application or two, and these
areas will be ready for gelcoat non-skid application.
December 28, 2010, Tuesday.
I
applied the second coat of paint on dinghy oar.
Will wait a day or two for good drying time, and then decide about a
third coat. Will probably apply the third coat, just so I have good
protection for at least a year of cruising.
Scrubbed the port side deck
around the dog house with a soap and bleach solution in preparation of
rolling on gelcoat
Recovered from outboard
experiment. Had to remove the Suzuki
outboard from my dinghy and install it back n Paul's dinghy. We
then had to remove the aft awning so I could lift the mizzen boom to
use as a motor crane. We then lifted my Yamaha motor off of the aft rail
of Dream Away and installed it on our Livingston tender. We then put the
aft awning back into place and all is now well. The problem now will be
to find a long shaft that will fit my motor.
Next, and last for the day was to
cut out the pieces of material for the outboard cover and the fuel tank
cover in the dinghy. I use a hot knife, so I do not have to run an
additional group of hems on the pieces.
December 27, 2010, Monday.
Started day working on the
computer getting pictures ready
for the web page, and ended the day that way also!
Sanded down the bad areas of the
shear stripe with 220 grit sandpaper in preparation for painting. I f
we have a sunny day tomorrow will mask the shear stripe, and put on the
Easypoxy Kelly Green
paint.
Worked on the FoodSaver
vacuum packer. It will not work properly. The folks at FoodSaver
are sending me a new unit, but of course it will not be available until
I return ot the states. Was able to figure out the problem is the
vacuum chamber will not seal unless I put hand pressure on the center
of the unit. At least now I can get bags vacuumed packed until I get
the new unit.
Last project for the day was an
experiment with the Livingston hard dinghy and a long shaft
outboard motor. Our dinghy with a 15 HP Yamaha 2 stroke engine is a great unit
for us as a tender, and we love it. The problem we have is when I get
three people or a lot of gear in the dinghy. I can not get the boat up
on a plane because the prop cavitates. I have always thought the
problem was because of the three hulls the Livingston dinghy has.
Today I was able to get with my
friend Paul who has a Suzuki outboard with a long shaft. We off loaded my
Yamaha and put his Suzuki
on the Livingston. With three of us in the Livingston we were able to get
up on a plane, and go through some large wakes with no cavitation. This
is both good and bad news. I have an 1989 Yamaha 2 stroke engine, with a ton
of spares, and just had it completely rebuilt, so I do not want to get
rid of that engine. Now I have to find a long shaft assembly that will
fit my Yamaha.
Put a coat of yellow paint on one
of the dinghy oars.
December 24, 2010, Friday.
I
removed the tape from the port side cap rail and the shear stripe. I
wanted to get that done, as it had been on for over a week. It says it
is 14 day tape, but you never know. I then scrapped and sanded
the crinkled paint areas on the port side shear stripe. It will be a
fairly easy repair, just takes time I wanted to spend on other
projects, and I really hope I have enough product to finish the job.
December 23, 2010, Thursday.
Another
rainy day. Took all of the Sunbrella
material up to the Rancho where I had plenty of room to lay out the
material and measure for the pieces I needed. I was able to get all of
the material measured for the OB cover and fuel tank cover. The good
news is I was able to find big pieces of material, so I will not have
to do a lot of sewing once I get the pieces cut out.
Rain stopped so we went shopping.
December 22, 2010, Wednesday.
Not a
lot accomplished today. Was able to dig out more green Sunbrella
to be used for the outboard cover and dinghy fuel tank cover.
Worked on printing pictures for
an album the boaters are putting together for the guardian family here
at Monkey Bay Marina. What an experience that was.
Great pictures but using Hewlett Packard printer was very
frustrating. I am using a Hewlett
Packard printer, with Hewlett Packard software, and Hewlett Packard picture paper, and
still get a bunch of confusing errors, that just wasts paper and ink.
There is no way I am ever going to purchase another
Hewlett
Packard printer again.
December 21, 2010, Tuesday.
What a
day of highs and lows, and I do mean both.
Started off the day by finishing
off the installation of the ice head in the ice maker. Just a matter of
putting new connectors on the end of some of the wires coming from the
ice head. Finished that up, and turned the ice maker on. Great news,
the motor in the ice head turned the system to the zero spot. The motor
was working. About 1.5 hours later, I heard the first ice cubes drop!!
The system was working!! I waited for the first five drops of ice
cubes, and threw them away. I wanted to make sure the system was making
clean ice!!
Somehow water had gotten into all
of the electrical connections, and corroded them. I think the solution
is to get all of the water out of the ice tray in the ice head before
making a passage. My bet is the last time I stopped the ice maker
before a passage there was water in the ice tray, and it sloshed out
during the passage. A couple of those events, and I have generated a
problem. Having the ice maker working was a big high.
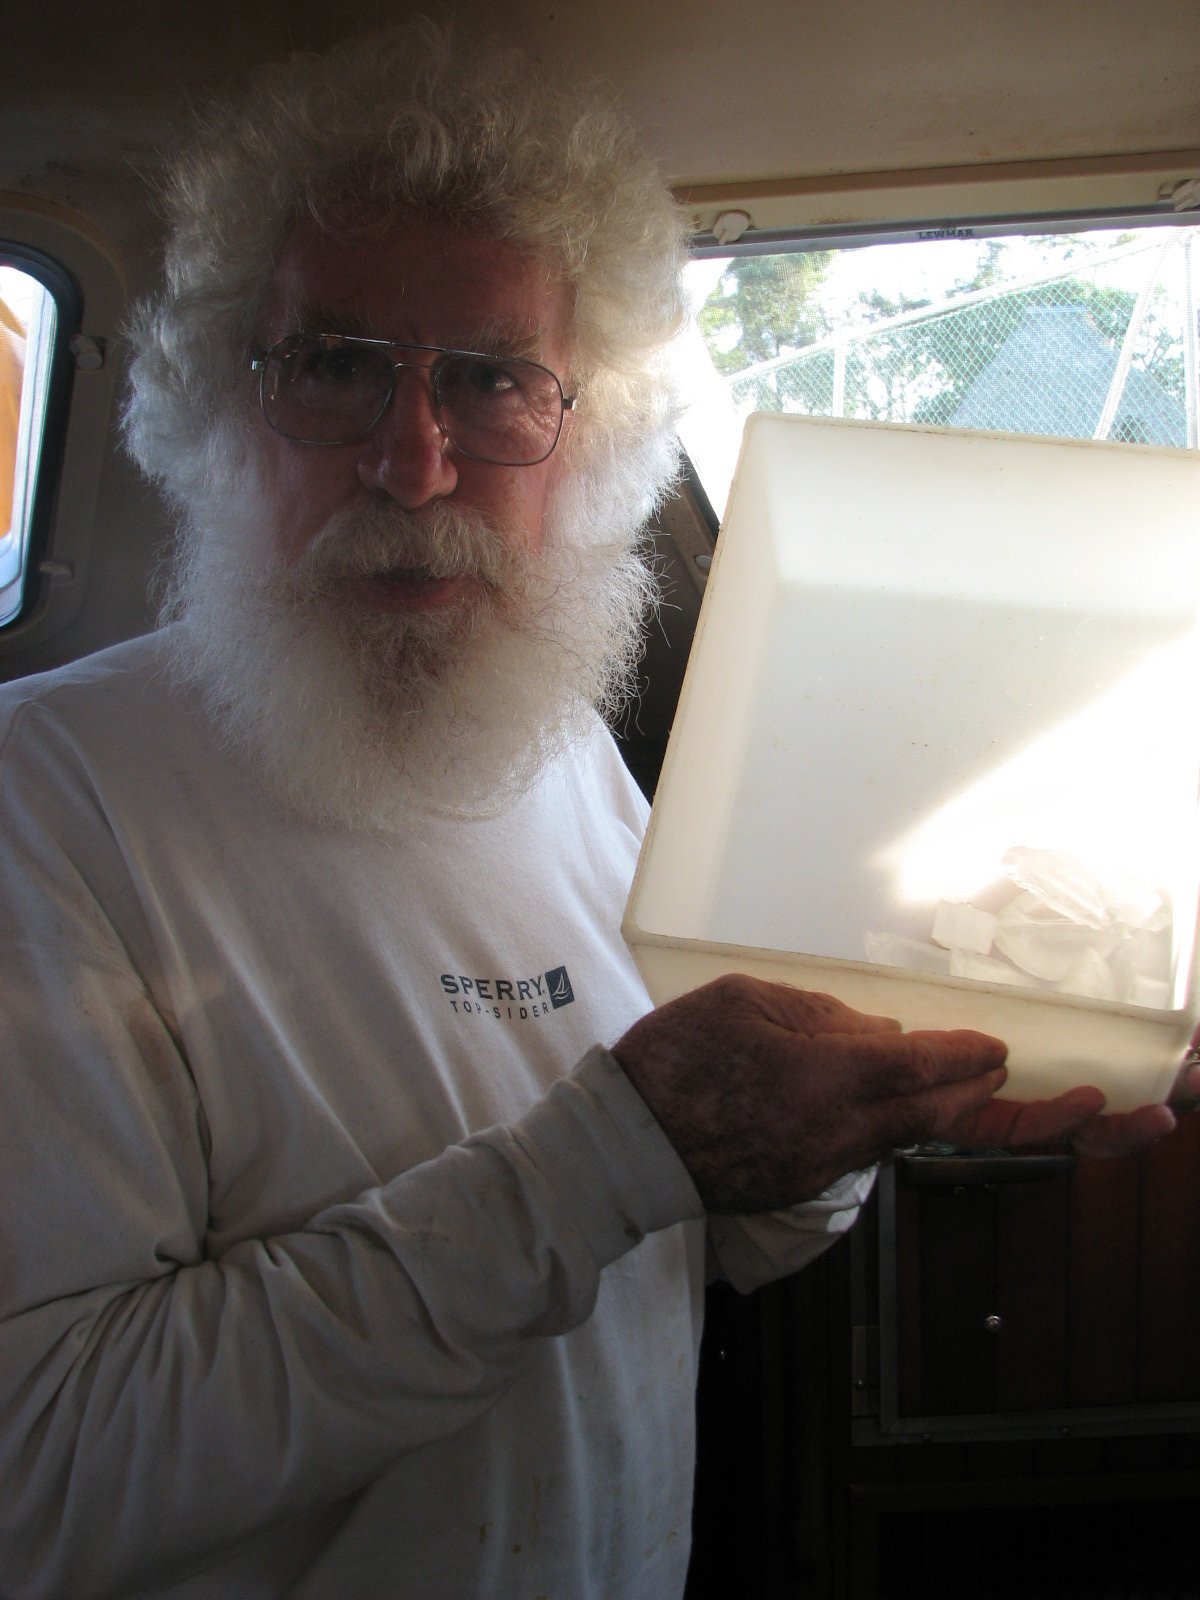
Captain With First New Ice Cubes
Next
was to get a coat of Nyalic
protectorant on the port side cap rail and shear stripe. I wiped
down the cap rail and shear stripe with a clean rag and clean water,
and then dried the cap rail with a clean dry rag. I got all set up for
the application, and had just started to apply the Nyalic
protectorant, and it started to rain! So the application was
shut down. When it finally quit raining, I got another dry rag out and
dried down the cap rail and shear stripe. I waited another 30 minutes,
and started the application of the Nyalic
protectorant. First the Nyalic
protectorant was applied on the cap rail, and it went on very
well. I then got in the dinghy and started the Nyalic
protectorant application on the shear stripe on the front of the
boat. I had worked my way down about half way applying the Nyalic protectorant, and looked back
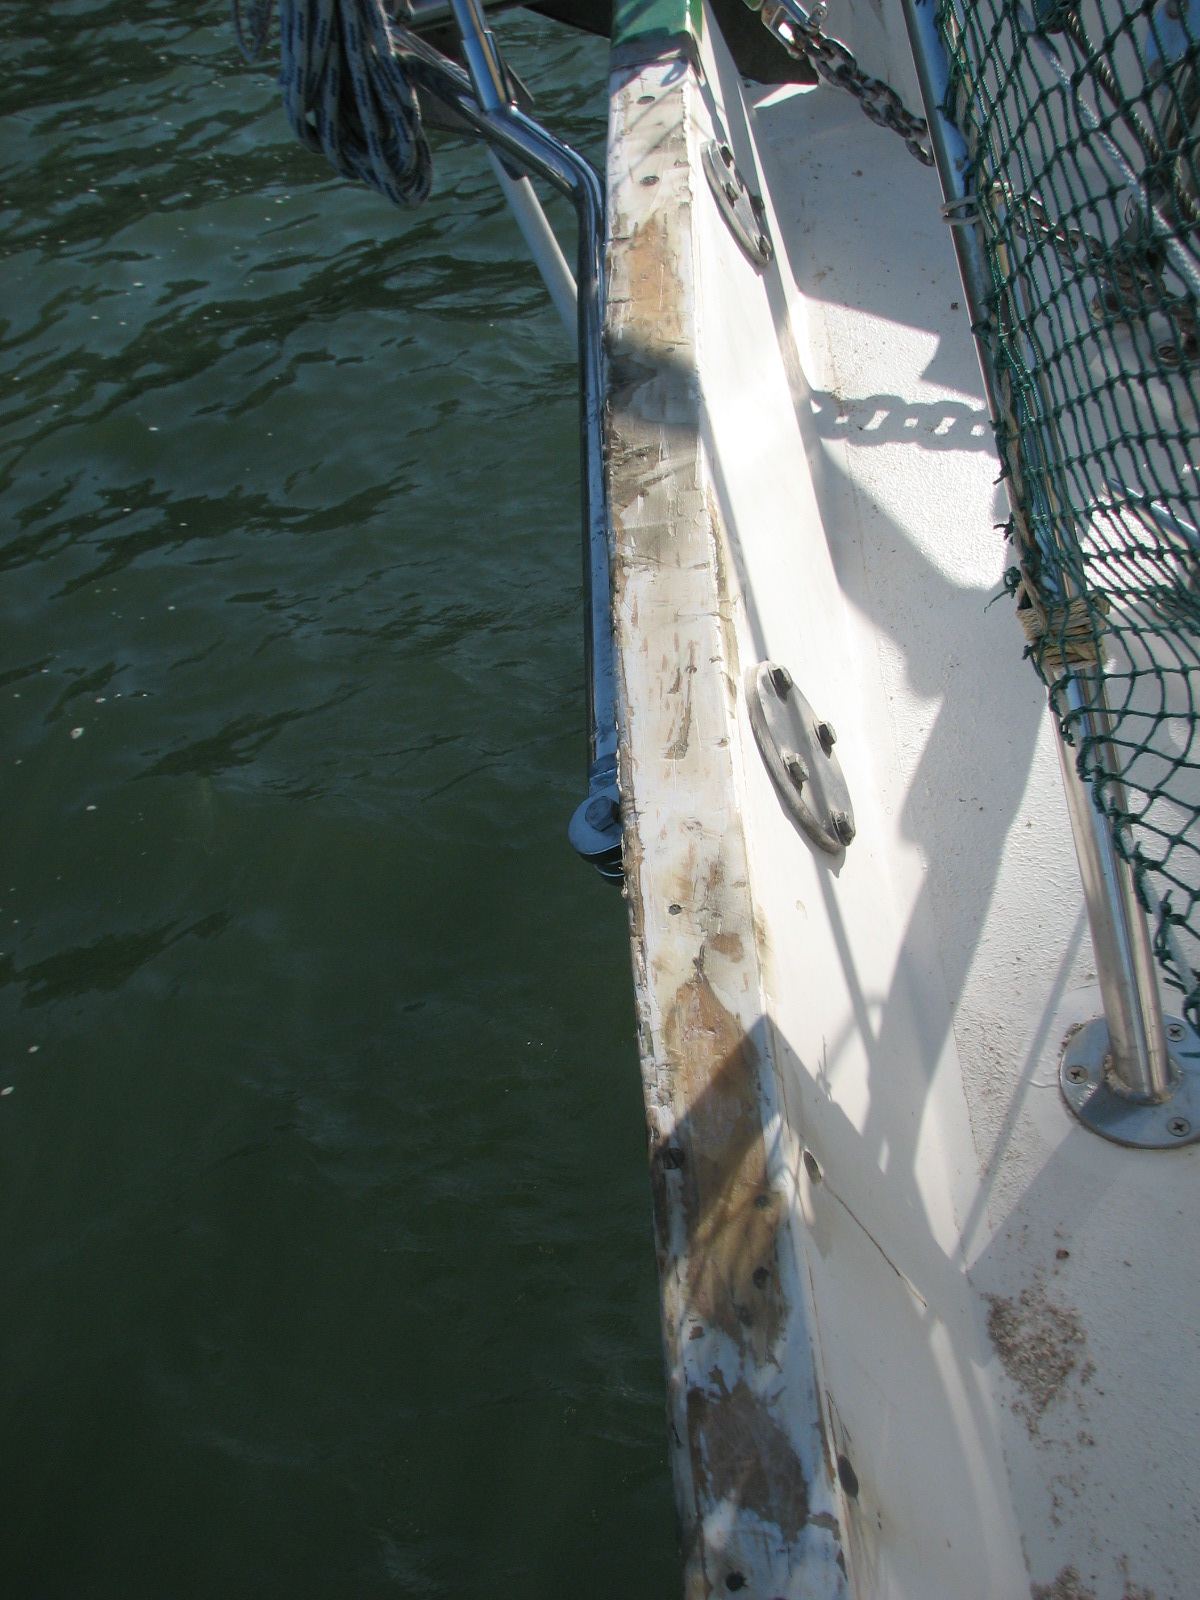
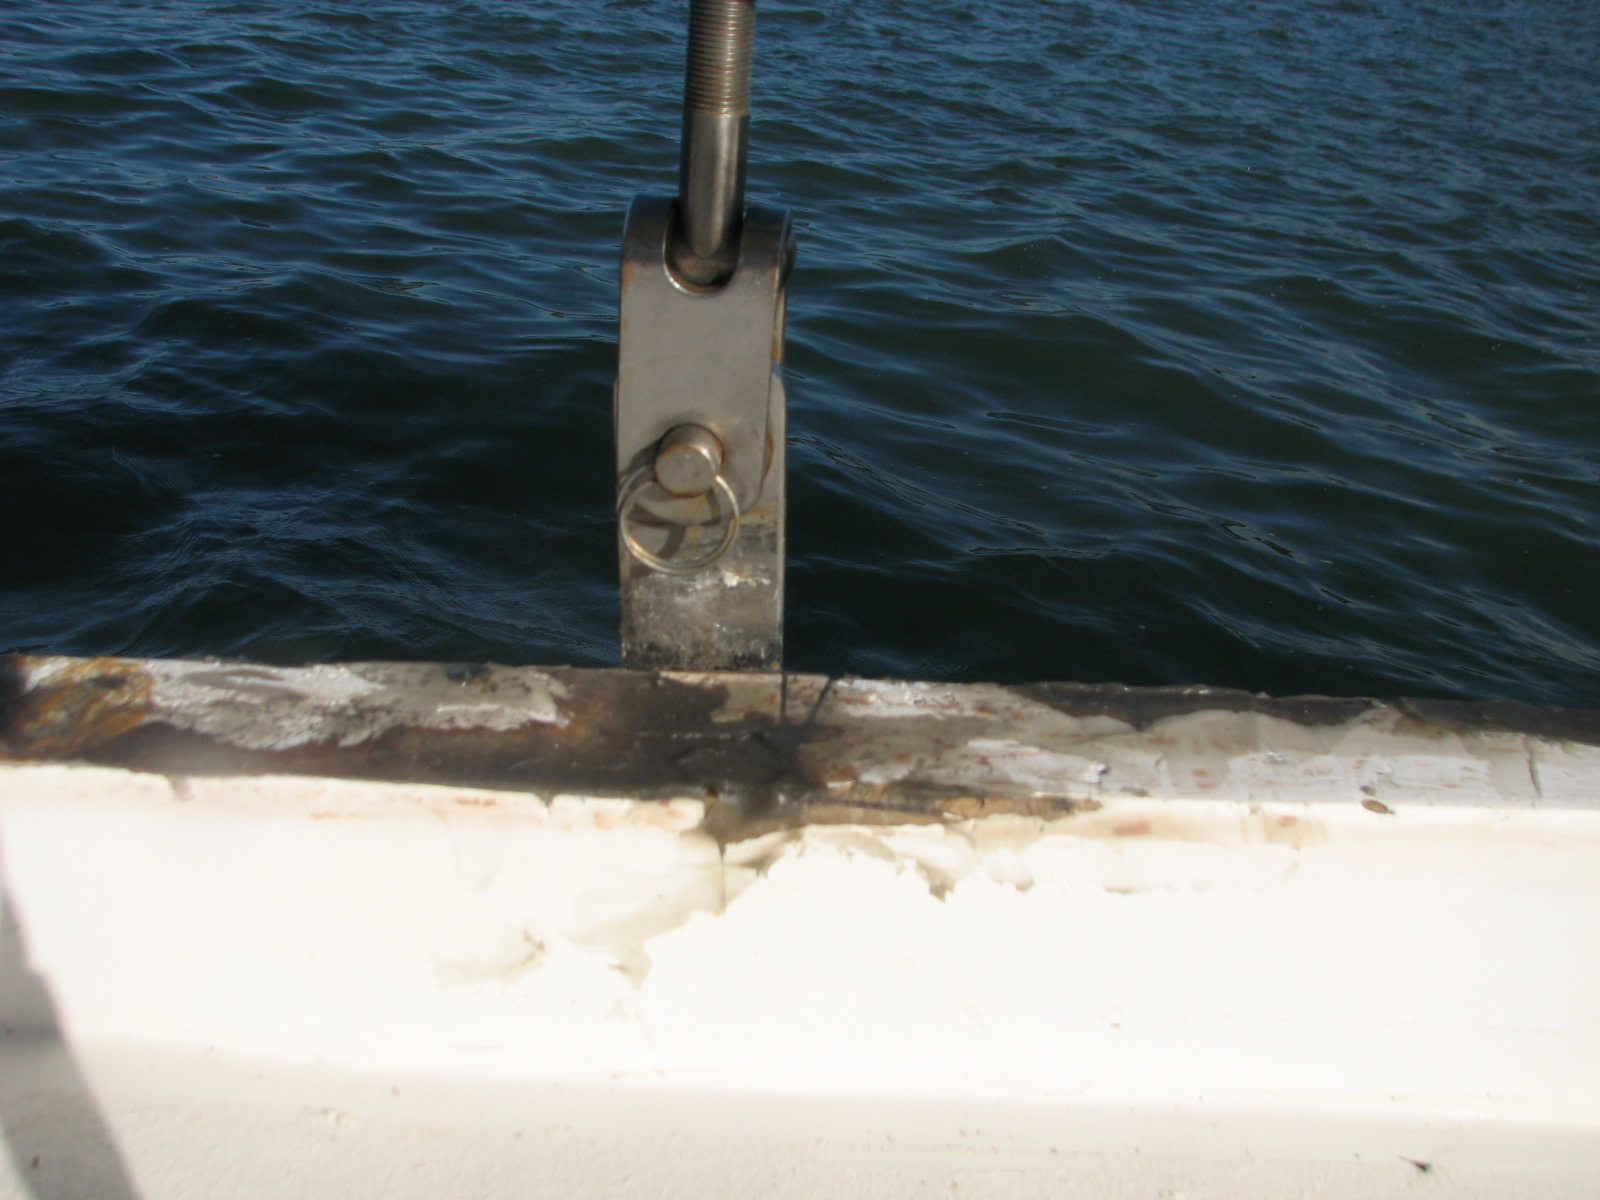
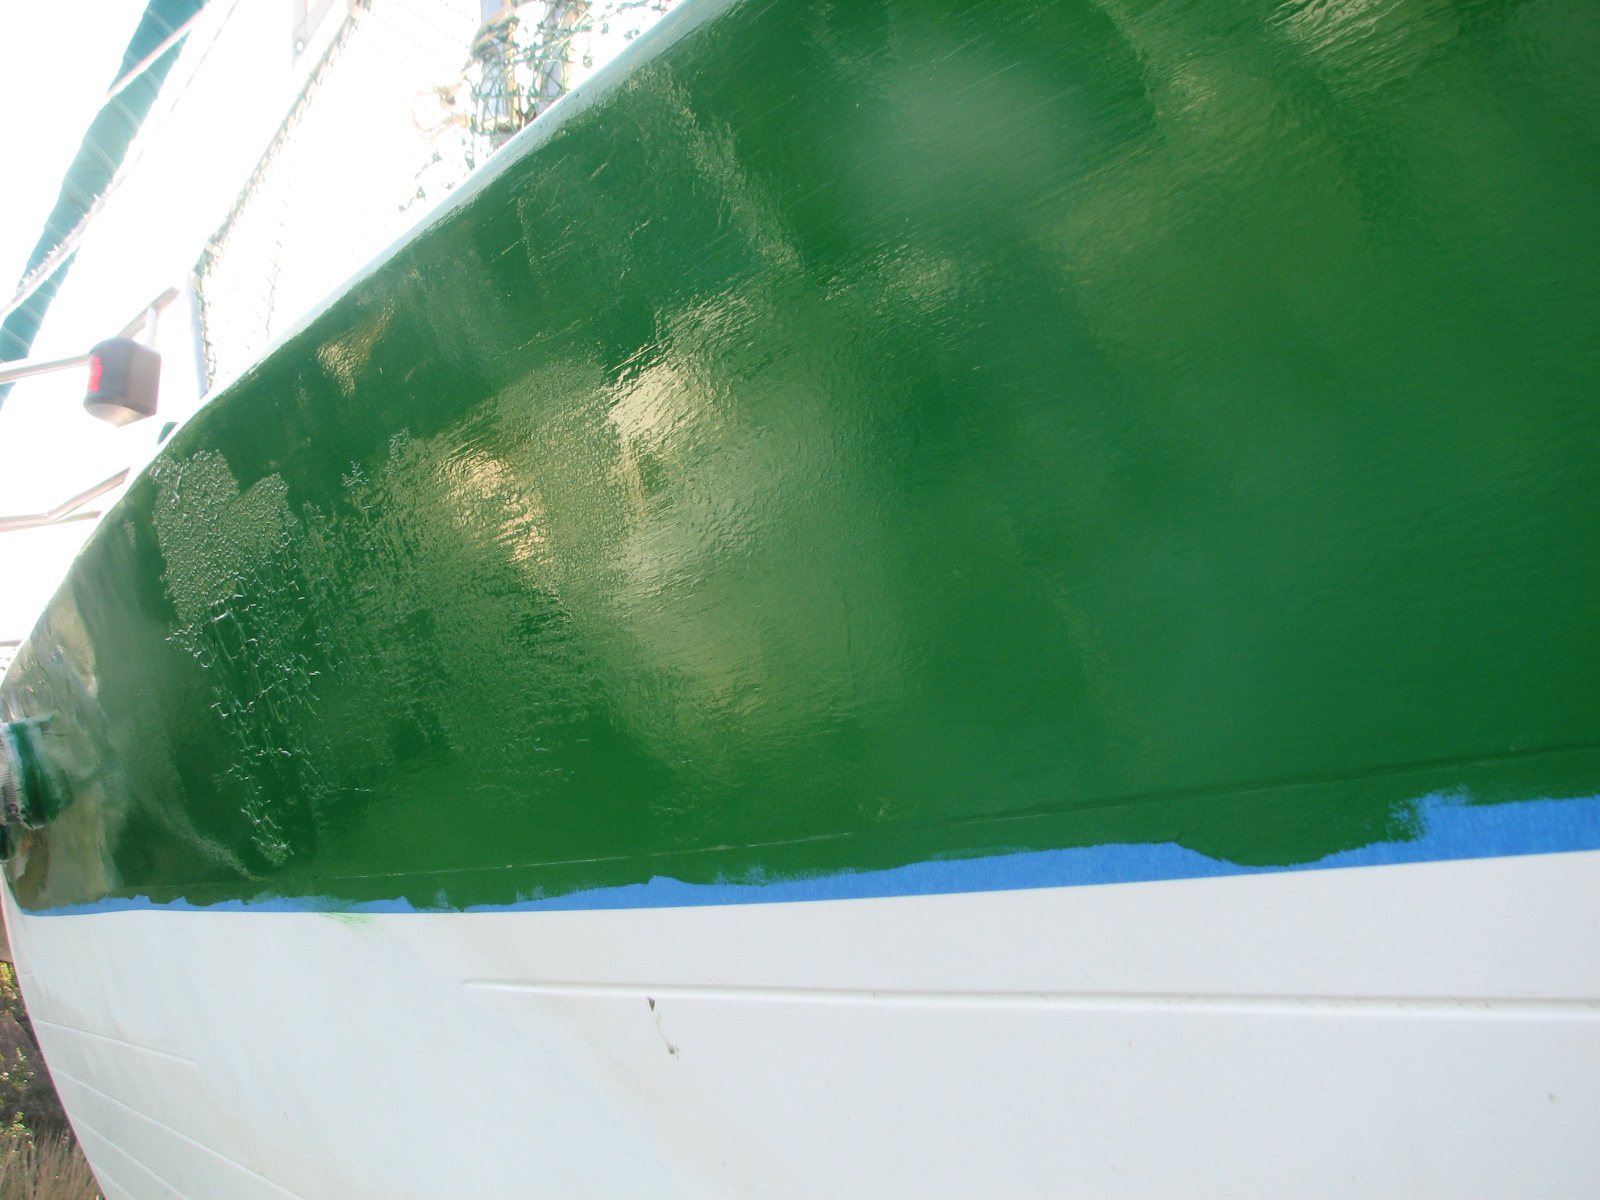
to check my work, and was horrified!! The green paint on the shear
stripe had started lifting off the surface with a really pretty crackle
pattern.
I
immediately stopped the Nyalic
protectorant application. I looked at the application that I had
done on the cap rail, and had no problems showing up there. The shear
stripe was in a bad way. Not sure what the problem was, but I am in a
fix. I am very short of the Easypoxy Kelly Green
paint. Not sure I will have enough paint to cover the repairs.
Tomorrow I will get an email off to the Nyalic
folks and see if they can tell me what I did wrong. My only thoughts
are that the surface on which I applied the Nyalic
protectorant was still damp. This was a major low!!
Cap Rail Showing No Effects Of Nyalic
Protectorant Application
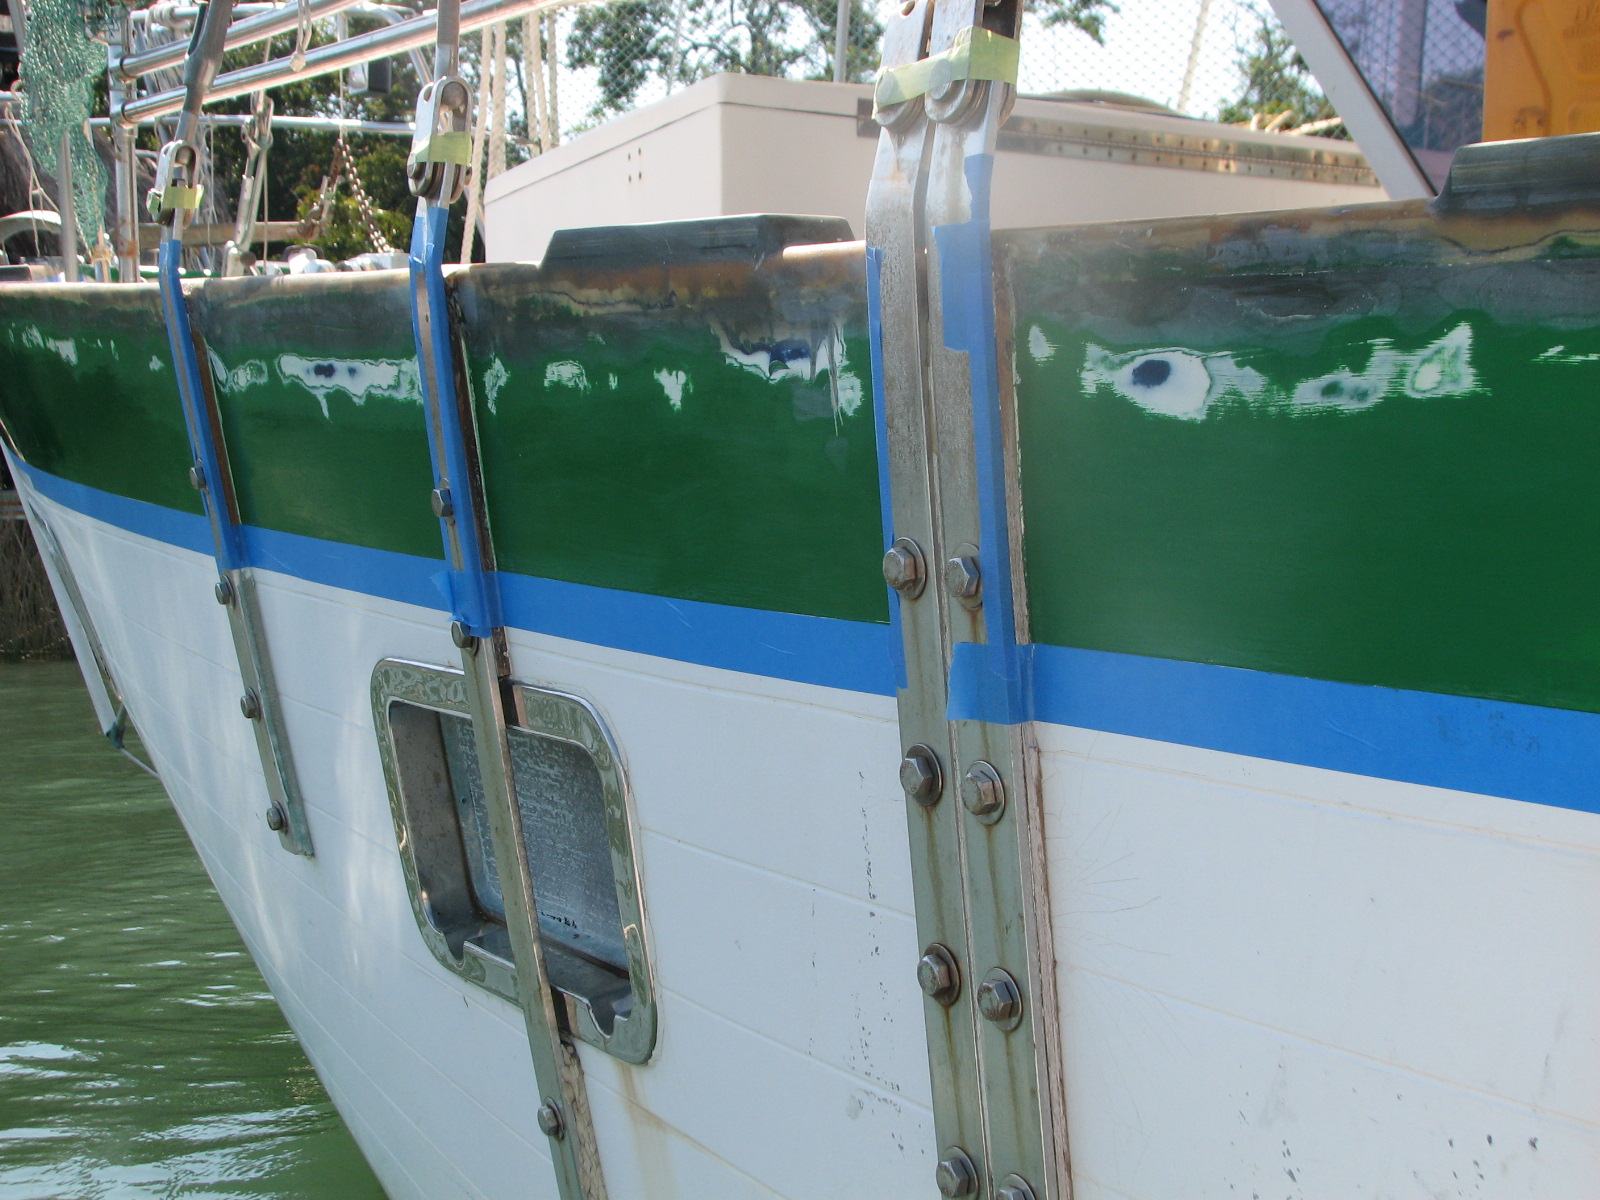
Damage To Shear Stripe After Nyalic
Protectorant Application
Damage To Shear Stripe After Nyalic Protectorant Application
In between bouts of the rain and
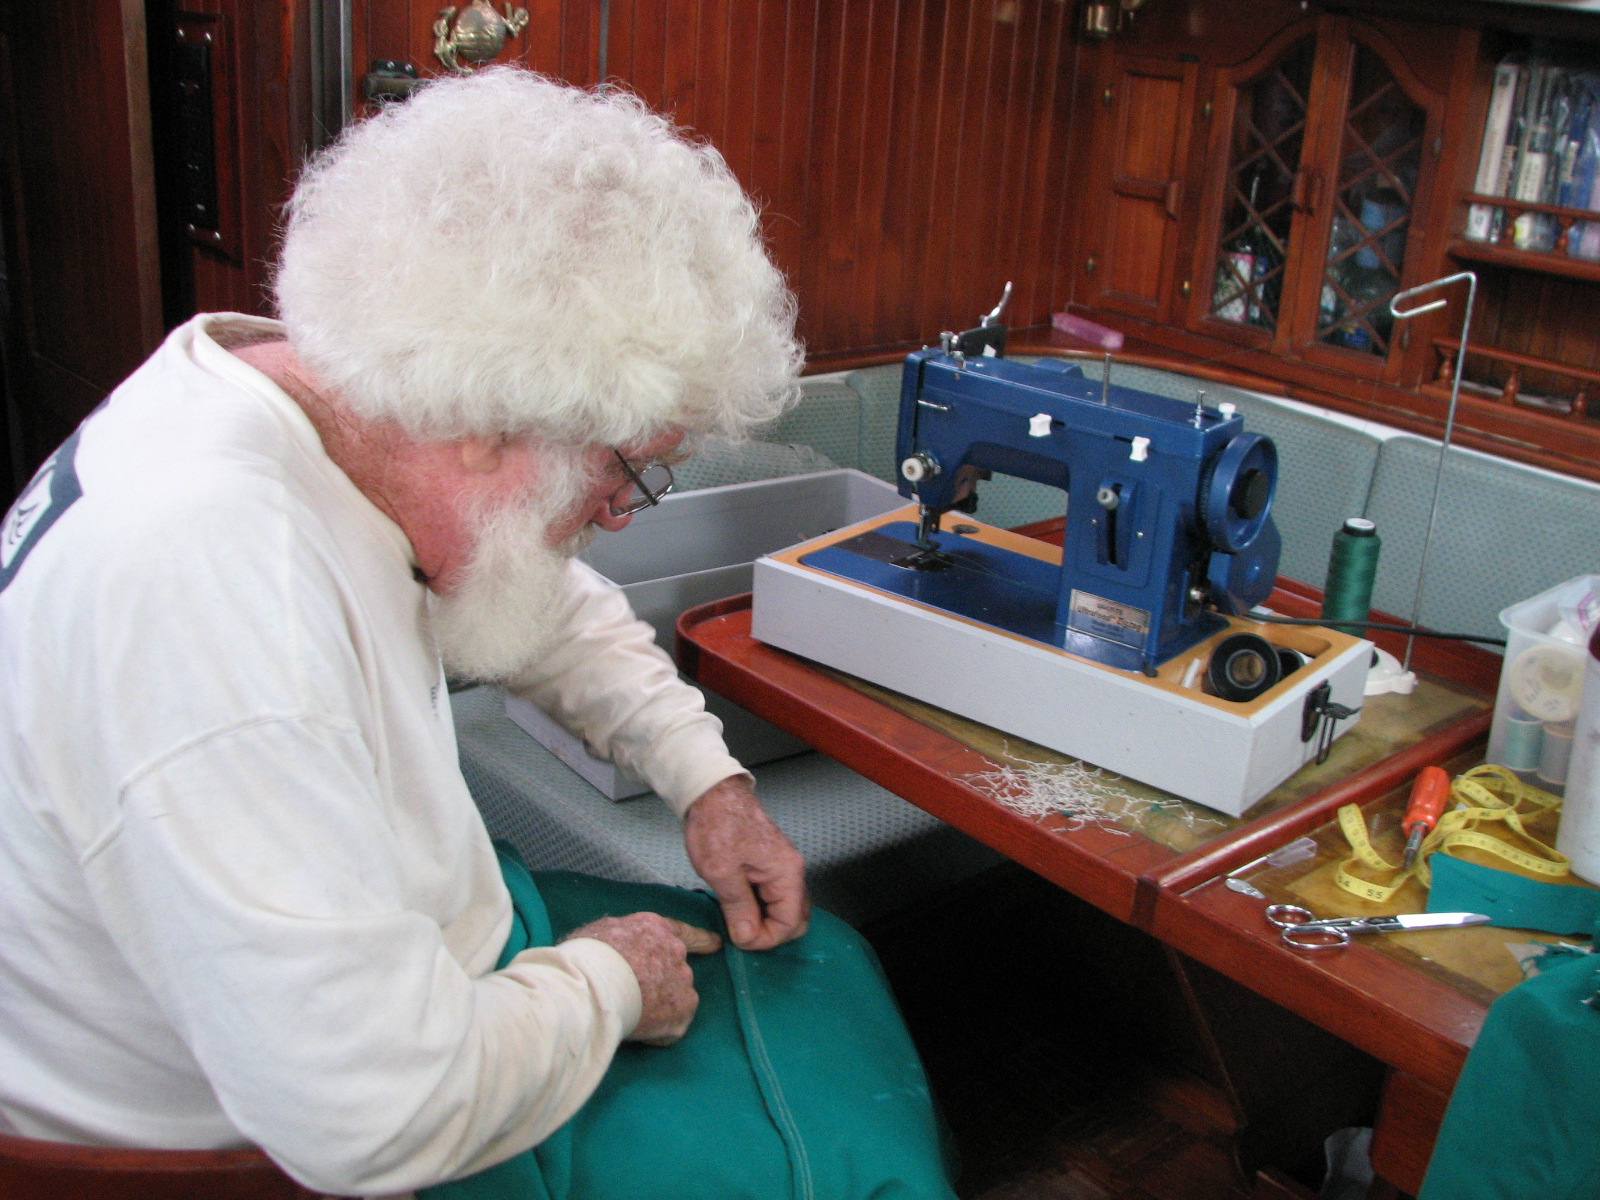
applying the Nyalic
protectorant, I got out the sewing machine and worked on two projects I
needed to finish up. First thing I did was to finish the straps I made
for Paul's sewing machine. I had decided to finish the straps for Paul
as a Christmas present. I also decided to make two straps for each boat
in Monkey Bay Marina as a Christmas
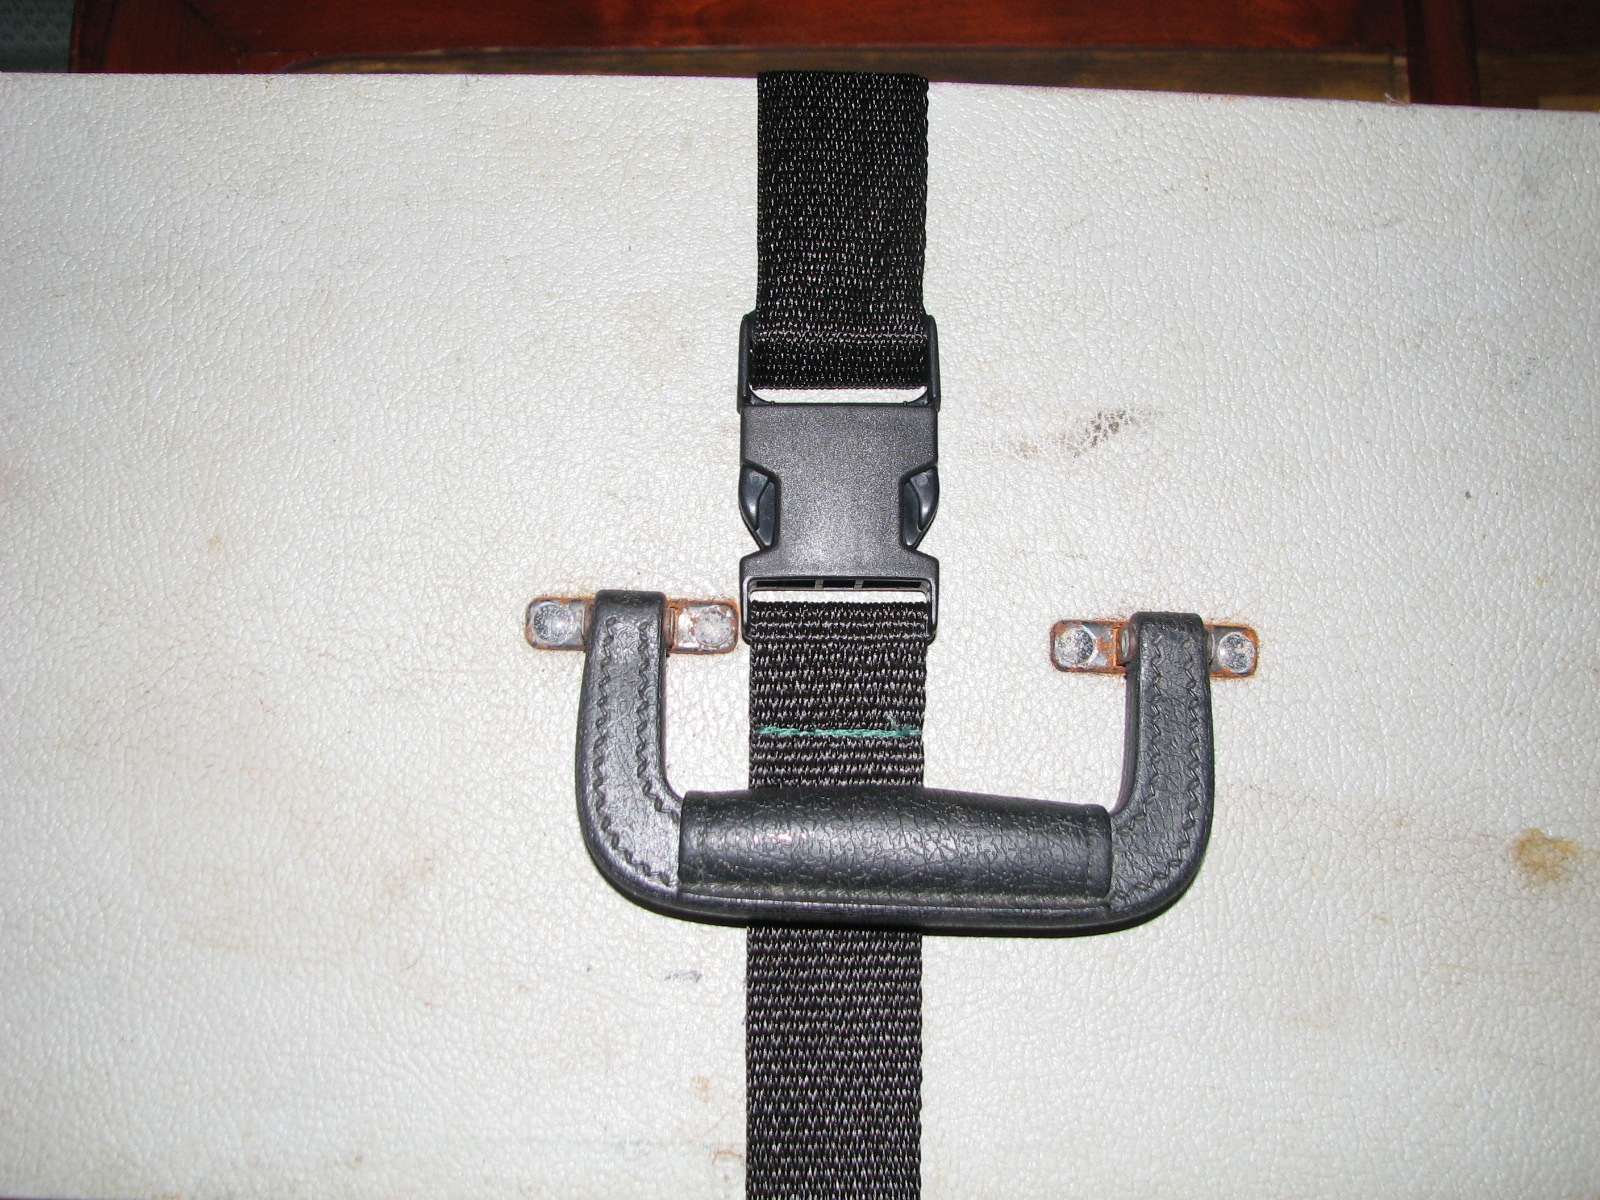
present. The straps are five foot long pieces of black webbing, with
the proper sized buckles on them. Very appropriate for the Sailrite
sewing machine case, or any other hold down use. This
was another high for the day.
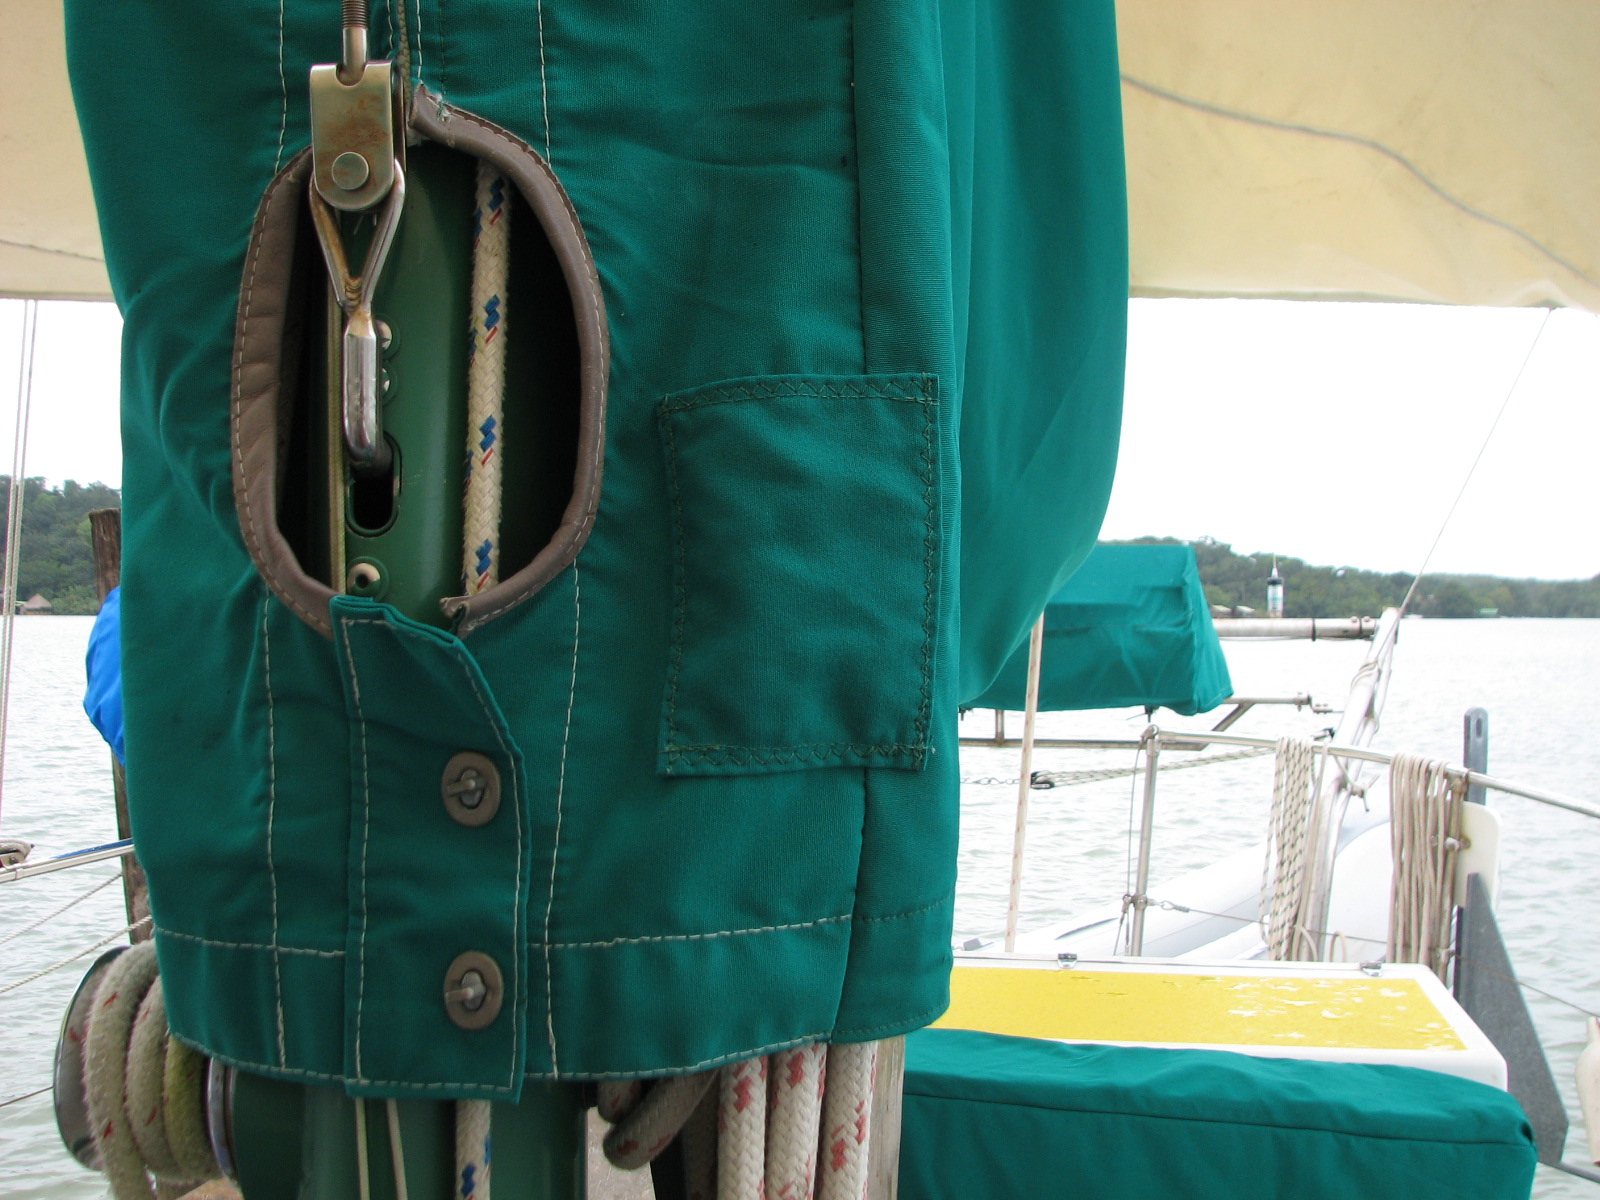
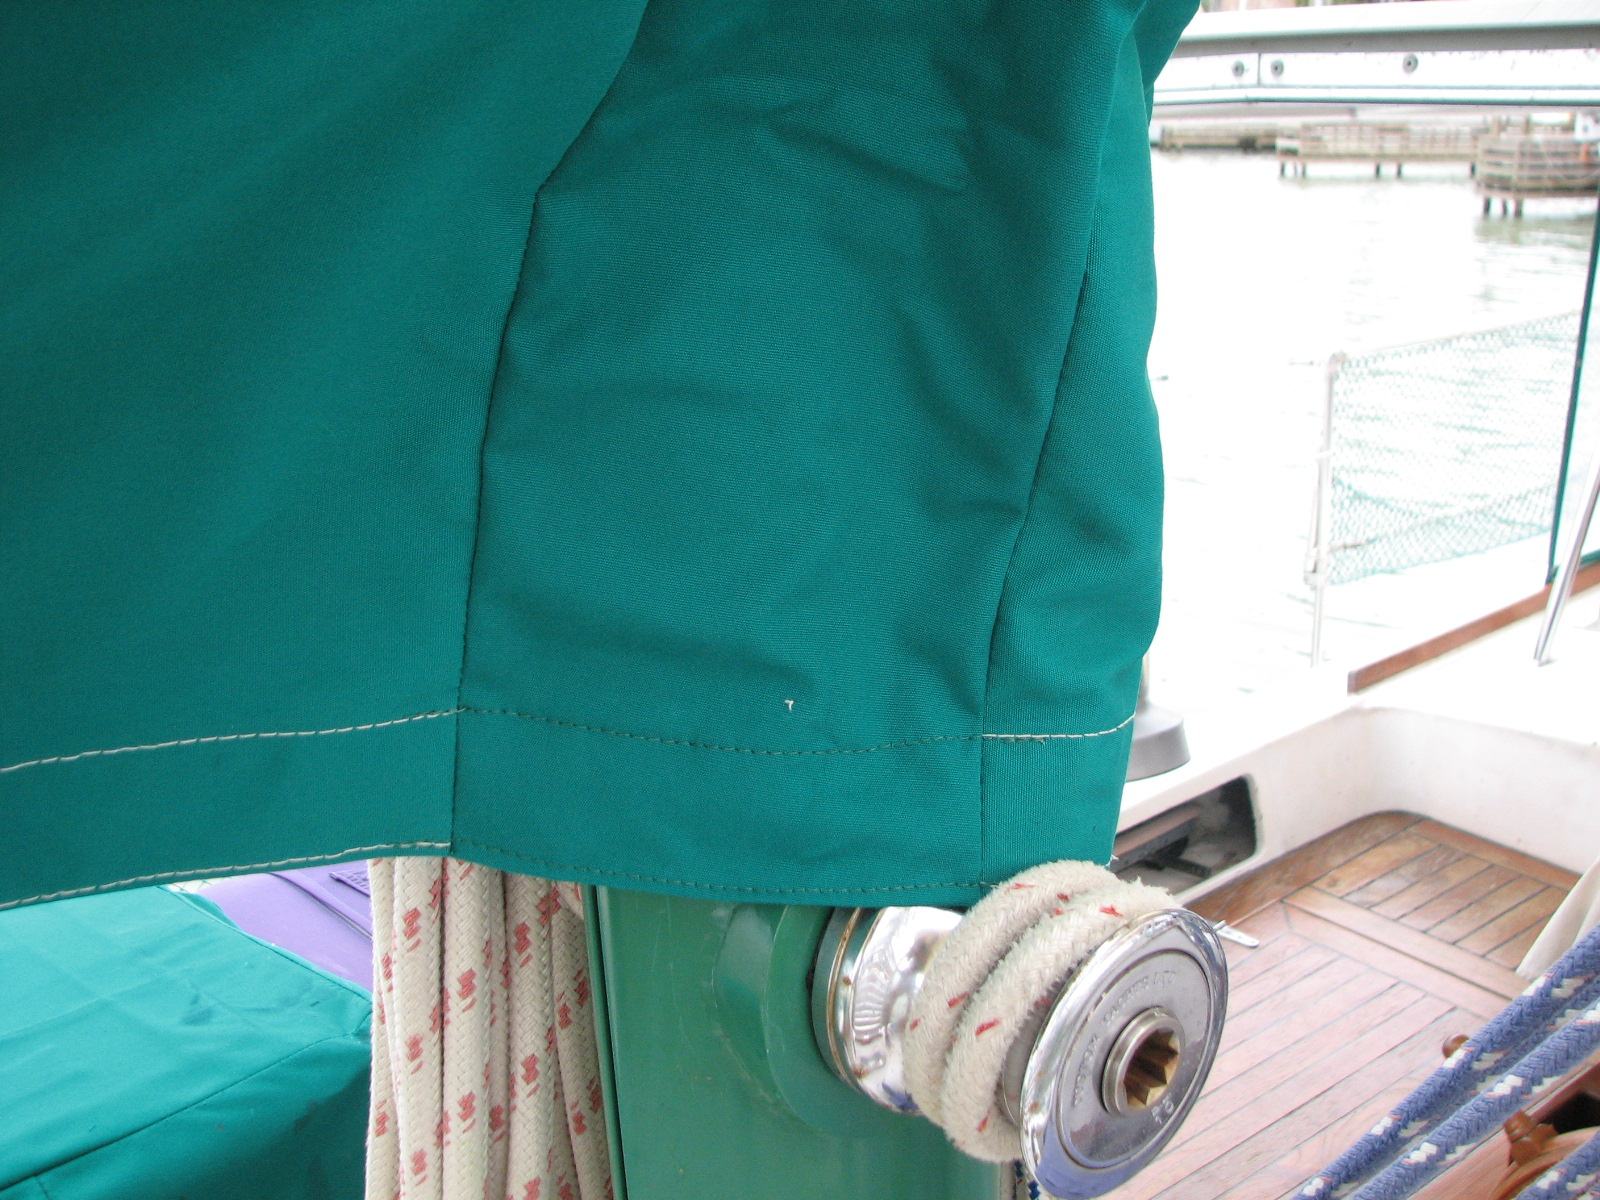
When I finished the straps, I
next worked on the mizzen sail cover. At the last day of bad weather, I
had sewn the skirts on the mizzen sail cover, but had not sewn on the
hook & loop material to keep the skirts in place. I was able to
complete the attachment of the hook & loop material,
so now that was finished. I finished the day by repairing a wrap that
Kitty uses to go to the shower. The hook & loop
material on it needed to be relocated. This was another high for
the day.
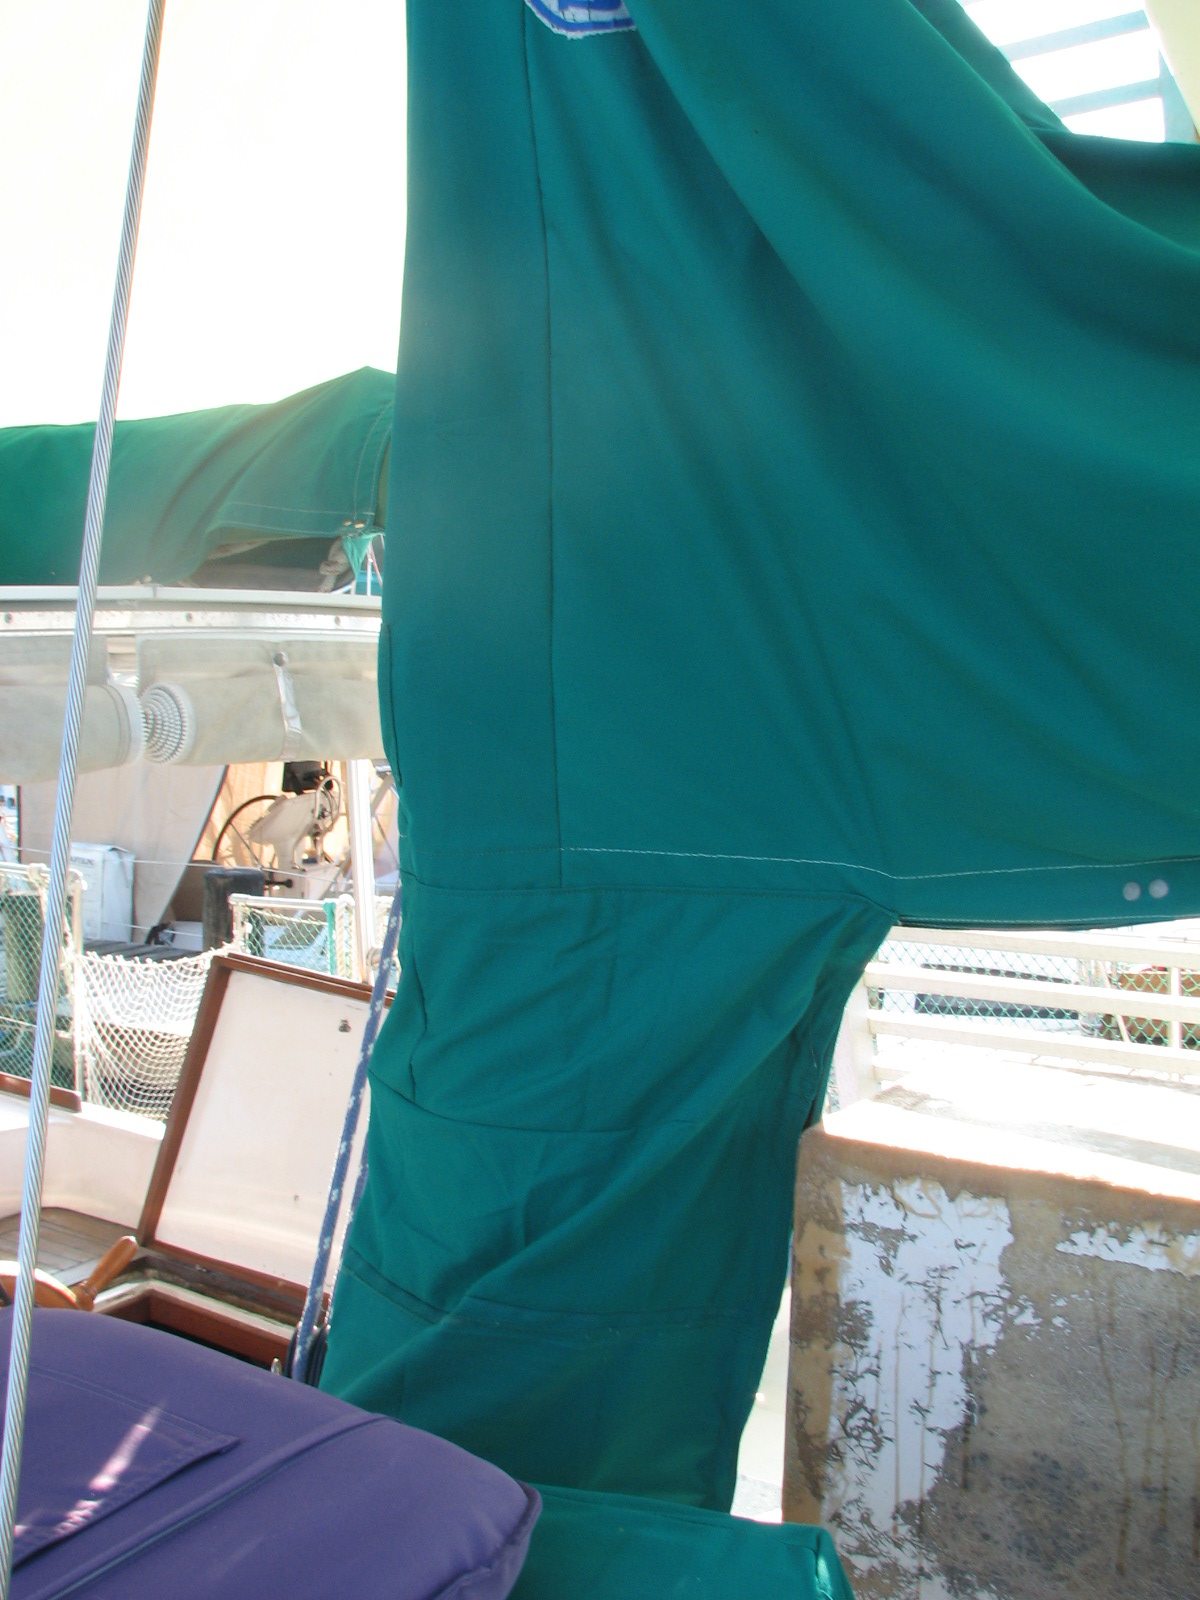
Mizzen Sail Cover With Skirts In Place To Cover Sheets And Halyards
December 20, 2010, Monday.
Did a
few small items today. Went up to the shop and drilled out all of the
chocks for the port side. They used to be screwed down to the cap
rail with large wood screws. I added the extra 3/4" fiberglass pads to
the cap rail/hull to deck joint, so I can use 5/16" bolts. I will drill
and tap the fiberglass. Because I am using larger fasteners, I had to
drill out the chocks and counter sink them for the flat head brass
machine bolts.
Next I mixed up a pot of
polyester resin, and put down the fiberglass to repair the port side of
the forward deck box, and to start filling in the hole behind the
anchor windlass. I got the deck box area done, but did not cut enough
fiberglass for the hole repair. Will finish that up tomorrow.
Just because, I decided to take
the ice head apart that I removed from the ice maker, to see if there
was anything obvious. Yes there was something obvious, I hope. The
electrical connections were all very much corroded. I took the
ice head up to the shop and took it all apart. I cleaned all of the
pieces, and did a really good job on all of the electrical connections.
I put the ice head back together, and installed the ice head back into
the ice maker. I did not get the ice head completely installed before I
ran out of time. I will complete the installation tomorrow.
I am hopeful the ice head will
operate properly, but the damage could have already been done. The
initial problem was the heater on the ice head would not come on and
release the ice cubes. Because of that the ice cube scoop could not
push the ice out of the tray. I am concerned, because the motor that
drives the ice cube scoop could be
defective. If that is the case, I will have to replace the ice head. I
am hopeful the problem was just electrical connections. Film at 11!
December 19, 2010, Sunday.
Day
off, Christmas stuff!!
December 18, 2010, Saturday.
Today is another beautiful day, so will have to wait until the port
side cap rail is in the shade.
In
the meantime, I worked on cleaning up the work bench and garage area on
Dream Away. It was a mess, and piled pretty high with the big power
tools. Hope fully will not need them for a while, so put the big eight
inch grinder and reciprocating saw away. Got the
garage area looking much better, and much more usable.
Cap rail
finally got in the shade, so went to the shop and got the paint and
brushes prepared, and went back to Dream Away. Wiped down the cap rail
and shear stripe with the tack rag, and applied the second coat of Easypoxy Kelly Green
paint. The application went very well, and I had enough paint. I even
have enough to do some touch up if necessary. I will wait a couple of
days and then apply the two coats of Nyalic
protectorant. Then I must install all of the hardware back on
the cap rail.
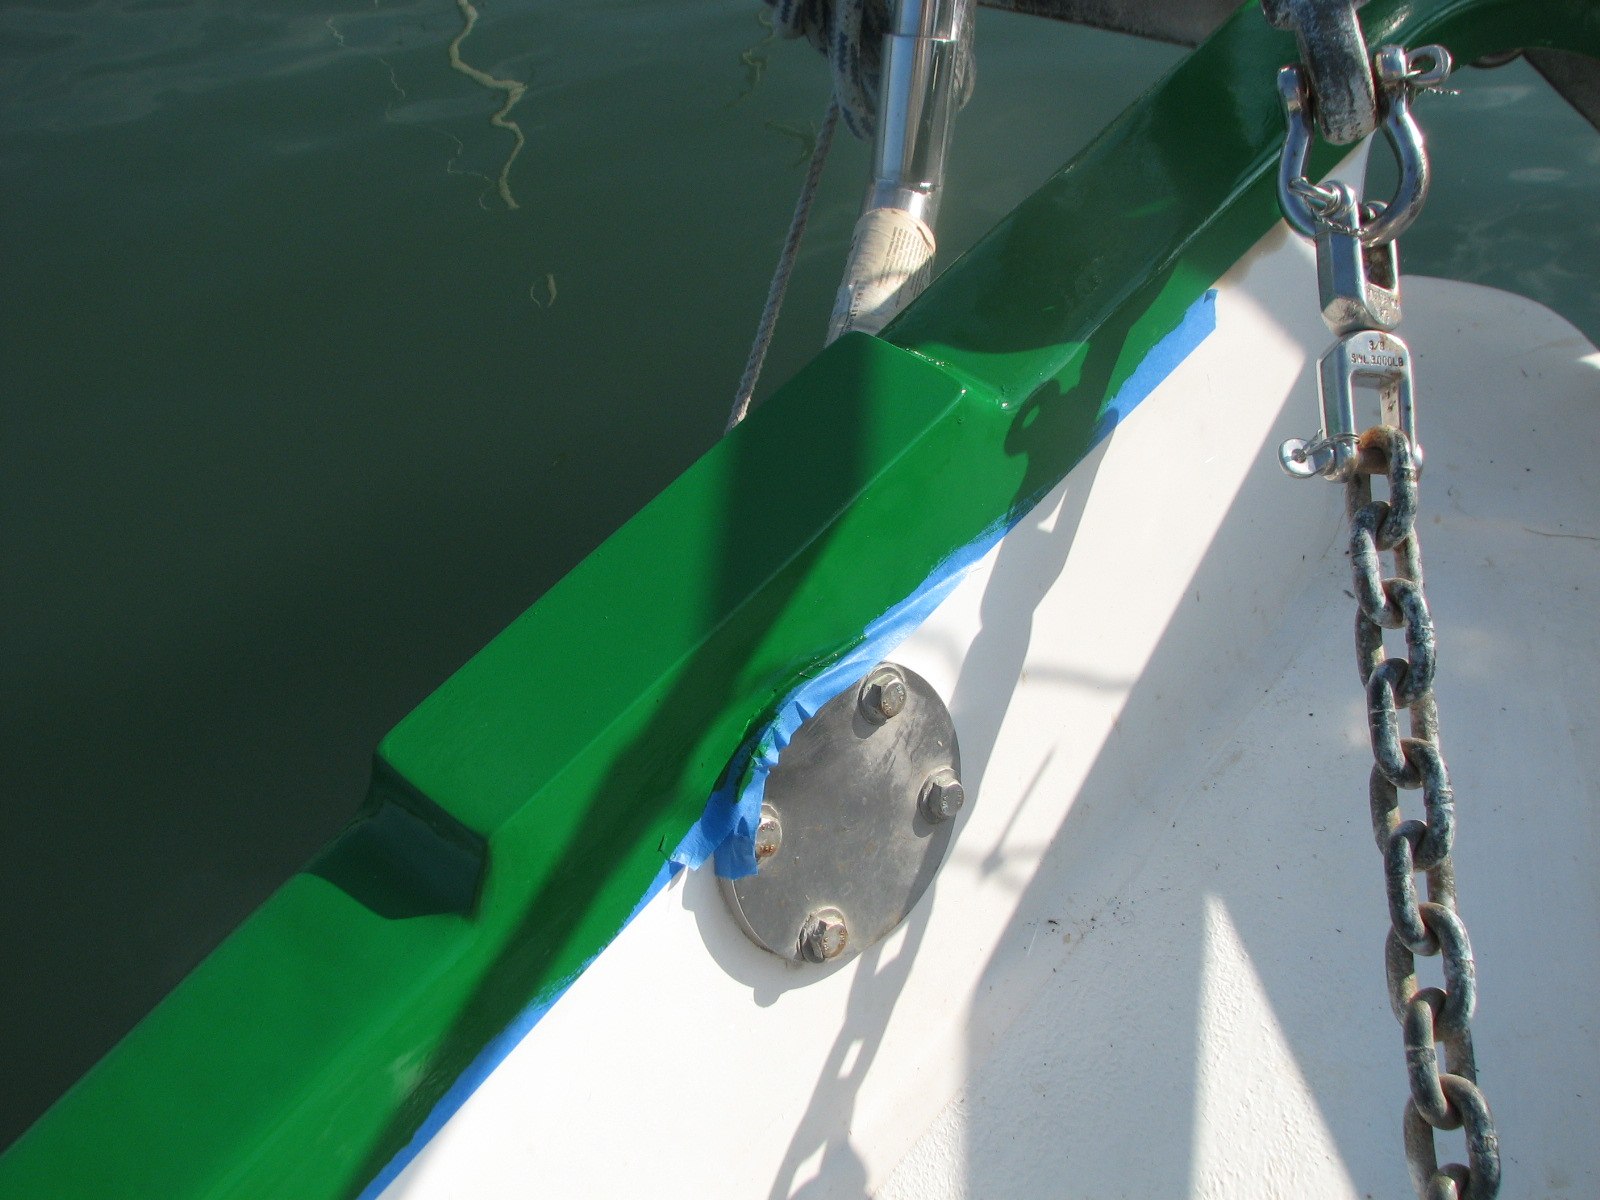
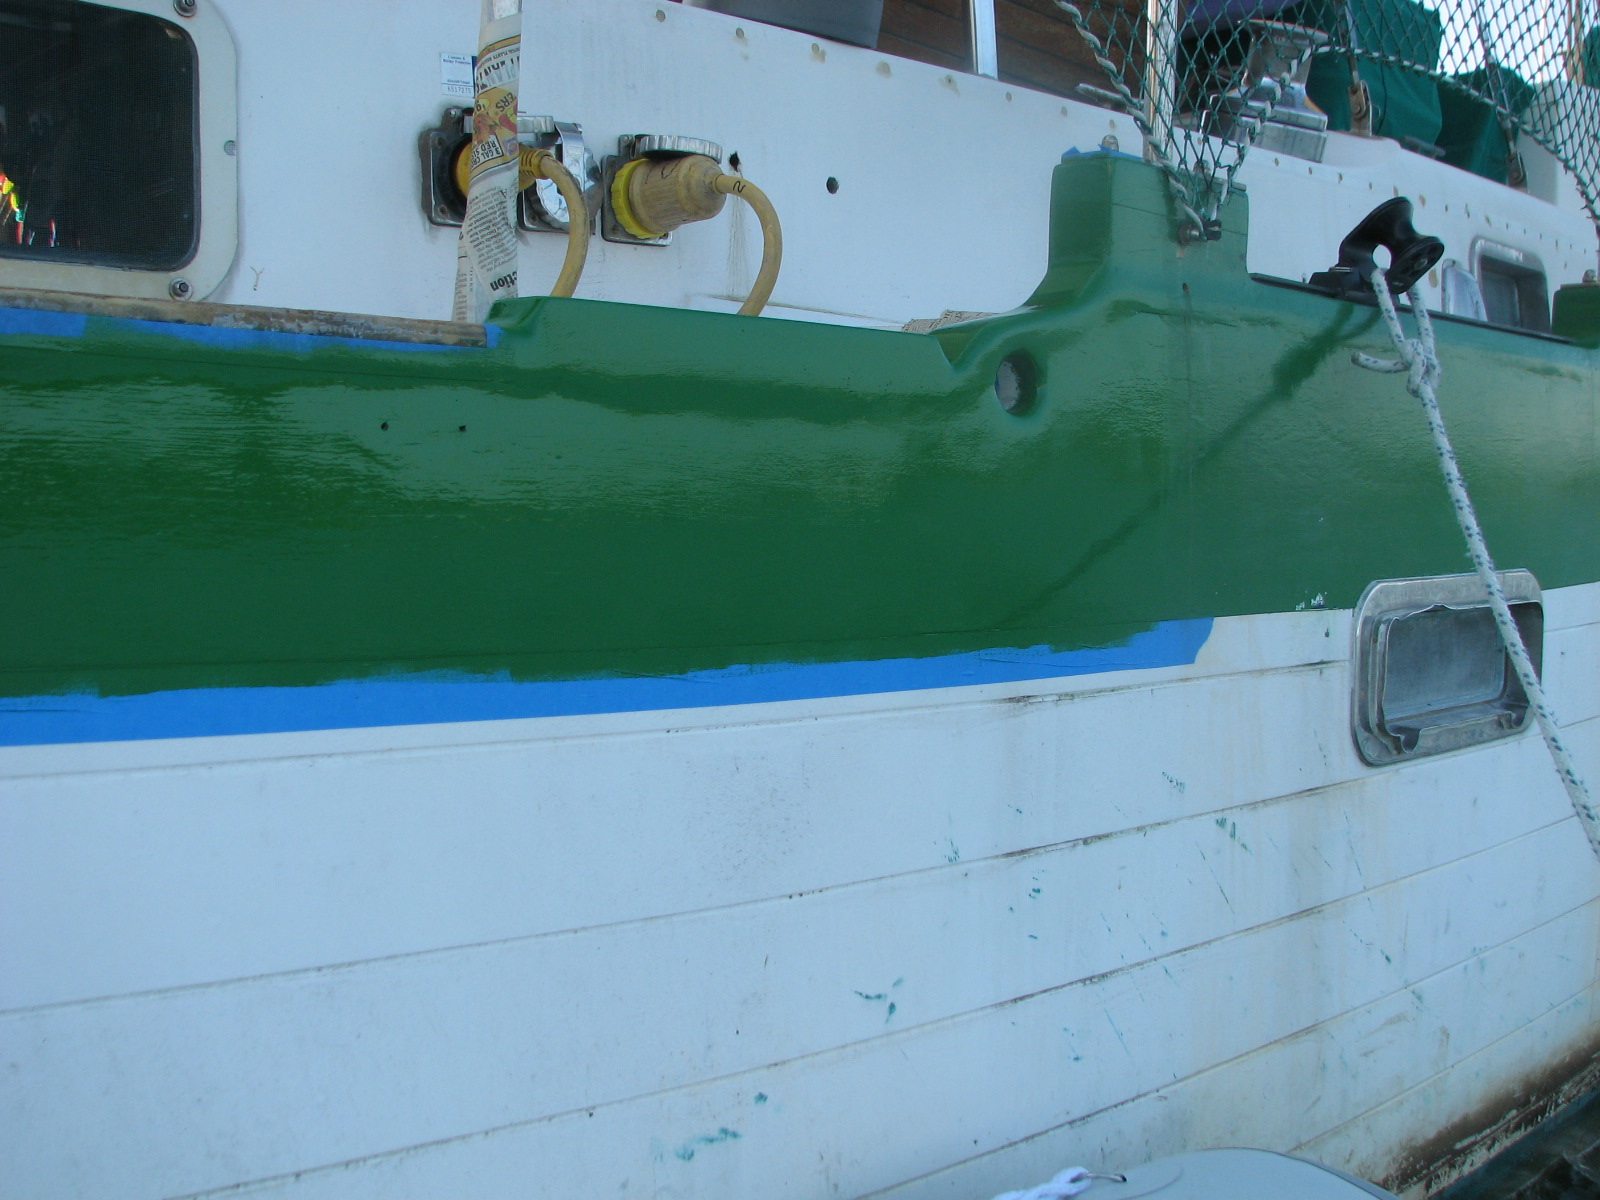
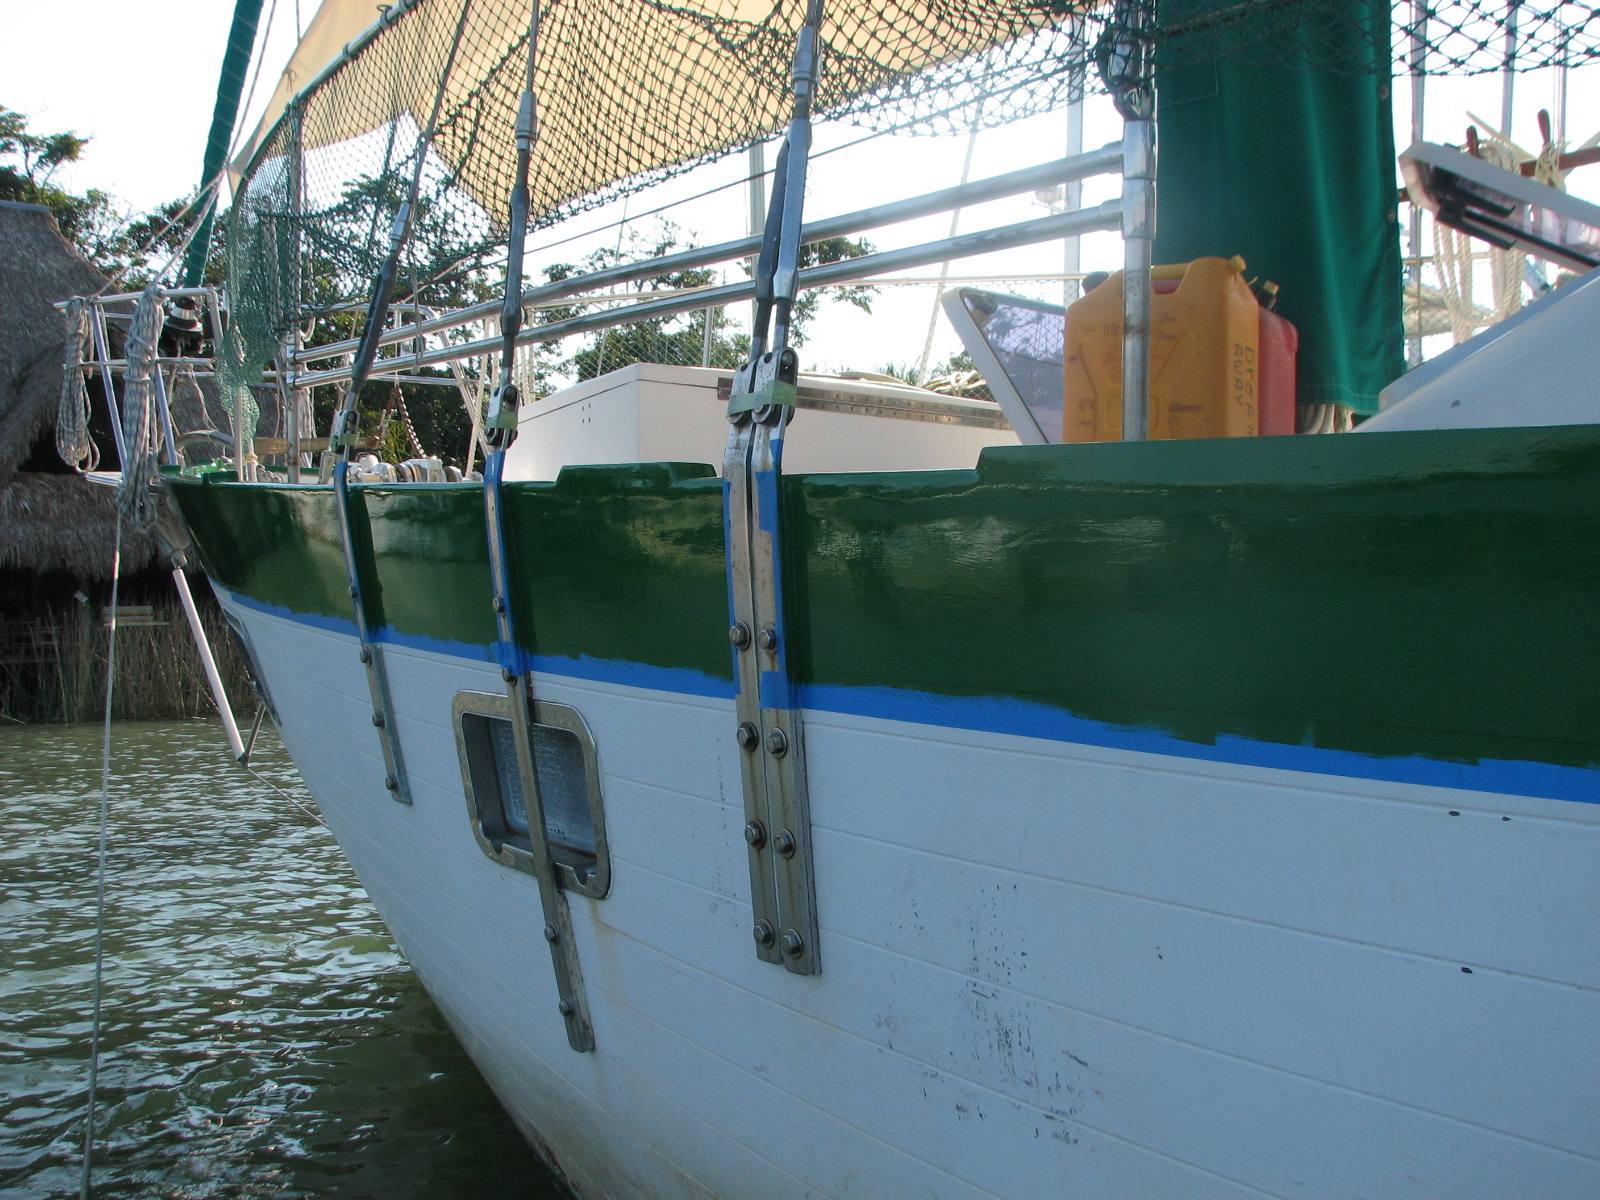
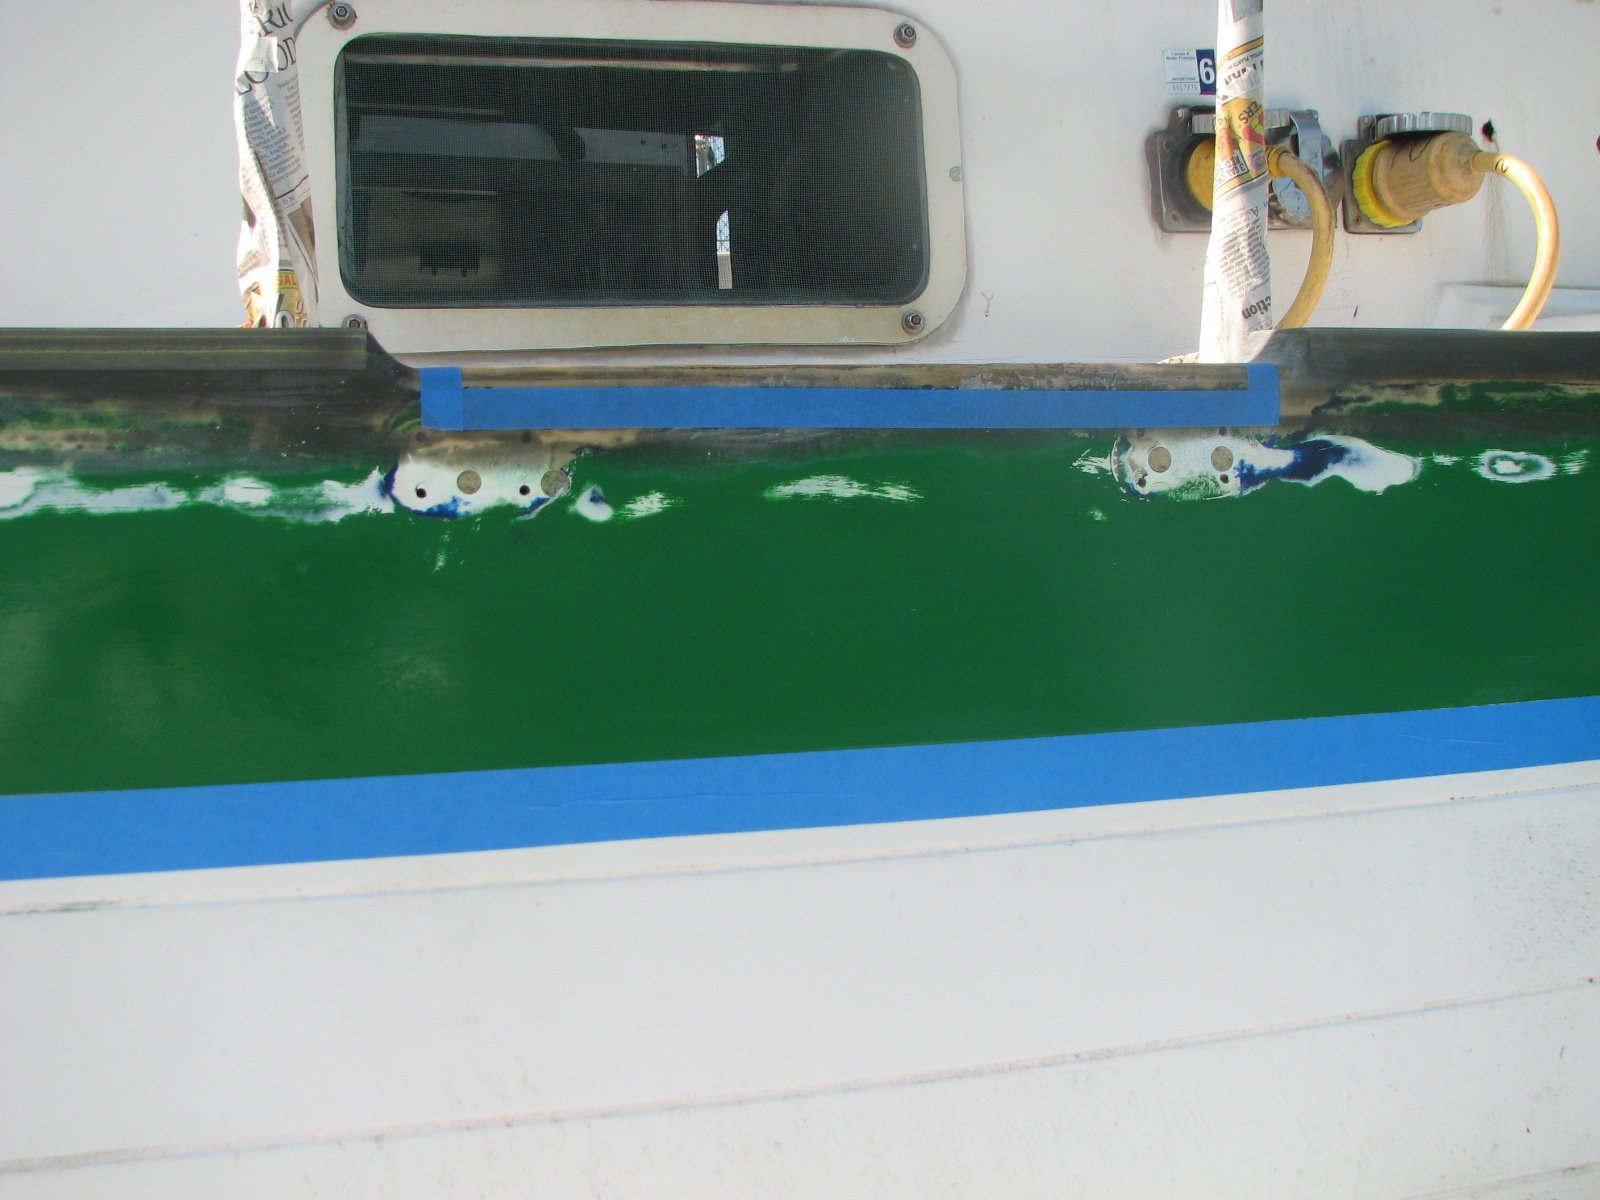
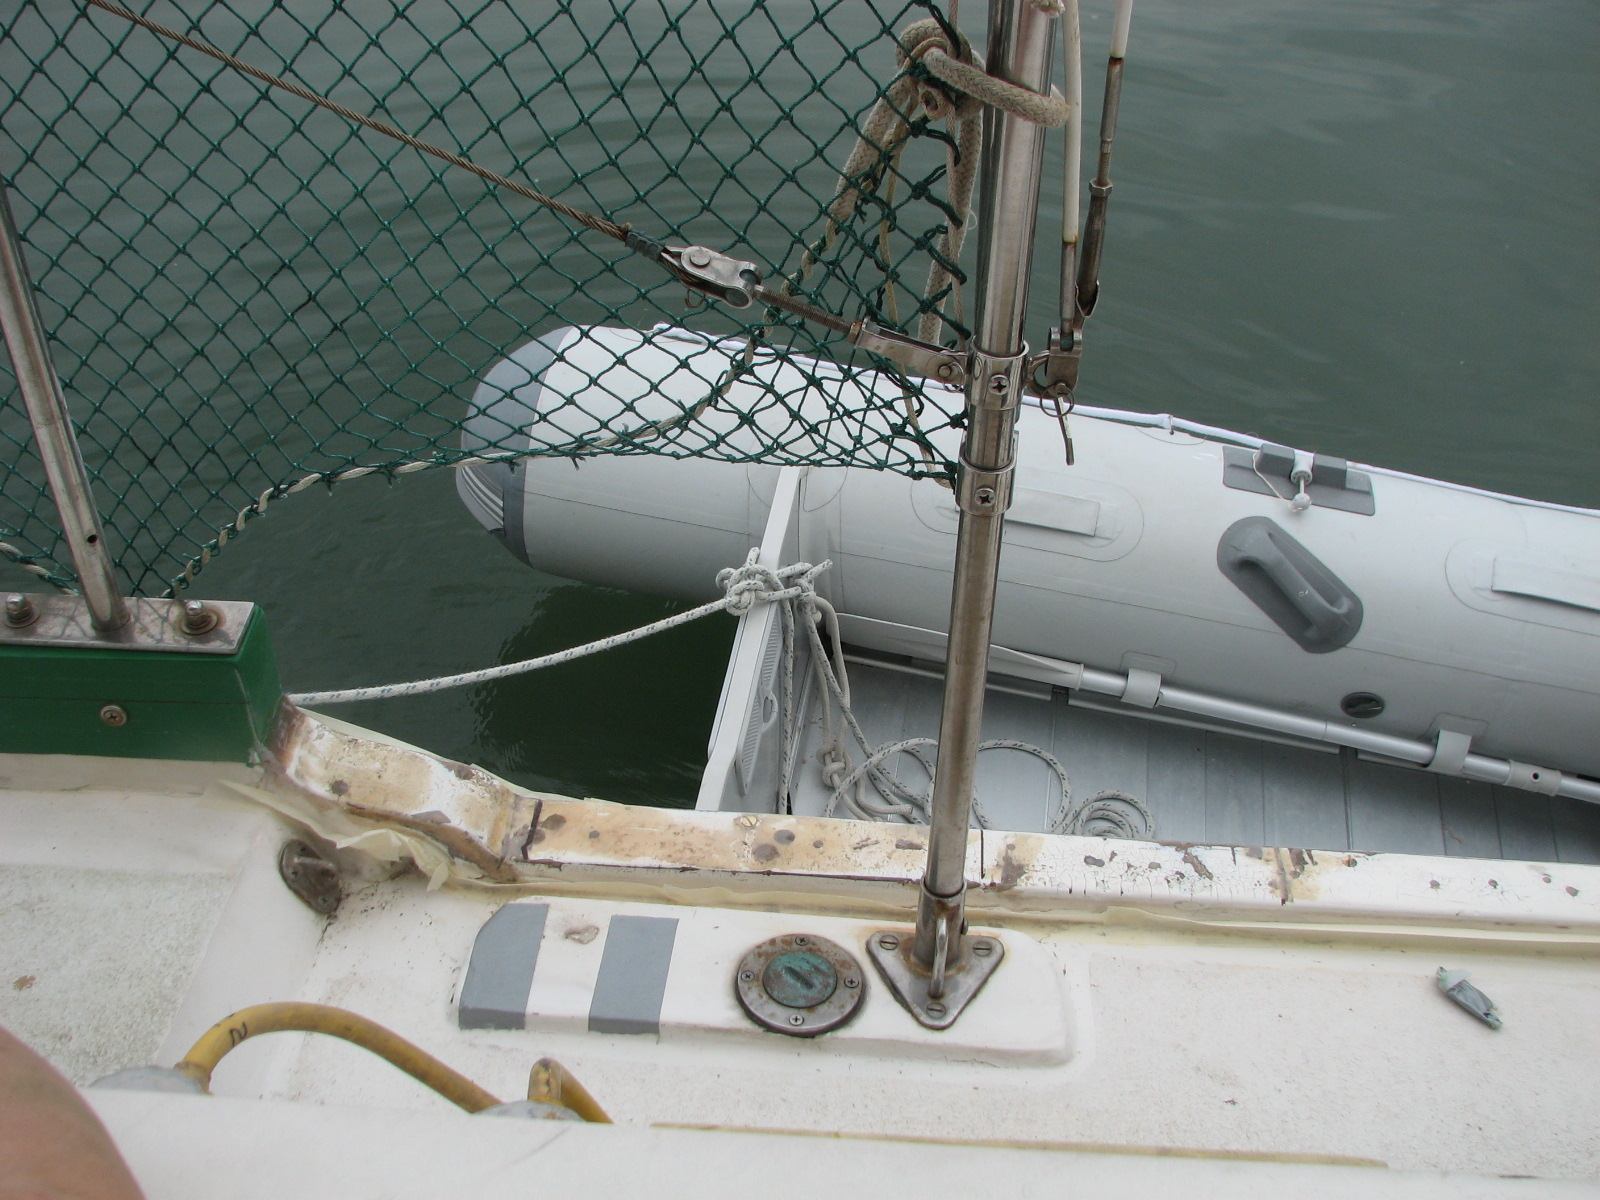
Two Coats of Epoxy Applied Near The Port Side Gate
Two Coats of Epoxy Applied To The Port Side Chain Plate
Area Shear Stripe & Cap Rail
Next, I
applied some putty to the place on the side of the forward deck box and
the hole in the deck just behind the anchor windlass.
Last item for
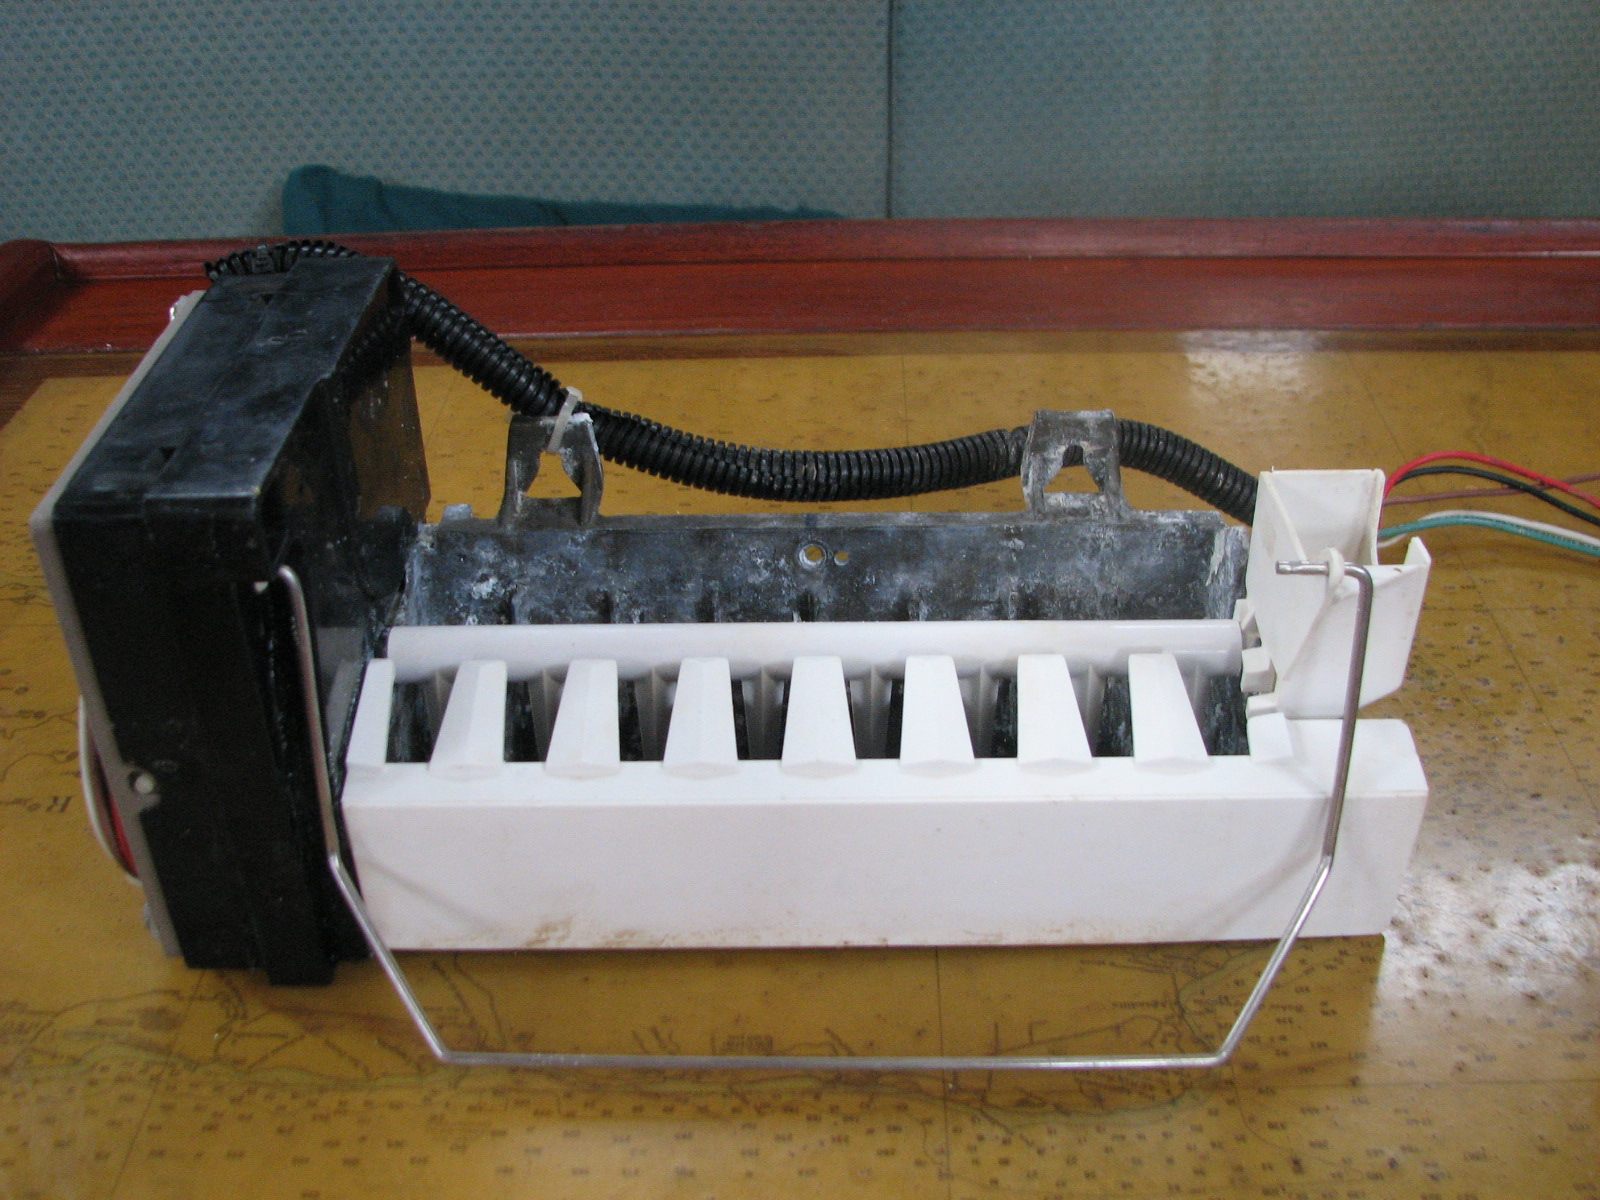
the day was to remove the ice head from the ice maker. Good friend Jim,
had done some research on the Internet for a replacement. It seems that
a new drive motor for the ice head is more expensive than a complete
new ice head, so I will probably just replace the entire ice head. From
what I have seen, all of the ice heads look the same, so the new one
should just fit into place.
Removed Ice Head Showing Two Side Mounting Tabs
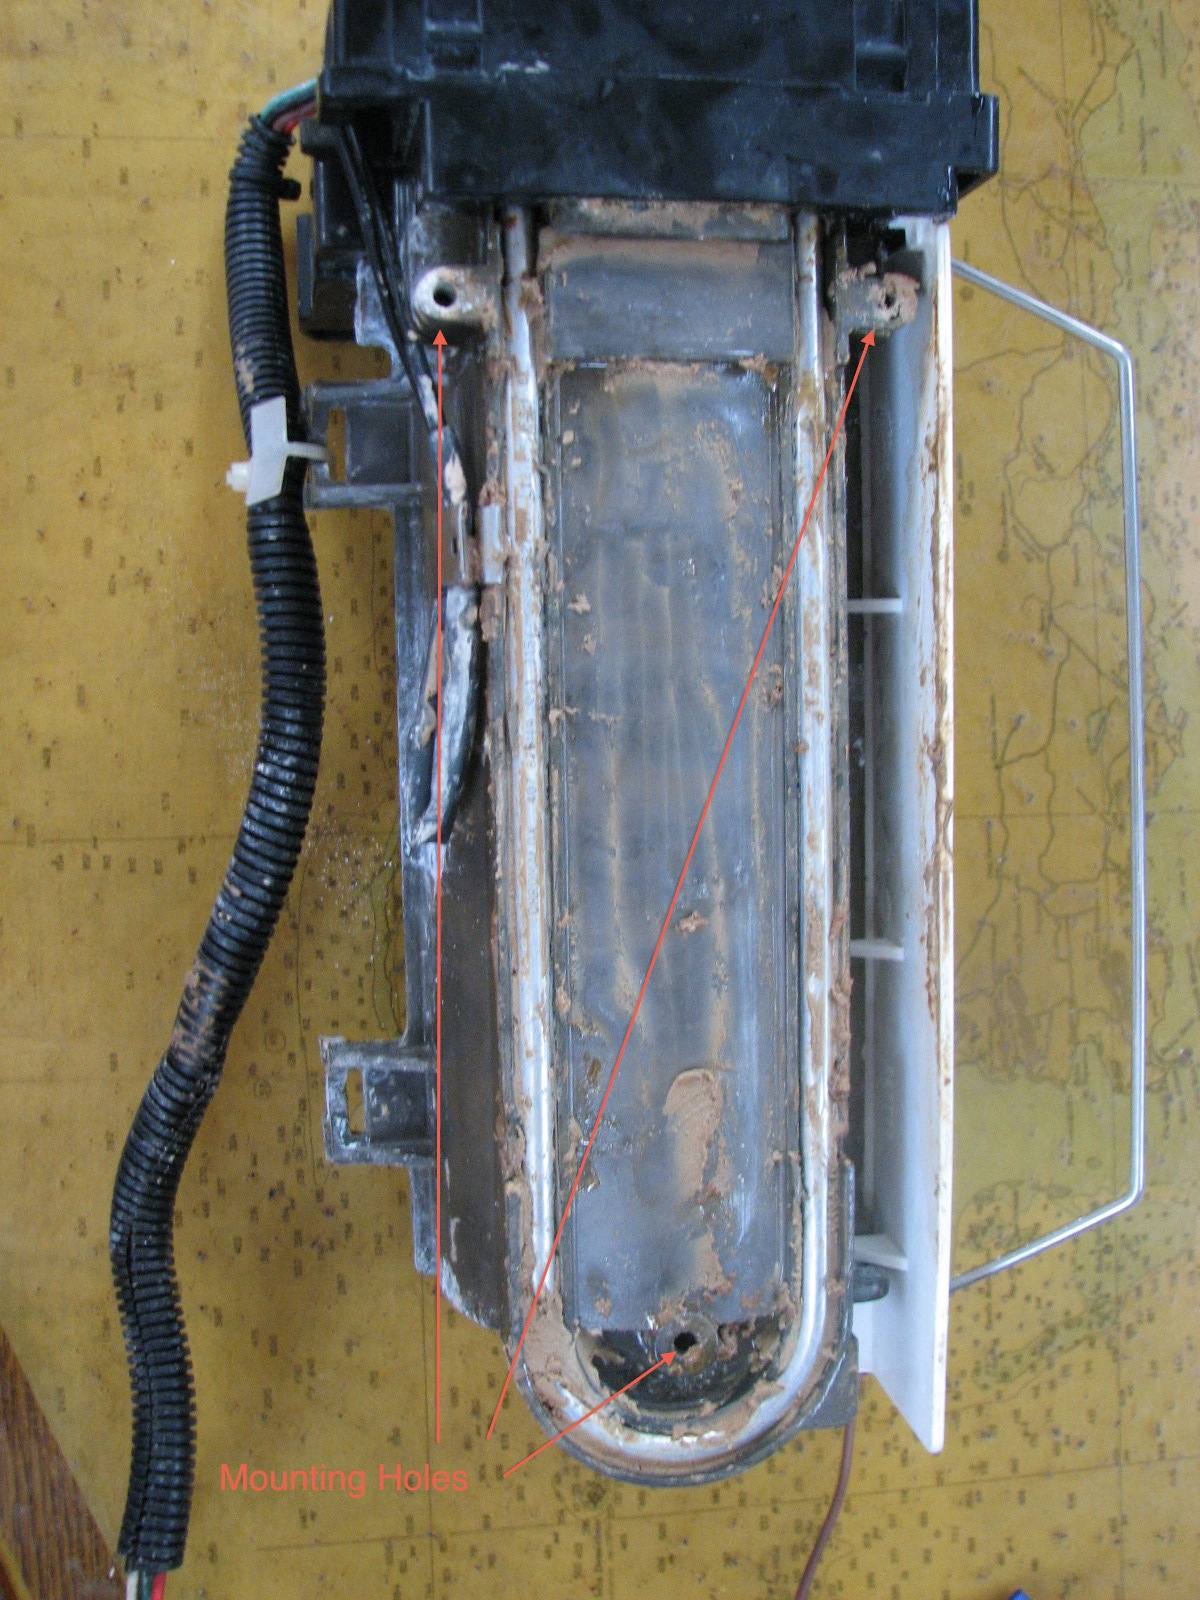
Ice Head Bottom Showing The Three
Mounting Tabs Used In My Ice Maker
December 17, 2010, Friday.
Today
is a bright sunny day, so looked good for masking the
port cap rail, and getting the first coat of Easypoxy Kelly Green
paint on the cap rail and shear stripe.
Fortunately when I was shopping
yesterday, I had purchased another couple of rolls of Scotch Blue Masking Tape.
This tape can stay on a surface for up to 14 days without leaving an
adhesive residue. As I was masking the port side cap rail I ran out of
masking tape and had to use the new tape.
Port Cap Rail And Shear Strip Masked Off Near Port Side Gate
Port Side Chain Plate Area Of Cap Rail And Shear Strip Masked Off
When the taping was completed, I
cleaned off the whole area with Acetone. I then went to the shop, and
got the paint prepared, and a final wash of the brush with acetone.
Back on Dream Away, I wiped down the cap rail and shear stripe with a
tack rag. I then started on the first coat of Easypoxy Kelly Green
paint on the cap rail and shear stripe. It is going to be close
to see if I have enough paint to complete two coats. The sun was really
out, so I had to wait until the port side was in the shade before I
could start the painting. I was able to finish the first coat of paint
with no large issues. I got all of the equipment cleaned up, and felt
pretty good.
December 16, 2010, Thursday.
Was
able to get some major grinding done on a couple of repair spots on the
forward deck. One place is on the port side of the forward deck box
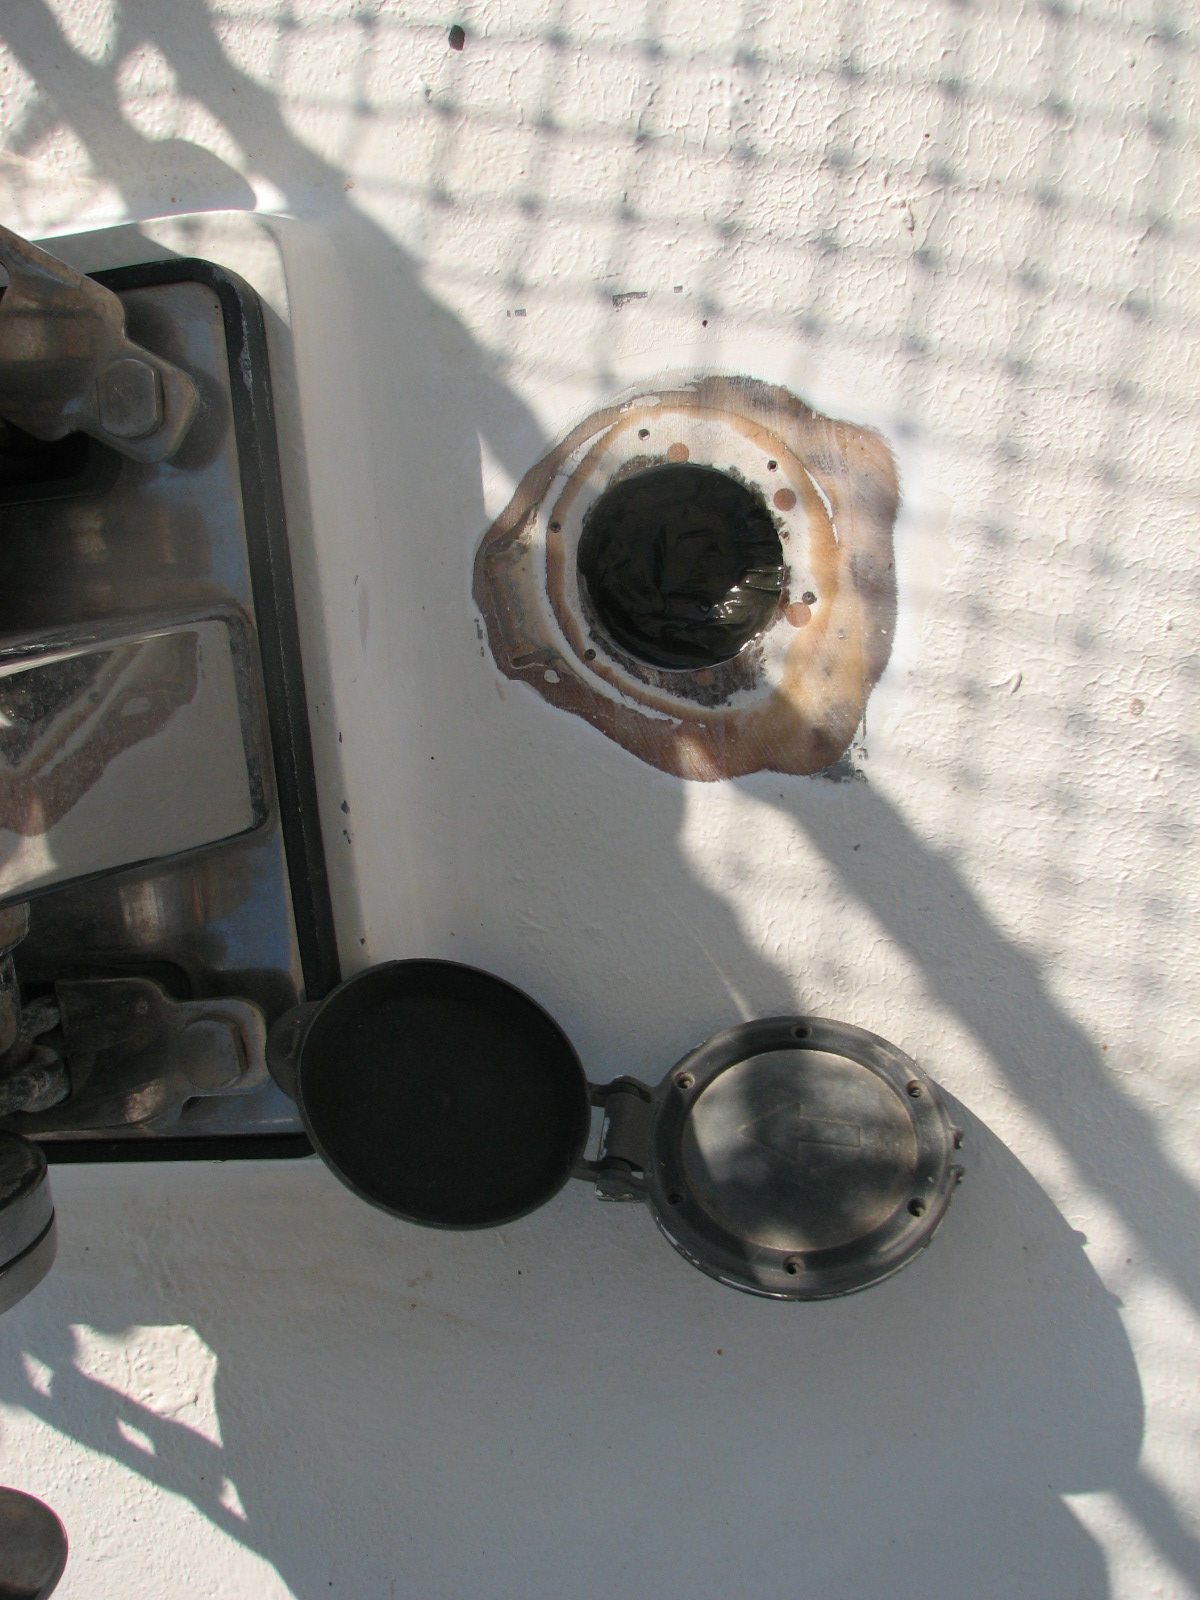
that needs repair. The other spot is just behind the anchor windlass.
There is a foot operated deck switch for the anchor windlass that is
not used any more. The switch is in the way, and the hole could be a
major leak problem. I decided to remove the switch, and grind out the
area, and fiberglass and fill the hole.
Ground Down Area On Side Of Forward Deck Box
Hole Behind Anchor Windlass With Switch Beside Hole
The remainder of the day was
spent shopping and preparing food.
December 15, 2010, Wednesday.
No
work on Dream Away today. Went on an edible tour to a farm near the Rio
Dulce, named Frutas Del Mundo.
December 14, 2010, Tuesday.
Sorry
about no pictures for the last few days, but once you have seen a
sanded cap rail, it becomes uninteresting very quickly!
Today was a great day to work, no
rain, but overcast and downright cool. I was able to sand the entire
port cap rail with 120 grit sandpaper. I also sanded smooth a couple of
places where I will be putty down new gelcoat non-skid. I cleaned, and
hosed down the cap rail. While sanding I noticed a couple of places
that needed more putty, so I mixed up a bit of surfacing putty, and
filled the few places. There are actually many more pin holes and
slight imperfections, that could be tended to, but the cap rail is what
I call 3-foot perfect. Stand back 3 feet, if it looks perfect, it is!
When the surfacing putty had
dried, I again sanded down the entire cap rail with 220 grit sandpaper.
I washed down the cap rail and cleaned up the area. The cap rail is now
ready for masking, and the first coat of Easypoxy Kelly Green
Paint.
December 13, 2010, Monday.
Beautiful
sunny day with the wind blowing, but not from the perfect direction.
Was able to get the port cap rail all sanded down using
80 grit sandpaper and the area cleaned up. I still had a few
places that needed another application of putty. After a short rain, I
mixed up a 2.5 ounce pot of finishing putty, and applied it to the cap
rail.
December 12, 2010, Sunday.
Went
into town today to do some grocery shopping and
to drop off mail. Finished off the sanding of
the port cap rail using 80 grit sandpaper. I checked all three sections of the cap rail, looking for
places that could use another application of putty. Went to the shop
and mixed two five ounce pots of putty. Back to Dream Away, and applied
the two pots of putty on all three sections of the cap rail .
If weather holds, will be back sanding tomorrow on the port cap rail.
December 11, 2010, Saturday.
Many
interruptions today, plus I had to go to town to get more polyester
resin and MEK. I did get most of the port cap rail sanded down using 80
grit sandpaper. Still have more to go.
December 10, 2010, Friday.
Started
out by cleaning up the third section of the cap
rail preparing it for the putty application. I also checked the first
and second sections, looking for places that could use another
application of putty. Went to the shop and mixed two pots of putty, and
one two ounce pot of plain resin. Back to Dream Away, and applied the
two pots of putty, mostly on the third section, but some additional on
the first and second sections. I then applied the plain resin on the
top of the cap rail to fill in the imperfections of the mat fiberglass.
Tomorrow will be a day of sanding!
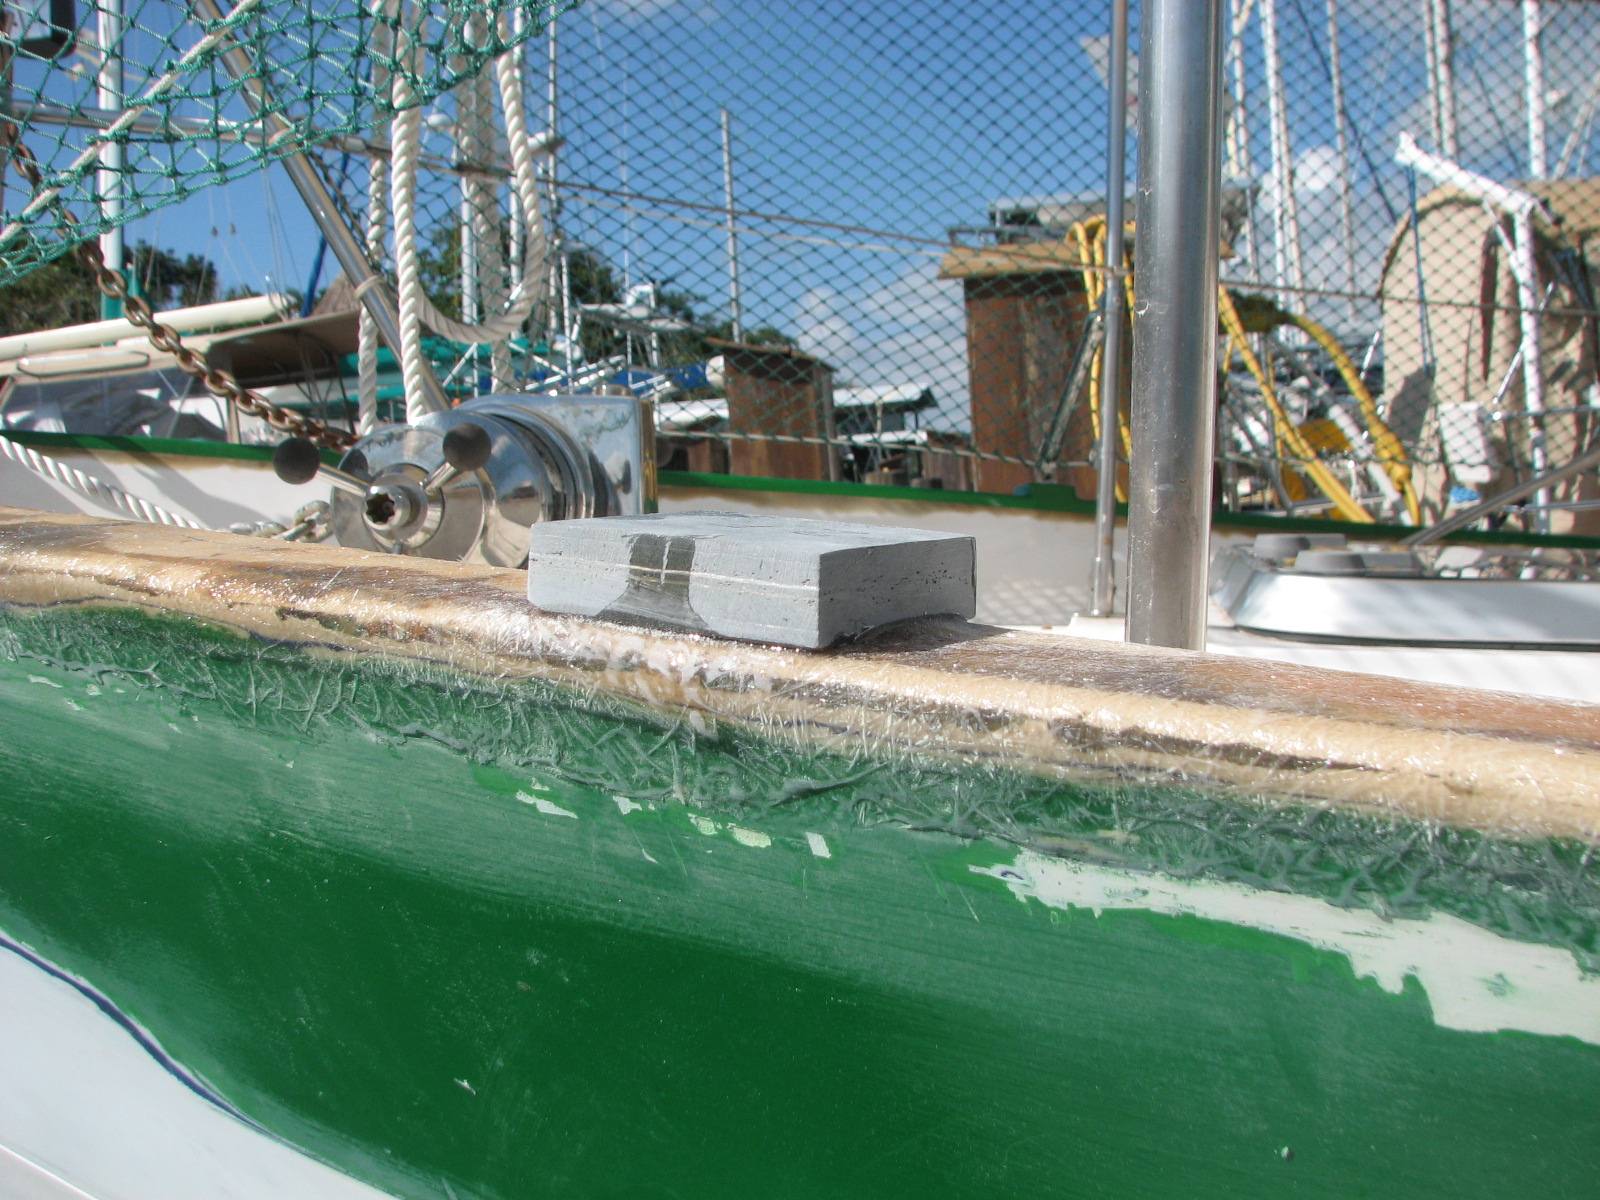
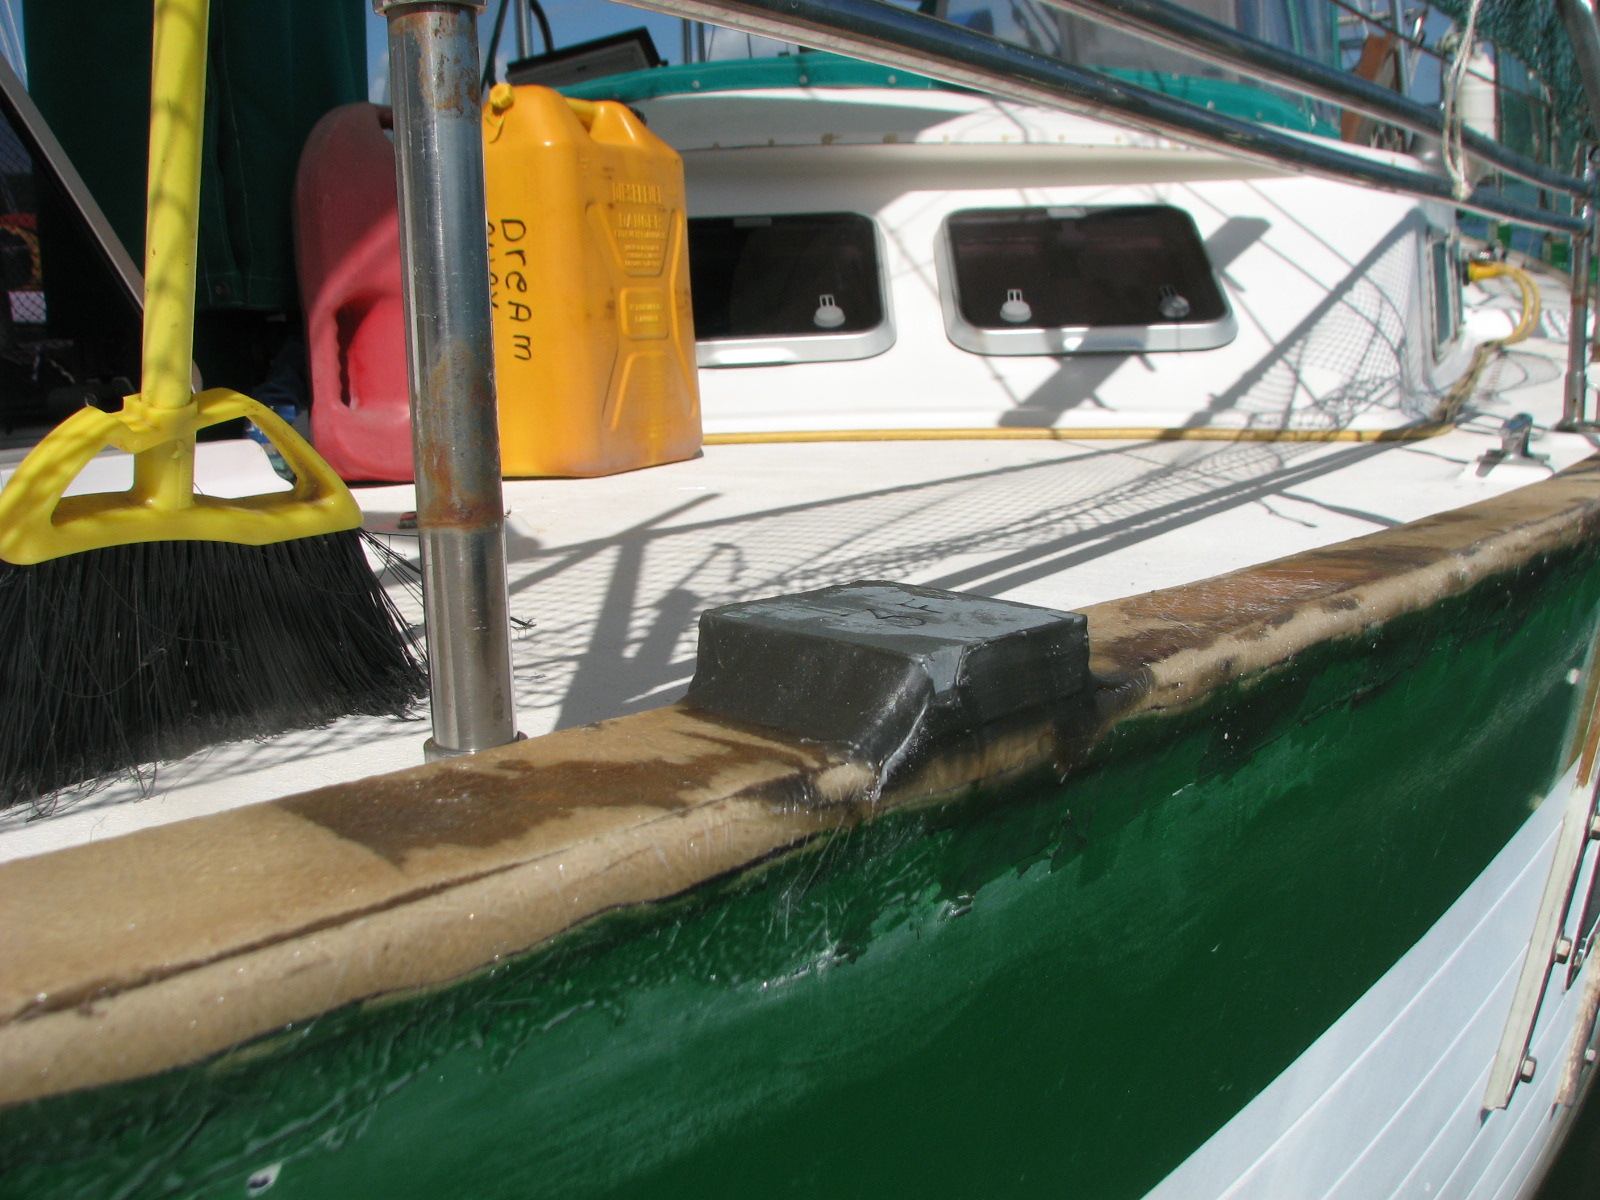
Fiberglass Plate On Cap Rail With No Putty Applied
Fiberglass Plate On Cap Rail With Putty Applied
I installed the newly finished
handle to the forward deck box.
Newly Finished Handle On Forward Deck Box
December 9, 2010, Thursday.
Different
day, same stuff! I removed the masking tape dams from the second
section of cap rail, and cleaned up the area. I then put on the masking
tape dams for the third and last section of cap rail. Following is
pretty much what happened in the entry for December 7, 2010.
When I
finished applying the fiberglass and the resin on the third section of
cap rail, I finished cleaning up the first section of cap rail and
prepared it and the second section of cap rail. I then mixed up two
pots of filler putty, and applied them to the first and second section
of cap rail. The weather is holding so I am moving along very well.
When the putty was applied to the
first and second sections of the cap rail, the resin on the fiberglass
of the third section had kicked off. I removed the masking tape dams on
the third section of the cap rail, which is the last section.
I
wiped down the handle for the forward deck box, and applied the second
coat of Nyalic protectorant. When that
dries, I will re-install the handle on the forward deck box.
December 8, 2010, Wednesday.
Removed
the masking tape on the first section of fiber glassed cap rail. This
is necessary because the masking tape used is only a one day tape if in
the sun. If the tape is left on more than one day, adhesive is left on
the boat, and then it has to be removed.
Next I started in building the
dams out of masking tape for the second section of cap rail. The
process is exactly like the first section, so please read about that
under the entry for December 7, 2010.
I wiped down the handle for the
forward deck box, and applied the first coat of Nyalic
protectorant.
December 7, 2010, Tuesday.
Started
in on the cap rail. First thing to do is measure the section of the cap
rail I am going to fiberglass. When this is done I build dams out of
masking tape on both sides of the cap rail. These tape dams are to
prevent the resin from running down the side of the boat. The first
time I did this on the aft cap rail, I did not build the dams, and
spent most of the time wiping up resin. When I get the dams built, I
wipe down the cap rail to be fiber glassed with acetone. I then
cut the actual fiberglass mat that I am going to use. I cut two layers
of the 1 ounce mat. I then make sure the pieces of fiberglass plate I
am also glassing to the cap rail are handy and I also do a dry fit.
The fiberglass plate is something
added to the cap rail for extra strength in areas where I am putting
stanchion supports, chocks and Genoa T-Track on the cap rail.
I then went up to the shop and
mix four pots of five ounces of resin, and bring them back to Dream
Away. I verify everything is prepared, and then add the catalyst to the
resin. From now on, timing is important. To much catalyst or to much
time, and the resin kicks off before you are finished, to little
catalyst, and it takes to much time for the resin to kick off. Once the
catalyst is added, I wet out the cap rail, then add one layer of the
fiberglass mat. Make sure the first layer of mat is completely wetted
out, then apply the second layer of mat, and completely wet it out.
When you add a piece of fiberglass plate, add more resin to the area on
the cap rail, and apply some resin to the bottom of the fiberglass
plate, then put the fiberglass plate into place. You must keep an eye
on the plate as it could slide off position when you initially put the
fiberglass plate on the cap rail. As you are doing all of this resin
application, of course when you run out of resin in one pot, you must
add catalyst to the next pot of resin, mix thoroughly, then apply. It
is like a race, get all the mat down, the fiberglass plates down, get
all the mat wetted out, be careful and do not make a mess!
Building Masking Tape Dams For Cap Rail
Masking Tape Dams Built And Ready For Fiberglass And Resin Application
Captain Appling Resin and Fiberglass To Cap Rail
Fiberglass Plate For Chock On Port Cap Rail
Fiberglass Plate For Genoa T-Track On Port Cap Rail
Fiberglass Plate For Stanchion Support On Port Cap Rail
Finished Fiberglass Plate For Stanchion Support On The Starboard Cap
Rail
I finished up, took all of the
stuff back to the shop and cleaned up all the mixers, pots, and
brushes. When I went back to Dream Away, I checked the resin, and it
was kicking off very nicely.
I
wiped down the forward deck box lifting handle and applied the seventh
coat of Cetol on the handle.
I cleaned out the overhead in the
galley dish locker. This is where the backing plate for the aft
mid-ships cleat goes, and the cleat is presently removed. I was
tracking down a leak there, so removed the cleat and backing plate. I
am keeping the cleat off the boat until the cap rail on the port side
is finished. It makes it so much easier to sand and paint the area.
December 6, 2010, Monday.
First thing
in the morning went to town to shop and have lunch, then came back to
Dream Away.
Overcast day but it seemed it
would not rain, so got out the tools and such to work on the port cap
rail. Was able to sand down the entire port cap rail, and get it rinsed
off. I then applied one more application of filler putty to the cap
rail in all of the places I missed on the last application. I put all
of the tools away and the dinghy, plus a wash down of the dinghy.
I went back to the shop at Monkey Bay, and cut out the fiberglass I
will be needing to cover the hull to deck joint. Naturally, I did not
have enough to finish the job, so the next trip into town I will have
to purchase more fiberglass.
I
sanded, then wiped down the forward deck box lifting handle and applied
the sixth coat of Cetol on the handle.
December 5, 2010, Sunday.
Day
started off cloudy and overcast, so got out all of the tools and
sanders to sand the cap rail on the port side. Got about eight feet of
the cap rail sanded and it started to spit rain. Put all of the tools,
electrical stuff and the inflatable dinghy away.
Made a few phone calls, had
lunch, and decided to try the sanding project again. Got out all of the
tools and sanders and it started to spit rain, and looked like more was
coming. I put everything back again. I was spending more time getting
tools and equipment out and putting it back than I was on actual
sanding.
It
was time to get the sewing machine out and continue with the "skirts"
on the mizzen sail cover, which I did. I got the "skirts sewn on the
sail cover but did not get the hook & loop material sewn on to
close the skirts. Depending on the weather tomorrow, I might get the
skirts finished, or more sanding done on the cap rail.
December 4, 2010, Saturday.
Dawned
a beautiful sunshiny day! Started off getting the remainder of the 5200 residue off of the cap rail.
Then got all of the cap rail prepared to put on the filler putty in
places where it was required. I mixed up a pot of filler putty and
applied it to the cap rail. A boat two down from me is applying varnish
today, so did not do any sanding.
Forward Section Of Port Cap Rail With All Residue Removed
Putty Applied To Port Cap Rail
I wiped down the
forward deck box lifting handle and applied the fifth coat of Cetol on the handle.
December 3, 2010, Friday.
Another
rainy day, so no progress made on the cap rail, but we did find the
source of a leak in a cabinet in the galley. When the weather improves,
and I can get back to work on the cap rail, I will get the leak fixed.
The problem is some damage from Wilma that I did not notice before, but
verified yesterday with a hose.
The Sailrite sewing machine I had been
using was a borrowed machine. The owner came by today and took his
machine back, so I was without a sewing machine. My good friend, Paul,
has a Sailrite sewing machine, but
back in September when we tried to use it, the machine was seriously
out of time, and would not sew. We borrowed the other Sailrite from friend Pete and
had been using it ever since.
Note:
As of right now those maintenance log
entries, from September, are in my written maintenance log and not in
this electronic log. I hope to get the electronic maintenance log up to
date in the future.
I went to Paul's boat and
picked up his Sailrite sewing machine, and
brought it back to Dream Away. When I borrowed Pete's Sailrite, I also borrowed his
maintenance CD's for the machine, and copied them to my computer, and
returned the CD's to Pete. Having the maintenance manual available
electronically was nice. When I was using Pete's machine, I had to
adjust the tension because the stitches were not correct. Having the
electronic manual available made the adjustments very easy. While
looking through the electronic maintenance manual, I had noticed there
were timing adjustments.
When Alan was here he said he
thought the problem with Paul's machine was a timing adjustment, but we
did not have a maintenance manual at that time. When I got Paul's Sailrite to Dream Away, I
started with the needle bar adjustment, which was way out. Next I
checked the gib hook and needle timing, and this seemed to be right on.
The problem seemed to be in the rotational timing as the gib hook did
not catch the thread loop from the needle. It took some time to figure
out how to do the rotational timing adjustment, because of not knowing
all of the term and words used in the timing adjustment. With a little
study of the drawings and the procedure, I was able to get the
rotational timing properly adjusted. Paul's Sailrite is now working
wonderfully!
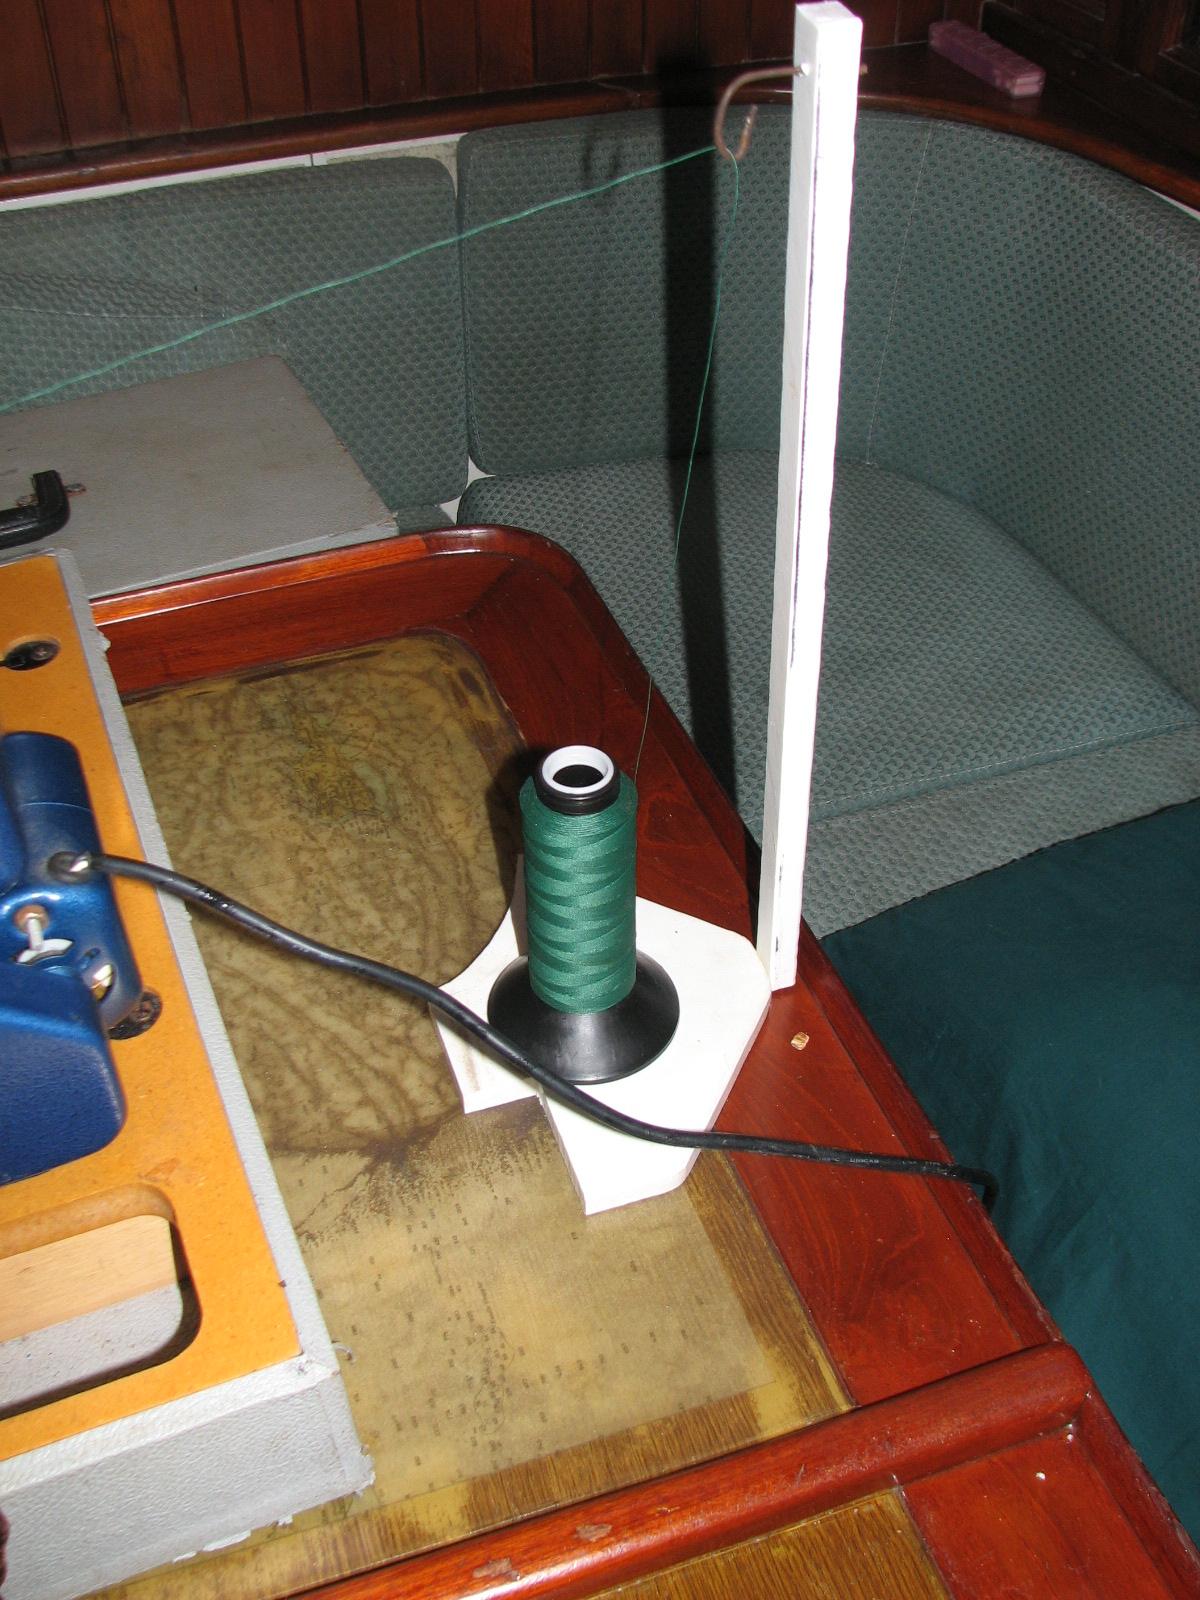
I had to make a thread stand from
scrap Starboard, as one is necessary to use the
large commercial spools of thread.
Starboard Thread Stand (Crude But It
Works)
I had fabricated carrying
strap's for Pete's Sailrite, because I was worried
about the case coming apart, and the machine falling into the river
during a dock to boat transfer. I made one strap for Paul's Sailrite as I did not have
enough webbing out for two. I will dig out some more webbing in the
near future and make Paul a second strap.
Sailrite Case With Webbing Strap
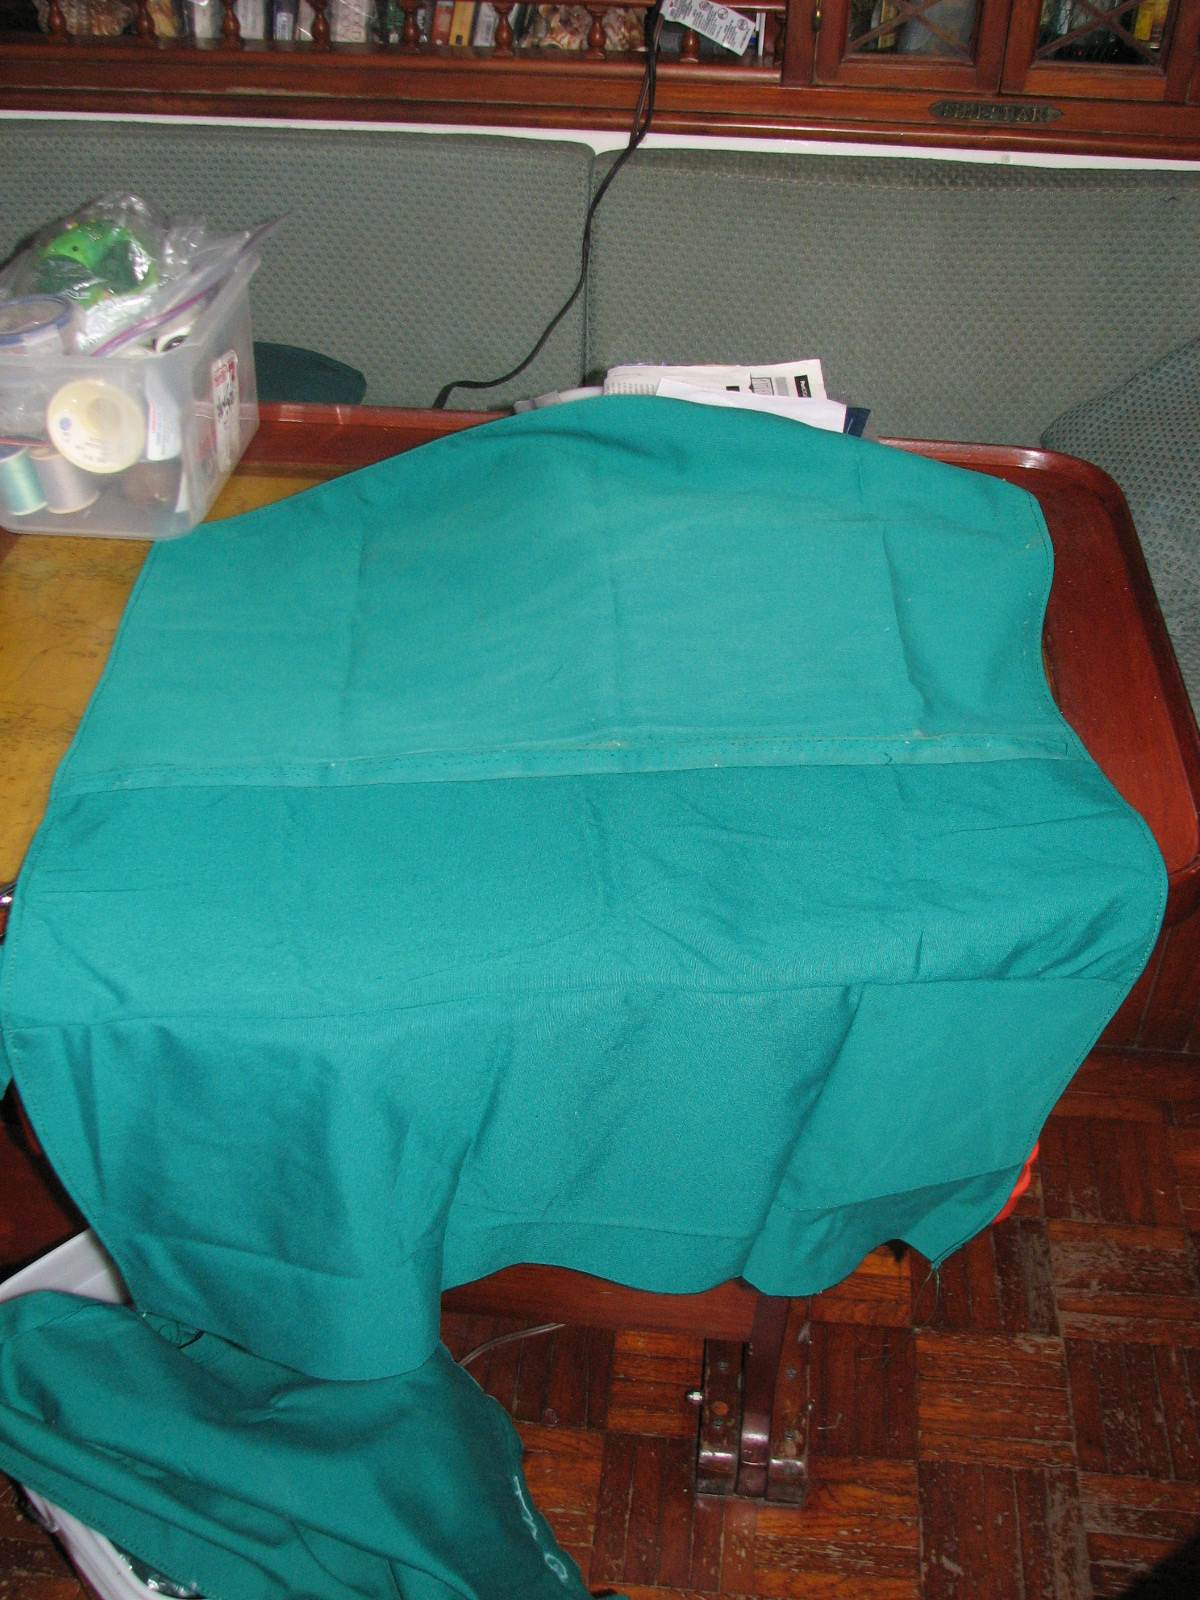
I then went to work on
fabrication the skirts to sew on the mizzen sail cover. It took a while
to find enough cloth to make the skirts, but I got the parts cut out
and sewn together. The day was pretty much over by this time, so I will
sew the skirts onto the mizzen sail cover tomorrow, or the next rainy
day. The sun is supposed to come out tomorrow.
One Of The Fabricated Skirts On Main Salon Table
December 2, 2010, Thursday.
As
predicted, the rains are still with us, so spent the whole day on the
mizzen sail cover. There was a lot of work to do on the cover. I had to
do a large amount of re-stitching. This necessitated taking out all of
the old stitching, and then sewing in all the new stitching.
I decided the best way to fix the
problem of having the sail cover fit around the mast steps was to
splint the sail cover on each side of the mast, and add a piece of
material on each side. The piece I added on each side was three inches
wide at the top, and five inches wide at the top. I also had to add
three patches to the sail cover. I also wanted to add "skirts" to the
bottom of the sail cover that would cover the sheets, protecting them
from the sun, while the sail cover is on.
I spent most of the day working
on the sail cover, and got everything done to the sail cover except the
"skirts". If it is a rainy day tomorrow, I should get the "skirts"
added to the sail cover.
Captain Removing Old Stitching
Front Of Mizzen Sail Cover
Around Mast, And Patch (The Sail Cover Would Not
Go Around Mast Until The Repairs Were Made )
Sail Cover With New Insert to Accommodate the
Mast Steps
December 1, 2010, Wednesday.
Day started out raining, because of a cold
front that moved in. Waited for a break, then headed into Fronteras to
do shopping. We were very lucky. We were able to get all of the
shopping done without getting rained on.
Got back to Dream Away, and
because of the rainy weather, started on the current sewing project
which is to repair the mizzen sail cover. It needs a major
re-stitching, some holes patched, and refitted. The cover was never
modified after adding mast steps to the mizzen mast, so the sail
cover never fit correctly. I will repair that problem. It is supposed
to rain all day tomorrow, so hope to get the sail cover finished then.
Will have pictures tomorrow.


